
Writing a Unit Test
Recall that a unit test is simply test code you write to call your application code. This test code asserts that various conditions are either true or false as a result of the call to your application code. The test either passes or fails based on the results of these assertions. If, for example, you expect an outcome to be true and it turns out to be false, that test would be a failed test.
In broad strokes, there are three steps to creating a typical unit test:
1. Apply the TestMethod attribute to the method you want to be treated as a test.
2. Write code in your test method to execute the code you want to test, passing in known values if there are parameters.
3. Write assertions in your test code to evaluate the results of your test.
Let’s look more closely with a real example.
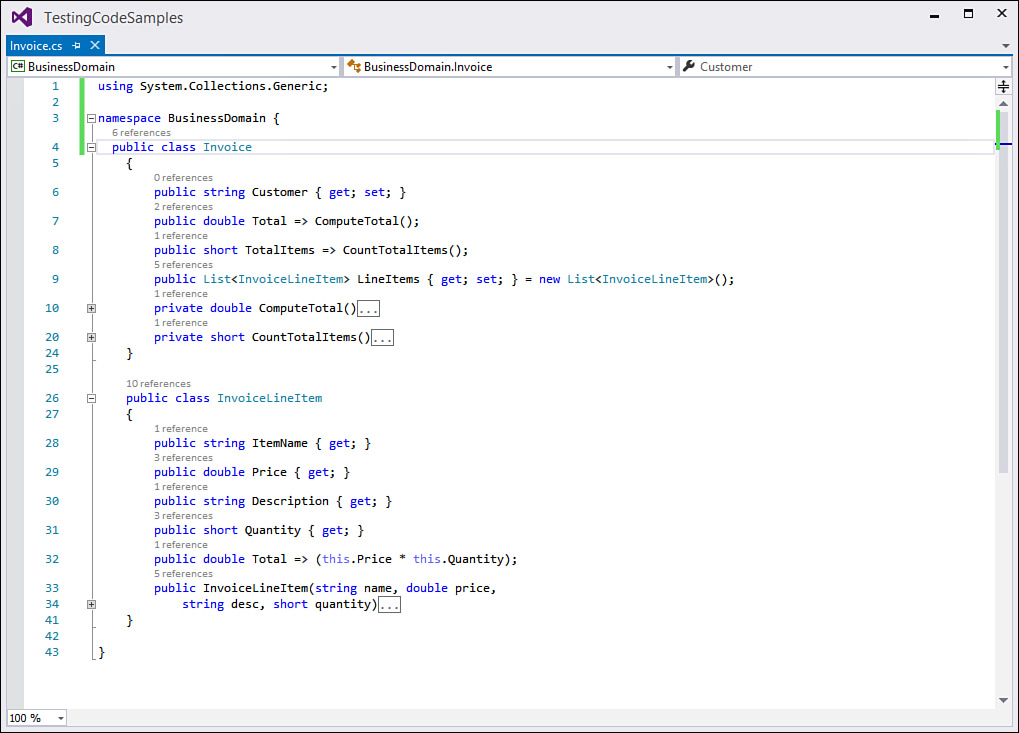
Consider an Invoice class that has all the properties implemented that we normally associate with an invoice. It exposes an InvoiceLineItem object as a collection of invoice line items (represented by a List<InvoiceLineItem>). It has properties and private methods for getting the invoice total and counting the total number of items on the invoice. Figure 8.5 shows this sample code.
Note
The code for this chapter is available for download from the website associated with this book: informit.com/title/9780672337369.
Let’s dig into the ComputeTotal method. This method cycles through the line items on the invoice and calculates a total price for the invoice (without shipping and tax, of course).
private double ComputeTotal()
{
double total = 0;
foreach (InvoiceLineItem item in LineItems)
{
total += item.Price * item.Quantity;
}
return total;
}
Now let’s see how we can add a unit test that will validate whether the invoice total property returns correctly when accessed. To do that, we create a new unit test project, as previously discussed. We then add a reference to the project containing the Invoice object. (Right-click the References folder under the unit test project, select Add Reference, and then pick the project containing the invoice class from within the list of projects; in this case, the project assembly name is BusinessDomain.)
Note
You don’t need to have access to a target object’s project or source code to write a unit test. You can add a reference instead to an assembly that implements the code you want to test.
With the initial structure set up, now we can actually write the unit test. One approach to organizing a unit test is to use the arrange, act, and assert (AAA) pattern. This pattern advocates a code structure that initializes the necessary objects and fields (arrange), calls the method that you want to test (act), and finally verifies that everything has worked as expected (assert). Listing 8.1 shows our test method, organized with the AAA pattern.
LISTING 8.1 Testing Invoice.Total with a unit test
using System;
using Microsoft.VisualStudio.TestTools.UnitTesting;
using BusinessDomain;
namespace BusinessDomainUnitTests
{
[TestClass]
public class InvoiceTests
{
[TestMethod]
public void ComputeTotalTest()
{
//arrange------------------
Invoice invoice = new Invoice();
//note: could store prices and quantities as variables in our code
// and then calculate the total here to make tests safer
double expectedTotal = 12;
//act----------------------
invoice.LineItems.Add(new InvoiceLineItem(
"Prod 1", 1.75, "First item description", 1));
invoice.LineItems.Add(new InvoiceLineItem(
"Prod 2", 5.25, "Second item description", 1));
invoice.LineItems.Add(new InvoiceLineItem(
"Prod 3", 2.50, "Third item description", 2));
//assert-------------------
Assert.AreEqual(expectedTotal, invoice.Total,
"Total invoice not computed correctly.");
}
}
}
Notice that there is nothing special with respect to this code. It looks like any other method that you would craft with C#. This is because unit testing with Visual Studio is attribute driven. What distinguishes your unit test code and signals it as an actual unit test to Visual Studio are the attributes (TestClass and TestMethod) added at the class and method levels. These attributes are automatically added for you when you create a unit test project, but there is nothing stopping you from writing a unit test class from the ground up and just adding the attributes manually.
The test as written should pass, as you will see in the next section. However, we will look at additional tests a developer might write to ensure their code passes other conditions, such as when the invoice list does not contain items or is null.