Create the ASP.NET Application and Azure Hosting
Azure web apps can be created directly from the Azure portal interface (a website) or from within Visual Studio (for ASP.NET solutions). The portal interface allows deploying from a source code provider such as Visual Studio Online, GitHub, TeamCity, Hudson, or BitBucket. You can use these source control providers for continuous deployment during a dev-test scenario. Here, we cover creating directly from Visual Studio. (The portal interface is covered in upcoming sections.)
To get started, we will create a new ASP.NET application linked directly to an Azure web app. This will create the Visual Studio application project (and related source code) locally as well as set up an Azure web app to which we can deploy. You can also link (and deploy) an existing application to an Azure web app; we cover that scenario later in the chapter. The first step is File, New Project, where we select the Web node and an ASP.NET Web Application. Figure 12.6 shows an example of the first step in creating the web application project.
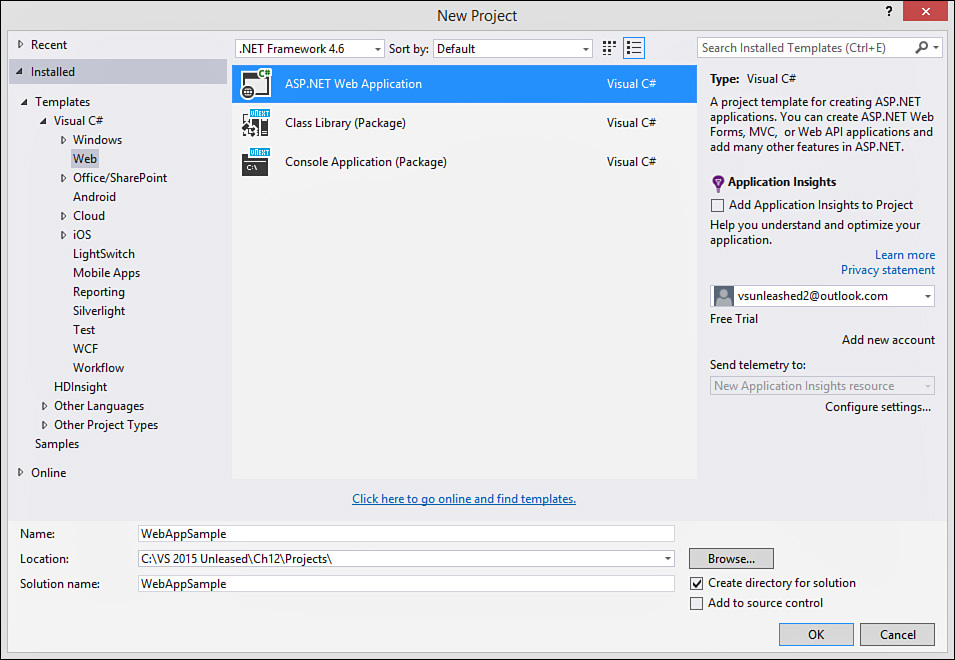
FIGURE 12.6 You create a new Azure web app in Visual Studio the same way you would create any website in Visual Studio.
Visual Studio then brings up the New ASP.NET Project dialog, as shown in Figure 12.7. Notice the bottom-right corner. This is where you choose to automatically set up and link this project to an Azure cloud hosting environment as either a web app or a virtual machine. You can use the Manage Subscriptions link to select the subscription you intend to use by turning off other subscriptions from this dialog (refer to Figure 12.4). If you leave multiple subscriptions active, you are prompted for the subscription under which the web app should be hosted (see Subscription option in Figure 12.8).
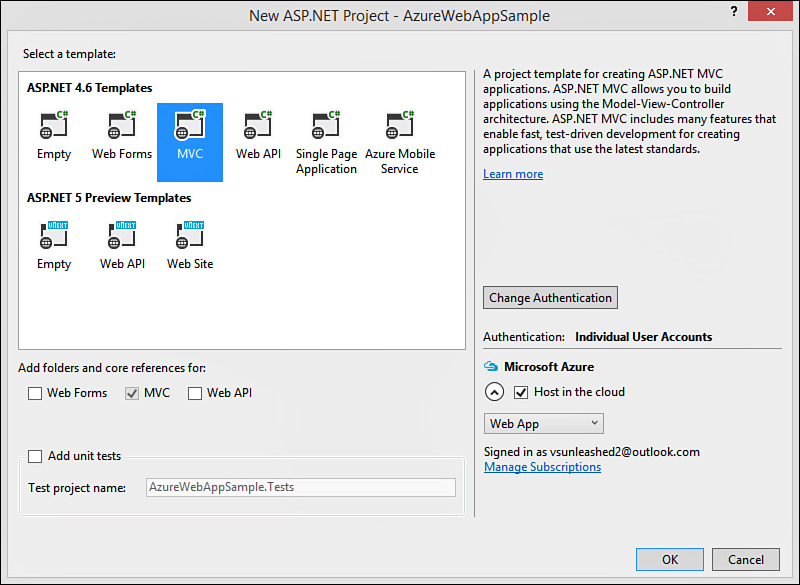

FIGURE 12.8 Configure your Azure URL, default hosting region, and database as part of the new project creation process.
Figure 12.8 shows the final step in setting up your Visual Studio project to be hosted by Azure. Here you can configure the basic Azure web app hosting settings. You start by creating a site name which also becomes your temporary URL as [SiteName].azurewebsites.net (until you update your DNS to point to an actual URL). You then set an Azure region for hosting the application (typically you select one closest to your users). Finally, you can choose to set up a database to be associated with the site.
The drop-down under Microsoft Azure hosting in Figure 12.6 (set to Website in the figure) includes the alternate choice: Virtual Machine. This allows you to set up your Visual Studio project to be deployed to a VM server that you manage (versus the Azure hosting platform built on PaaS). Figure 12.9 shows the VM setup dialog you receive after selecting this choice. This includes settings for your DNS, the VM location, a username and password, and server sizing. You have a couple dozen choices for VM size based on CPU cores and RAM. (Of course, different pricing applies as you select bigger VMs.)

FIGURE 12.9 You can use Visual Studio to link your website to an Azure VM (versus an Azure web app hosted on PaaS).
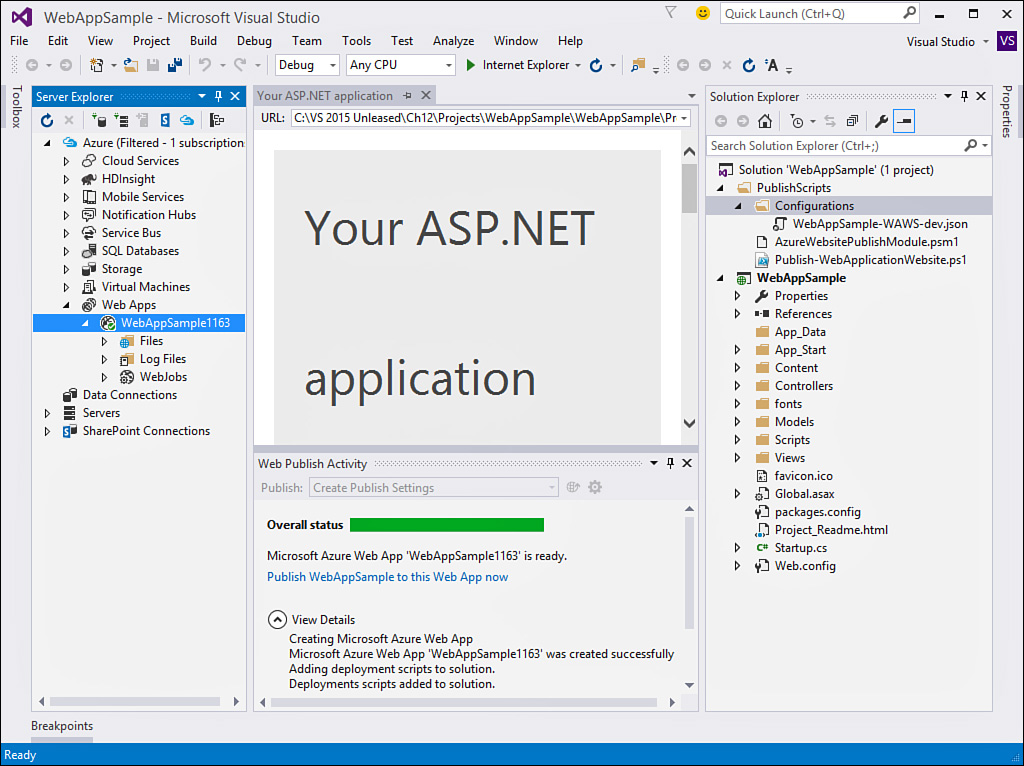
Clicking the OK button on either Figure 12.8 or 12.9 will create your new project and related Azure hosting infrastructure. (Provision a VM or create an Azure web app.) Visual Studio will also link your project to the given Azure environment to allow for easy deployment (also called publishing by Visual Studio). It can take a few minutes for your provisioning to complete (especially for VMs); however, Visual Studio will notify you when it’s complete in both the Output and the Web Publish Activity windows.
Figure 12.10 shows a completed project setup for Azure web apps. (The VM solution looks similar in the end.) Notice the link from Server Explorer to the site. (We cover this in upcoming sections.) Also, notice that the solution inside Solution Explorer now contains a folder called PublishScripts. These are the scripts Visual Studio uses to publish your site to Azure. You can add similar scripts to an existing site to connect it to Azure in the same way (more on this to follow).