
In General
Certain miscellaneous settings are difficult to pigeonhole. Apple wisely lumped many of these under the General settings moniker. Figure 14-9 gives you a look at them all.
About About
You aren’t seeing double. This section is all about the setting known as About. And About is full of trivial (and not-so-trivial) information about the device. What you find here is straightforward:
![]() Name of your network
Name of your network
![]() Number of songs stored on the device
Number of songs stored on the device
![]() Number of videos
Number of videos
![]() Number of photos
Number of photos
![]() Number of apps
Number of apps
![]() Storage capacity used and available: Because of the way the device is formatted, you always have a little less storage than the advertised amount of flash memory.
Storage capacity used and available: Because of the way the device is formatted, you always have a little less storage than the advertised amount of flash memory.
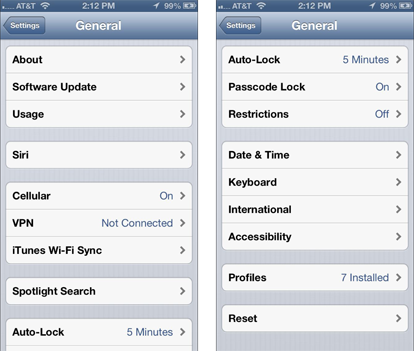
Figure 14-9: You find these items on the General settings screen.
![]() Software version: We were up to version 6.0 as this book was being published. But in parentheses next to the version number, you also see a number such as (10A405), which is the build number of the software version you have. The build number changes whenever the iPhone’s software is updated.
Software version: We were up to version 6.0 as this book was being published. But in parentheses next to the version number, you also see a number such as (10A405), which is the build number of the software version you have. The build number changes whenever the iPhone’s software is updated.
![]() Carrier: Yep, in the United States, that’s most likely AT&T, Sprint, or Verizon Wireless.
Carrier: Yep, in the United States, that’s most likely AT&T, Sprint, or Verizon Wireless.
![]() Model and serial numbers
Model and serial numbers
![]() Wi-Fi address
Wi-Fi address
![]() Bluetooth address
Bluetooth address
![]() IMEI, ICCID, and MEID: Say what? These abbreviations stand for the International Mobile Equipment Identity, Integrated Circuit Card Identifier, and Mobile Equipment Identifier numbers, respectively. ICCID is for GSM type networks, and MEID pertains to CDMA networks. Hey, we warned you some of this was trivial — and geeky.
IMEI, ICCID, and MEID: Say what? These abbreviations stand for the International Mobile Equipment Identity, Integrated Circuit Card Identifier, and Mobile Equipment Identifier numbers, respectively. ICCID is for GSM type networks, and MEID pertains to CDMA networks. Hey, we warned you some of this was trivial — and geeky.
![]() Diagnostics & Usage: At your discretion, you can send daily diagnostic and usage data to help Apple out. This data may include location information.
Diagnostics & Usage: At your discretion, you can send daily diagnostic and usage data to help Apple out. This data may include location information.
![]() Modern firmware: It’s not quite software and not quite hardware. But without it your phone wouldn’t function.
Modern firmware: It’s not quite software and not quite hardware. But without it your phone wouldn’t function.

![]() Advertising: Tap here to limit ad tracking via the Advertising Identifier introduced as part of iOS 6.
Advertising: Tap here to limit ad tracking via the Advertising Identifier introduced as part of iOS 6.
![]() Legal and Regulatory: You had to know that the lawyers would get their two cents in somehow. All the fine print is here, including license, warranty, regulatory, and even RF (radio frequency) exposure information. And fine print it is. Although you can flick to scroll these lengthy legal notices, you can’t unpinch the screen to enlarge the text. (Not that we can imagine more than a handful of you will bother to read this legal mumbo jumbo.)
Legal and Regulatory: You had to know that the lawyers would get their two cents in somehow. All the fine print is here, including license, warranty, regulatory, and even RF (radio frequency) exposure information. And fine print it is. Although you can flick to scroll these lengthy legal notices, you can’t unpinch the screen to enlarge the text. (Not that we can imagine more than a handful of you will bother to read this legal mumbo jumbo.)
Software update
If there’s a software update to be had, you can find it under the Software Update setting. Otherwise you’ll be informed that your software is up to date.
Usage
Think of the Usage setting as one of the places to go on the iPhone for statistics about how you employ the device. You find other information in the About setting (under General on the Settings screen), described in the preceding section.
You can scroll up or down the Usage list to discover the following information:
![]() Battery percentage: How much of your battery is charged in percentage terms. The percentage appears just to the left of the battery gauge at the upper-right corner of the iPhone.
Battery percentage: How much of your battery is charged in percentage terms. The percentage appears just to the left of the battery gauge at the upper-right corner of the iPhone.
![]() The amount of time since you last fully charged your iPhone: Indicated in days and hours, for the time when the iPhone has been unlocked and in use and also when it has been in standby mode.
The amount of time since you last fully charged your iPhone: Indicated in days and hours, for the time when the iPhone has been unlocked and in use and also when it has been in standby mode.
![]() Call time: Shown for the current period and for the lifetime of the product.
Call time: Shown for the current period and for the lifetime of the product.
![]() Cellular Network Data: The amount of network data you sent and received over EDGE, CDMA, 3G, or 4G. You can reset these statistics by tapping the Reset Statistics button at the bottom of the screen.
Cellular Network Data: The amount of network data you sent and received over EDGE, CDMA, 3G, or 4G. You can reset these statistics by tapping the Reset Statistics button at the bottom of the screen.
![]() Storage: A list of all the apps taking space on your iPhone. Ask yourself if you really need all the apps that are hogging the most space. If not, tap the name of the app and then tap Delete App. You can always sync again if you find that you can’t live without the bloat that the app provided. You also see your total iCloud storage and how much is available. If you need to buy more storage, tap Manage Storage⇒Buy More Storage. At the time this book was going to press, an additional 20GB of storage cost $40 a year, and an additional 50GB cost $100 a year. But remember that anything you buy through iTunes doesn’t count against your storage limits.
Storage: A list of all the apps taking space on your iPhone. Ask yourself if you really need all the apps that are hogging the most space. If not, tap the name of the app and then tap Delete App. You can always sync again if you find that you can’t live without the bloat that the app provided. You also see your total iCloud storage and how much is available. If you need to buy more storage, tap Manage Storage⇒Buy More Storage. At the time this book was going to press, an additional 20GB of storage cost $40 a year, and an additional 50GB cost $100 a year. But remember that anything you buy through iTunes doesn’t count against your storage limits.
Siri
Apple’s voice assistant (see Chapter 7) gets its own dedicated place in Settings, at least on the only models as of this writing that have Siri. As you know by now those are the iPhone 4S and iPhone 5. Choose the language Siri works in (across an increasing number of countries), determine whether you always want voice feedback or only in a hands-free situation, let Siri know your own information, and decide whether Siri will kick in when you raise the phone to speak. We revisit another setting relevant to Siri later in this chapter, in the “Passcode” section.
Cellular
A few major controls appear under the Cellular setting: Cellular Data, Enable LTE (if you have an iPhone 5), Data Roaming, Set Up Personal Hotspot, and Use Cellular Data For. We tackle them one by one in this section.
Cellular Data
Turn off the Cellular Data option if you don’t want to exhaust your cellular minutes. Of course, turning off this setting means you can access the Internet only through Wi-Fi.
Enable LTE
If you have an iPhone 5, you’ll appreciate the zippy speeds that LTE (Long Term Evolution) is capable of delivering. But if you’re concerned about consuming too much data or overtaxing the battery, you may want to turn off LTE sometimes. Here’s where you flip the switch for that purpose.
Data Roaming
You may unwittingly rack up lofty roaming fees when using Safari, exchanging e-mails, and engaging in other data-heavy activities while traveling in a foreign country. Turn off data roaming to avoid those excess charges.
Set Up Personal Hotspot
If your provider offers tethering, when it’s turned on you can share the iPhone’s Internet connection with a PC and iOS devices via Bluetooth or USB. Typically, an extra fee is involved; check with your carrier for rates.
Use Cellular Data For
You can specify that you want to use cellular data for iCloud documents, iTunes, FaceTime (the capability to do this over cellular rather than just Wi-Fi is new to iOS 6), Passbook updates, and Reading List.
VPN
 A virtual private network, or VPN, is typically a way for you to securely access your company’s network behind the firewall — using an encrypted Internet connection that acts as a secure “tunnel” for data. The iPhone software supports the protocols L2TP (Layer 2 Tunneling Protocol), PPTP (Point-to-Point Tunneling Protocol), and Cisco IPSec VPN, which apparently provides the kind of security that satisfies network administrators.
You can configure a VPN on the iPhone by tapping VPN under Network, tapping Add VPN Configuration, and then tapping one of the aforementioned protocols. Then, using configuration settings provided by your company, fill in the appropriate server information, account, password, encryption level (if appropriate), and other information. Better yet, lend your iPhone to the techies where you work and let them fill in the blanks on your behalf.
After you configure your iPhone for VPN usage, you can turn that capability on or off by tapping (yep) the VPN On or Off switch under Settings.
iTunes Wi-Fi sync
Through the magic of wireless, you no longer have to connect a cable to a PC or Mac to sync your iPhone with your iTunes account. If you’ve set up Wi-Fi syncing with iTunes, you can click a Sync Now button here to commence a Wi-Fi syncing session. For more on syncing, consult Chapter 3.
Spotlight search
You can designate which apps on your phone are searched when you take advantage of Spotlight. (As a reminder, you initiate a Spotlight search by flicking to the left of the Home page, or pressing the Home button from the first Home screen).
By default, all the options on the list shown in Settings will be part of a search. Tap to remove the check mark next to any app that you don’t want the iPhone to include in its search mission. You can also change the order in which items are searched. Press the three bars to the right any item and drag that item up or down the list.
Auto-lock
You can set the amount of time that elapses before the phone automatically locks or turns off the display. Your choices are 5 minutes before, 4 minutes before, and so on, all the way down to 1 minute. Or you can choose to have the iPhone never lock automatically.
 If you work for a company that insists on a passcode (see the next section), the Never Auto-Lock option isn’t on the list your iPhone shows you.
Don’t worry if the iPhone is locked. You can still receive calls and text messages, adjust the volume, see notifications, take pictures, call upon Siri’s services (if you have an iPhone 4S or 5), access Passbook, and reply with a message when you can’t answer an incoming call.
Passcode lock
You can select a passcode to prevent people from unlocking the iPhone. Tap Passcode Lock, and then use the virtual keypad to enter a 4-digit code (or skip a few paragraphs to see how to set up a more complex code). During this setup, you have to enter the code a second time before it’s accepted.
You can also determine whether a passcode is required immediately, after 1 minute, after 5 minutes, or after 15 minutes. Shorter times are more secure, of course. On the topic of security, the iPhone can be set to automatically erase your data if you (or someone else!) make ten failed passcode attempts. Your settings will be reset to their defaults and all your media and information might as well be dust.
You can also change the passcode or turn it off later (unless your employer dictates otherwise), but you need to know the present passcode to apply any changes. If you forget the passcode, you have to restore the iPhone software, as described in Chapter 16.
The iPhone has two kinds of passcodes. A simple passcode is a four-digit number. If you require a more stringent password — one that is much harder to guess — turn off the simple passcode and come up with something much more difficult to crack, a longer combination of letters, numbers, punctuation, and special characters.
Under Passcode Lock settings on the 3GS and 4, you have the option to turn voice dialing on or off by keeping Voice Control enabled. Choose your preference by tapping the Voice Dial switch. On the 4S and 5, you have the option to turn Siri on or off. Note that Voice Control is still available regardless of the setting for Siri.
Siri can send an e-mail, send a message, or dial the phone even from the Lock screen. In fact, having Siri at the ready from the Lock screen is the default. Although that’s a convenience for some, others might construe this as a security risk because an intruder would not need to know the phone’s passcode to make a call or send an e-mail or text. If this notion bothers you, turn off Siri.
Restrictions
Parents and bosses may love the Restrictions tools, but kids and employees usually think otherwise. You can clamp down, um, provide proper parental guidance to your children by preventing them at least some of the time from using the Safari browser, the camera, FaceTime, iTunes, iBookstore, and Siri. Or you might not let them remove old apps, install new apps, or make purchases in the apps you do allow. You can also try to avoid exposing them to explicit language. When restrictions are in place, icons for off-limit functions can no longer be seen.
For instance, you can allow Junior to watch a movie on the iPhone but prevent him from watching a flick that carries an R or NC-17 rating. You can also restrict access to certain TV shows and apps, based on age-appropriate ratings, and stop the kids from engaging in multiplayer games or adding friends in Game Center. You can also access the various Privacy settings we address earlier in this chapter, including settings for Location Services, here.
Don’t feel guilty: You have your users’ best interests at heart.
Date and time
In our neck of the woods, the time is reported as 11:32 PM (or whatever time it happens to be). But in some circles, it’s reported as 23:32. If you prefer the latter format on the iPhone’s status bar, tap the 24-Hour Time setting (under Date & Time) to turn on the setting.
This setting is just one that you can adjust under Date & Time. You can also have the iPhone set the time automatically, using the time reported by the cellular network (and adjusted for your time zone).
If you’ve turned off the option to set the time automatically, you’re asked to select the time zone and then set the date and time manually. Here’s how:
1. Tap Set Automatically so that it’s off.
You see fields for setting the time zone and the date and time.
2. Tap the Time Zone field.
The current time zone and virtual keyboard are shown.
3. Tap out the letters of the city or country whose time zone you want to enter until the one you have in mind appears. Then tap the name of that city or country.
The Time Zone field is automatically filled in for that city.
4. Tap the Set Date & Time field so that the time is shown. Then roll the bicycle-lock-like controls until the proper time is displayed.
5. Tap the date shown so that the bicycle-lock-like controls pop up for the date. Then roll the wheels for the month, day, and year until the correct date appears.
6. Tap the Date & Time button to return to the main Date & Time settings screen.
Keyboard
Under Keyboard settings, you can turn on or off autocapitalization and turn on or off Enable Caps Lock.
Autocapitalization, which the iPhone turns on by default, means that the first letter of the first word you type after ending the preceding sentence with a period, a question mark, or an exclamation point is capitalized.
If Cap Locks is enabled, all letters are uppercased LIKE THIS if you double-tap the shift key. (The shift key is the one with the arrow pointing up.)
You can also turn on a keyboard setting that inserts a period followed by a space when you double-tap the space key. Additionally, you can choose to use an international keyboard (as discussed in Chapter 2), which you select from the International setting — the next setting after Keyboard in the General settings area. You can also choose a foreign keyboard by tapping Keyboards under the Keyboard setting and then choosing Add New Keyboard.
As you might have surmised, this is also the area where you can turn on or off the keyboard’s autocorrection smarts.
And you can add keyboard shortcuts such as omw for On my way! To do so, tap Shortcuts, and create a shortcut that will automatically expand into the word or phrase you have in mind as you type.
International
The iPhone is an international sensation. It’s sold and used around the world by people of all nationalities. In the International section, you can set the language you type on (by using a custom virtual keyboard), the language in which the iPhone displays text, and the language in which it speaks through Voice Control. Heck, you can even select a different region format (from among numerous countries) and a different calendar type, among Gregorian, Japanese, and Buddhist.
Accessibility
The ever-comprehensive Accessibility tools are targeted at people with certain disabilities. The following tools are available:
![]() VoiceOver: A screen reader describes aloud what’s on the screen. The screen reader can read e-mail messages, web pages, and more. As you dig into these settings, you’ll see that you can use phonetics, change the pitch, alter the speaking rate, and more.
VoiceOver: A screen reader describes aloud what’s on the screen. The screen reader can read e-mail messages, web pages, and more. As you dig into these settings, you’ll see that you can use phonetics, change the pitch, alter the speaking rate, and more.
![]() Zoom: This tool is a screen magnifier for those who are visually challenged. To zoom, double-tap the screen with three fingers, and drag three fingers to move around the screen. Double-tap the screen with three fingers again to zoom back out.
Zoom: This tool is a screen magnifier for those who are visually challenged. To zoom, double-tap the screen with three fingers, and drag three fingers to move around the screen. Double-tap the screen with three fingers again to zoom back out.
![]() Large text: You can enlarge the text in Mail, Contacts, Calendars, Messages, and Notes from a range of 20pt (points) up to 56pt. Don’t worry if you don’t know exactly what these point sizes mean. You’ll see a sample of the text on the screen.
Large text: You can enlarge the text in Mail, Contacts, Calendars, Messages, and Notes from a range of 20pt (points) up to 56pt. Don’t worry if you don’t know exactly what these point sizes mean. You’ll see a sample of the text on the screen.
![]() Invert colors: The colors on the iPhone can be reversed to provide a higher contrast for people with poor eyesight. The screen sort of resembles a film negative.
Invert colors: The colors on the iPhone can be reversed to provide a higher contrast for people with poor eyesight. The screen sort of resembles a film negative.
![]() Speak selection and speak auto-text: When the Speak Selection setting is on, you’ll see a Speak button when you select text. The Speak Auto-Text option allows the iPhone to automatically speak autocorrections and capitalizations.
Speak selection and speak auto-text: When the Speak Selection setting is on, you’ll see a Speak button when you select text. The Speak Auto-Text option allows the iPhone to automatically speak autocorrections and capitalizations.
![]() Hearing aids: The iPhone can communicate with hearing aids through Bluetooth.
Hearing aids: The iPhone can communicate with hearing aids through Bluetooth.
![]() LED flash for alerts: This tool lets those who are hard of hearing know when an alert arrives. The setting works only when the phone is locked or asleep.
LED flash for alerts: This tool lets those who are hard of hearing know when an alert arrives. The setting works only when the phone is locked or asleep.
![]() Mono audio: If you suffer hearing loss in one ear, the iPhone can combine the right and left audio channels so that both can be heard in both earbuds or earpods, or any speakers connected to the iPhone’s audio jack. You can drag a volume slider left or right to raise or lower the volume, respectively, in one channel or the other.
Mono audio: If you suffer hearing loss in one ear, the iPhone can combine the right and left audio channels so that both can be heard in both earbuds or earpods, or any speakers connected to the iPhone’s audio jack. You can drag a volume slider left or right to raise or lower the volume, respectively, in one channel or the other.
![]() Guided access: Parents of autistic kids know how challenging it can be to keep the child focused on a given task. The Guided Access setting, new in iOS 6, can limit iPhone usage to a single app and also restrict touch input on certain areas of the screen. You actually circle the area of the screen that you want to restrict. You can turn the feature on or off by triple-pressing the Home button. You can also create a passcode to use when Guided Access is at work. By turning on Enable Screen Sleep, you can dim the screen after a period of inactivity. If you tap the sleep/wake button, the screen will take an immediate nap.
Guided access: Parents of autistic kids know how challenging it can be to keep the child focused on a given task. The Guided Access setting, new in iOS 6, can limit iPhone usage to a single app and also restrict touch input on certain areas of the screen. You actually circle the area of the screen that you want to restrict. You can turn the feature on or off by triple-pressing the Home button. You can also create a passcode to use when Guided Access is at work. By turning on Enable Screen Sleep, you can dim the screen after a period of inactivity. If you tap the sleep/wake button, the screen will take an immediate nap.
![]() AssistiveTouch: Turn on this setting if you need to use an adaptive accessory such as a joystick because of difficulties touching the screen. Plus, when this setting is on, you can create your own custom gestures.
AssistiveTouch: Turn on this setting if you need to use an adaptive accessory such as a joystick because of difficulties touching the screen. Plus, when this setting is on, you can create your own custom gestures.
![]() Home-click speed: Slow down the speed required to double or triple-click the Home button, which is next on the list of Accessibility options.
Home-click speed: Slow down the speed required to double or triple-click the Home button, which is next on the list of Accessibility options.
![]() Triple-click the Home button: As you know by now, double-pressing the Home button launches multitasking. But you can set up the iPhone so that triple-clicking the button (pressing three times really fast) turns on certain Accessibility features. By doing so, you can turn on or off VoiceOver, Invert Colors, Zoom, and AssistiveTouch.
Triple-click the Home button: As you know by now, double-pressing the Home button launches multitasking. But you can set up the iPhone so that triple-clicking the button (pressing three times really fast) turns on certain Accessibility features. By doing so, you can turn on or off VoiceOver, Invert Colors, Zoom, and AssistiveTouch.
![]() Incoming calls: You can route calls to come through a headset or the iPhone speaker.
Incoming calls: You can route calls to come through a headset or the iPhone speaker.
Profiles
If you know an app developer who is willing to share an app with you before it is publicly made available, you’ll see that app in the list. You’ll also see when any of the prerelease apps on the list expire, and can manually remove them.
Reset
As little kids playing sports, we ended an argument by agreeing to a do-over. Well, the Reset settings on the iPhone are one big do-over. Now that we’re (presumably) grown up, we’re wise enough to think long and hard about the consequences before implementing do-over settings, which is probably why you must enter a passcode before proceeding. Regardless, you may encounter good reasons for starting over; some of these reasons are addressed in Chapter 16.
Here are your reset options:
![]() Reset All Settings: Resets all settings, but no data or media is deleted.
Reset All Settings: Resets all settings, but no data or media is deleted.
![]() Erase All Content and Settings: Resets all settings and wipes out all your data.
Erase All Content and Settings: Resets all settings and wipes out all your data.
![]() Reset Network Settings: Deletes the current network settings and restores them to their factory defaults.
Reset Network Settings: Deletes the current network settings and restores them to their factory defaults.
![]() Reset Keyboard Dictionary: Removes added words from the dictionary. As we point out early on, the iPhone keyboard is intelligent. And one reason it’s so smart is that it learns from you. So when you reject words that the iPhone keyboard suggests, it figures that the words you specifically banged out ought to be added to the keyboard dictionary.
Reset Keyboard Dictionary: Removes added words from the dictionary. As we point out early on, the iPhone keyboard is intelligent. And one reason it’s so smart is that it learns from you. So when you reject words that the iPhone keyboard suggests, it figures that the words you specifically banged out ought to be added to the keyboard dictionary.
This option deletes all the words you’ve added to the keyboard dictionary, so it will make your keyboard stupider instead of smarter. We suggest that you think twice before you invoke this option.
![]() Reset Home Screen Layout: Reverts all icons to the way they were at the factory. This feature is useful if, as has happened to us, an icon that used to be where you expected it has gone AWOL.
Reset Home Screen Layout: Reverts all icons to the way they were at the factory. This feature is useful if, as has happened to us, an icon that used to be where you expected it has gone AWOL.
![]() Reset Location & Privacy: Restores factory defaults.
Reset Location & Privacy: Restores factory defaults.