SharePoint Designer is not a tool for general use by all those who visit or have access to a SharePoint site; instead, it is a tool targeted to site owners, business analysts, project managers, developers, and IT professionals.
There are a few tasks that still cannot be completed within SharePoint Designer. For those tasks, click the site object in the Navigation pane to display the site settings page, and then on the Site tab, in the Manage group, click Administration Web Page. A browser window opens and displays the Site Settings page.
When you first open a site in SharePoint Designer, the site settings page is displayed in the workspace, as shown in Figure 14-4. The page is divided into five sections:
Site Information Use this section to change the site’s title and description, which are important properties, because they appear on each page within a site and communicate to users the purpose and function of the site. They are also important because the words in the title and description fields are used to rank content items that are returned in a search result set.
Customization Use this section to open a new workspace tab when the home page is displayed in Edit mode. The Change Site Theme link in this section opens the browser and displays the Site Theme page. Themes are discussed later in this chapter.
Settings Use this section to select the options to display the Quick Launch, enable tree view, and enable site Really Simple Syndication (RSS) feeds. The Quick Launch and tree view options are the same as you would find in the browser when on the Site Settings page; under Look And Feel you click Tree View. To select the RSS feeds option, in the browser on the Site Settings page, under Site Administration, click RSS.
Permissions Use this section to assign users and groups permission to this site. When you click the icon to the left of a user or group, the Site tab set becomes active and displays the Permissions tab (see Figure 14-13), which you can use to add new users and groups, edit permissions, inherit permissions from the site’s parent site if the site is using unique permissions, and manage anonymous access, permission levels, access requests, and Site Collection administrators.
Subsites Use this section to list all the Subsites created below the site. When you click in the area below Site Name, the Site tab set becomes active and displays the Subsites tab, as shown in Figure 14-14, which you can use to create a new Subsite, open, delete, or rename a site, view the Subsite in the browser, view the Site Settings page in the browser for the Subsite, or save the Subsite as a template.


Tip
INSIDE OUT Using the Grow Size and Shrink Size commands
You will see the Grow Size and Shrink Size command in the List View group on many ribbon tabs, especially when a settings page is displayed in the workspace. Settings pages contain many sections, and you can use these two commands to reduce the space taken on the workspace for each section. Alternatively you can collapse a section, leaving only the section title visible—by clicking the section title or the up arrow in the title bar.
You can use the SharePoint artifacts listed in the Navigation pane to manage other components of the SharePoint Site, for example:
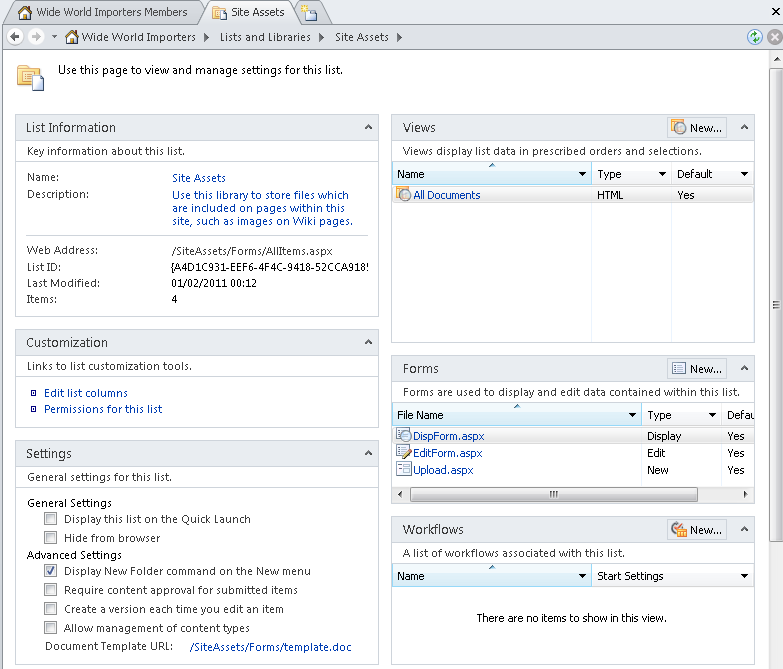
Lists And Libraries You can use the List And Libraries gallery (see Figure 14-7) to create new lists and libraries, manage list settings, edit columns, delete or rename a list or library, preview the list or library in the browser, open a browser window, and display the list settings page and save the list as a template. If you click a list in the workspace, the list settings page is displayed in the workspace, as shown in Figure 14-15. An alternative method of navigating to this page is to click the icon to the left of the list in the List and Library gallery, and then on the Lists And Libraries tab, in the Edit group, click List Settings.
The List Settings page contains eight sections in which you can view list information, edit list columns and the permissions for the list; manage general settings for the list, such as hiding the list from the browser so that is does not display on the View All Sites Content page; manage the content types and workflows associated with the list; create and manage list views and forms; as well as create custom actions.
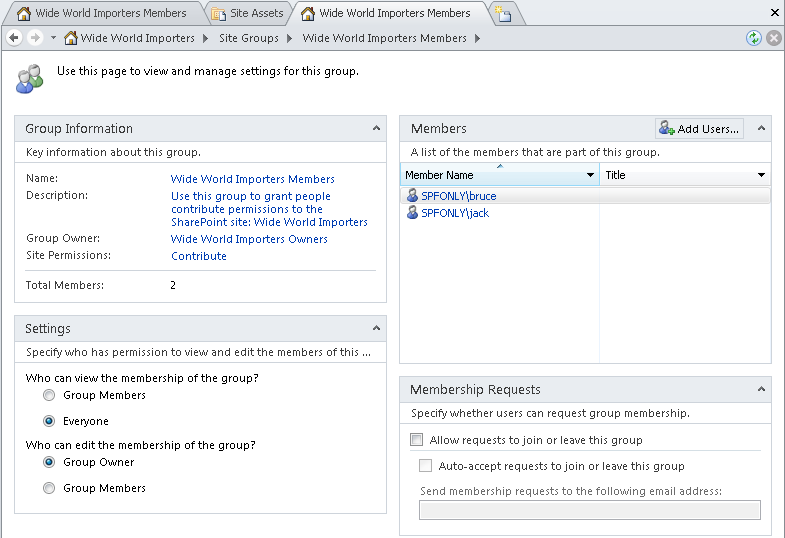
Site Groups When you click this option in the Navigation pane, the Site Groups gallery opens in the workspace and the Site Groups tab is displayed in the ribbon, on which you can add users to an existing group, create new groups, edit and delete a group, make a group the default members group, or view the group permissions. When you click one of the groups, the settings page for that group is displayed in the workspace, as shown in Figure 14-16.