
Multipage Meeting Workspaces are very similar to Basic Meeting Workspaces, with the exception that there are additional pages. The default is three pages (including the Home page), but it is possible to add and/or remove pages as needed. The pages can be named to match their purpose or remain with their default names (Home, Page 1 and Page 2). A Multipage Meeting Workspace is usually reserved for a more involved meeting with lots of supporting documents. An example of possible usage would be to put an agile burn down chart on one of the pages. There are lots of other uses for this type of workspace, but if you aren’t going to use at least one of the additional pages, then it will just serve to confuse end users because of the left hand navigation. Before you learn how to customize the Multipage Meeting Workspace, you need to create one, first:
Open up the site above where you want to create the Multipage Meeting Workspace with the browser.
In the Site Actions menu, click New Site.
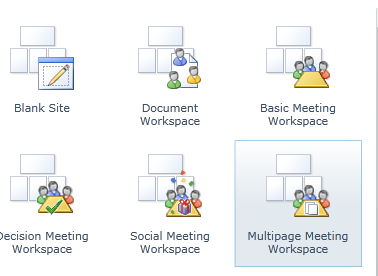
From the template page, select the Multipage Meeting Workspace, as shown in the following:
Provide a Title and URL name for the site.
Click OK to create the site.
The site is created with two default pages, an Objectives list, Attendees list, and an Agenda list.
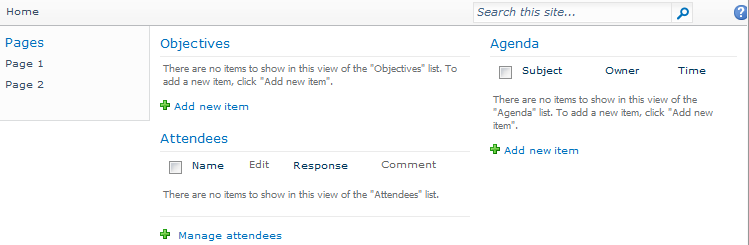
Now that the site has been created, the pages can be customized. The preceding screenshot shows the Home page. The other pages, Page 1 and Page 2, have links in the navigation pane and are blank by default. They are meant to be customized as needed. The navigation pane is somewhat confusing. Clicking Pages does not go to a place to manage the pages; it goes to the same place as All Site Content. Managing the pages can be done through the Site Actions menu. For example, if you want to add a new page, perform the following:


This adds a blank page to the site and places a navigation element in the Pages section on the left side of the page. Depending on the choice made, the new page will appear just for this one meeting or for all meetings. The new page is a normal Web Part page with three Web Parts (left, center, and right), as shown in Figure 4-10.

This view is obtained by clicking Site Actions | Edit Page. There are a few items to notice when editing the page on the ribbon (see Figure 4-11). The Workflow and Approval sections are grayed-out. Normally, workflows are not associated with Meeting Workspaces because they are considered temporary. Publishing features are not normally used either because Meeting Workspaces are not intended to be viewed by people outside of the attendee list.

Another item to note is Delete Page, which, not surprisingly, is used to delete individual pages. Be aware though, that if you created a page that crosses all meetings, it will be deleted across all the meetings. Normally this is used for pages that were created for just one meeting and a decision was made to make a similar page that crosses all meetings.
Now that you have learned how to add pages, you are going to learn how to manage pages. There are only a few items that can be modified. The order of the pages can be changed, but the pages that appear in all the meetings must be on top of those pages that show up for individual meetings. You can manage the order of pages by performing the following steps:
In the Site Actions menu, click Manage Pages, as shown in the following:
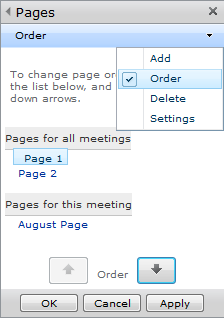
The Pages dialog box appears on the right side of the page. It should default to Order, but if it doesn’t, you can select it from the drop-down at the top of the window.
To move Page 1 down, click the words Page 1, click the down arrow, and then click Apply.

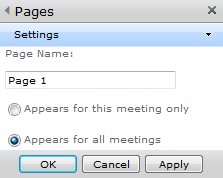
The order can be changed as often as needed. From this same dialog box, it’s also possible to add a new page, delete a page, or change the settings. The only setting that is available is the one that changes a page from just being on a particular meeting or one that crosses all meetings and the title of the page, as shown in Figure 4-12.
Tip
INSIDE OUT Customizing a workspace
When you use the browser, you are limited to adding only Web Parts to the workspace pages in a Multipage Meeting Workspace. For more advanced customization, you can use SharePoint Designer 2010. Workspaces are designed to be more utilitarian than attractive (hence, the “work” in the name), but there is nothing to stop you from making workspaces just as attractive as the rest of your sites.