
So far, you have seen individual Web Parts in action on a SharePoint Site. Configuring these Web Parts can be as simple as placing one on the page and then making minor changes in the configuration, or as complex as specifying behaviors for appearance and function.
What you haven’t seen yet is the interaction between two distinct Web Parts. SharePoint Web Parts can be interconnected, with one Web Part providing values that can be consumed by another. Not all Web Parts have this functionality, and as you have seen, the configuration of a Web Part can be restricted such that connectivity is not allowed.
This section begins with the creation and mild alteration of a wiki page (this activity is covered in Chapter 6,). Web Parts will then be added and connected to demonstrate this defined Web Part relationship.
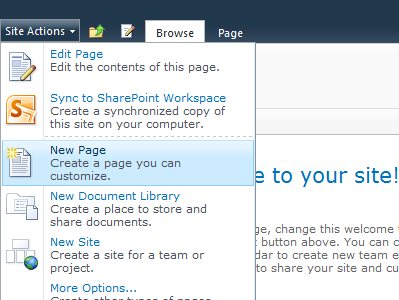
To begin creating a new page, click Site Actions | New Page, as shown in Figure 7-28.
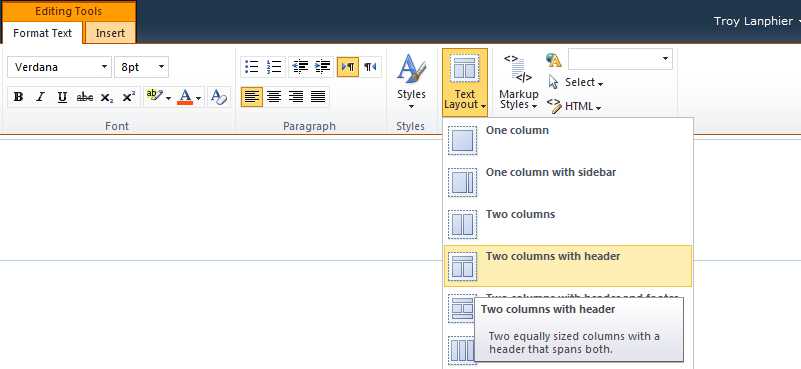
When the new page appears, on the Editing Tools tab, click Format Text. Next, click the Text Layout button. You can use this tool to dynamically change the layout of the page. The page only had one content area when it was created; change this to Two Columns With Header, as depicted in Figure 7-29. Note the tip that appears, describing each layout.
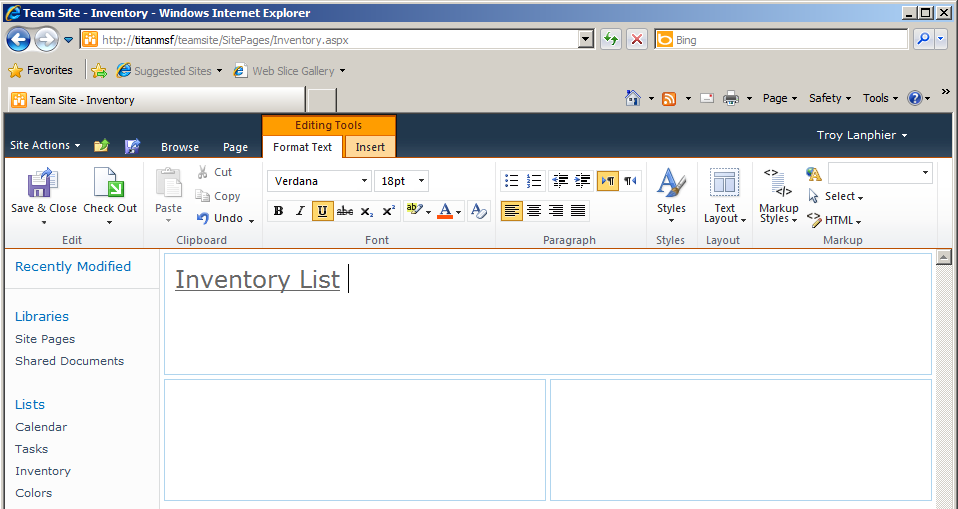
The new page layout appears with the three content areas. Click the header (the top content area), and then type Inventory List for the page title. Format the text by using the ribbon, just as you would in Microsoft Word (see Figure 7-30).
It’s time to add the first of two Web Parts. First, click inside the lower-left content area to select it. On the Editing Tools tab, click Insert (see Figure 7-31), and then click the Web Part button to display the Web Part Categories selector.

Select Forms in the Web Parts section, and then click the HTML Form Web Part. This Web Part accepts input and can pass it to another, connected Web Part.
Click the Add Web Part To drop-down list. Notice that there is only one choice: Rich Content. This is because you are adding this Web Part to a wiki page. If this were a Web Part page, there would be Web Part Zones specified in this drop-down and you could choose to which Zone to add the Web Part.
Click the Add button to complete the addition of the Web Part to the site, as shown in Figure 7-32.
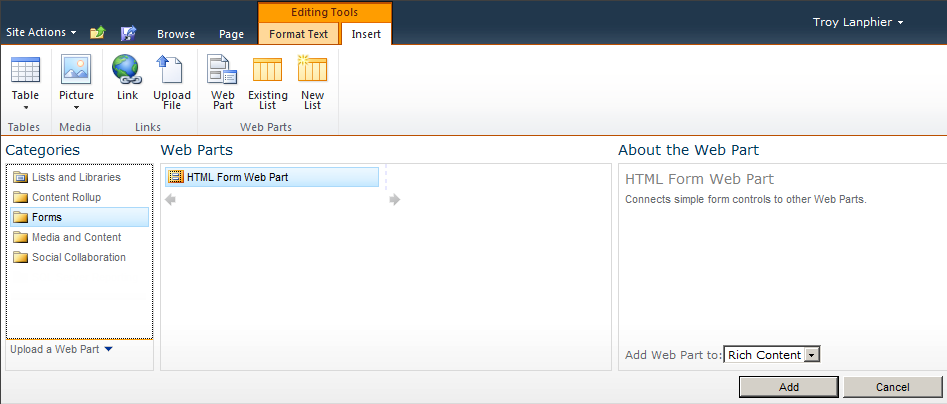
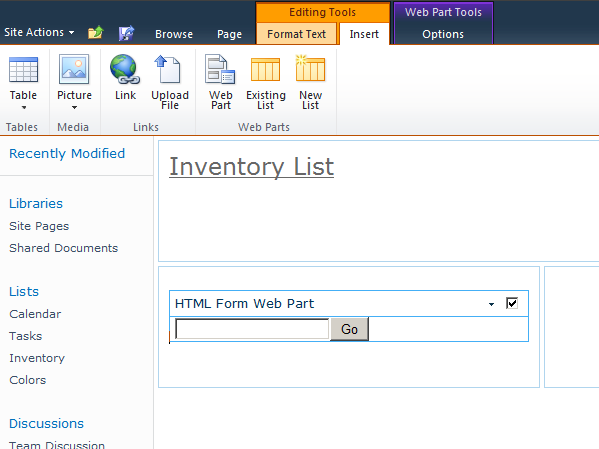
Figure 7-33 shows that the HTML Form Web Part appears in the lower-left content area that you selected previously. At this point, the Web Part is not configured and is of little to no use; it has one text form input box and a button that can execute whatever code has been placed in the Web Part.
You will edit the HTML Form Web Part shortly; in the meantime, place the other Web Part on the page. As before, click in the lower-right content area to select it.
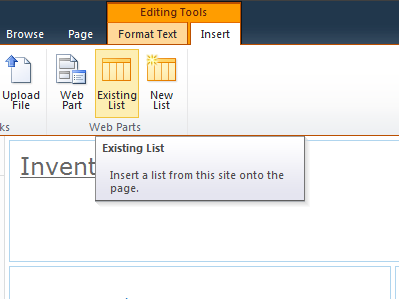
This time, you will be inserting a Web Part from an existing list (see Figure 7-34). On the Editing Tools tab, select Insert, and then click Existing List.
A list was created for this example called Inventory. It has three columns:
Title The title of the item
Color A choice field (Red, Orange, Yellow, Green, Blue, Purple)
Quantity A number field with no decimals
If you have difficulty building this list, for a refresher, refer to Chapter 5. There were also views created for this library, which look at the Title field:
Pint Glasses
Cocktail Glasses
Shot Glasses
Wine Glasses
These views will be used in the next section.
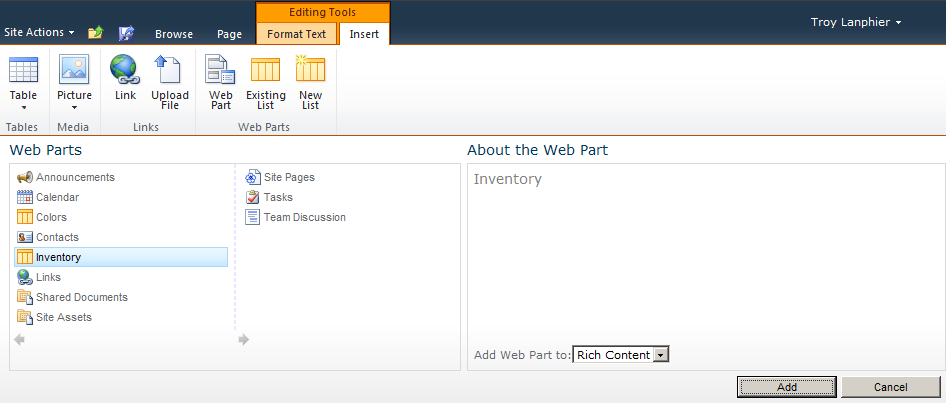
In the Web Parts selection screen, click Inventory, and then click the Add button, as shown in Figure 7-35.
The page should now appear similar to Figure 7-36, which includes:
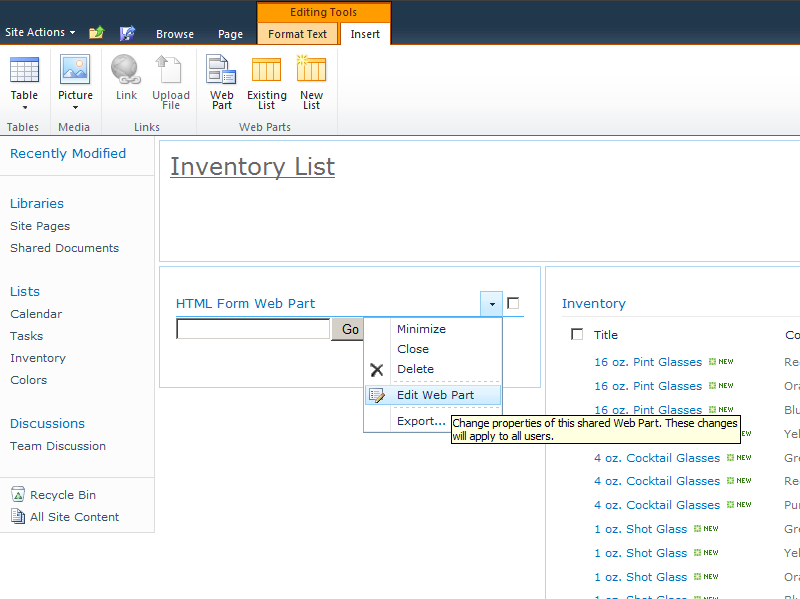
Next, you can begin editing the HTML Form Web Part. Select its drop-down arrow, and then click Edit Web Part.
In the HTML Form Web Part dialog box, you can specify HTML/Javascript to alter its appearance as well as how it handles information that will be passed to another Web Part. Click the Source Editor button (see Figure 7-37) to begin the process of altering the Web Part’s content.

Next, you define the Web Part’s actions. The intended goal is to have the HTML Form Web Part specify a color and pass this as a filter to the Inventory Web Part. This will result in the Inventory Web Part being filtered according to input from the HTML Form Web Part (using the Color column of the Inventory list).
The Text Editor box opens, presenting the basic text that creates the form you see in the Web Part’s default configuration (see Figure 7-38).
This code contains the following JavaScript and HTML components:
A Text Box
A “Go” Button
An Action (in the <DIV> field) that submits the form
One thing is important to remember here—this Web Part is capable of passing only one value to a particular Web Part at a time. If you have multiple values, you can connect them to multiple Web Parts, again one at a time. You cannot, however, connect multiple fields from the HTML Form Web Part to a single Web Part; it’s just not that fancy of a tool.

The code in this Web Part will need to be replaced for this Web Part to meet your needs.
Tip
INSIDE OUT Working with the HTML Form Web Part
In the aforementioned article on http://office.microsoft.com, titled “Use the HTML Form Web Part to filter and display data in another Web Part,” there are several examples of how to interact with this Web Part as well as some code snippets that teach you a little bit about creating an HTML form with JavaScript components. In case you misplaced the link from the last section, you’ll find this article at http://office.microsoft.com/en-us/sharepoint-foundation-help/use-the-html-form-web-part-to-filter-and-display-data-in-another-web-part-HA101791813.aspx.
The code you will see momentarily is derived from that contained on the website that you were just referred to. It has been modified to accomplish a bit more than was required in the article, however.
Let’s have a walk through the following code, which you will use to add the required functionality to the Web Part:
<div onkeydown="javascript:if (event.keyCode == 13) _SFSUBMIT_">
<p>Please select a color to sort your inventory by</p>
<input type="Radio" name="color" value="Red"/> Red<br/>
<input type="Radio" name="color" value="Orange"/> Orange<br/>
<input type="Radio" name="color" value="Yellow"/> Yellow<br/>
<input type="Radio" name="color" value="Green"/> Green<br/>
<input type="Radio" name="color" value="Blue"/> Blue<br/>
<input type="Radio" name="color" value="Purple"/> Purple<br/>
<p align="right">
<input type="button" value="Select Color" onclick="javascript:_SFSUBMIT_"/>
<input type="button" value="Reset Filter" onclick="location.href='../SitePages/
Inventory.aspx'"/>
</p>
</div>
The JavaScript code within the default HTML Form Web Part performs the following actions:
It creates a “Submit” action for the “Select Color” button.
It prompts the user for a color selection.
It creates six radio buttons, one for each color in the library (note that the name of the radio button is “color”—this will be important later).
It moves both buttons to the right side of the Web Part.
It creates a button to select the color—this one will be linked to the Inventory Web Part.
It creates another button that resets the filter on the Inventory Web Part by simply reloading the page (admittedly, this is not elegant, but it works for this example).
Copy the code and then replace the original code in the HTML Form Web Part (see Figure 7-39). Click the Save button to close the text editor.
Tip
INSIDE OUT Writing your code outside of the built-in text editor
One thing you will learn very quickly when experimenting with these Web Parts is that the text interface can be challenging to use because of its small work area; it also does not validate your code. If you plan on adding code of any complexity, you could use something as basic as the Notepad editor (built in to Windows) or something nicer such as NotePad++ (http://notepad-plus-plus.org) or Microsoft Visual Studio (http://msdn.microsoft.com/en-us/vstudio), and then paste your results into the Web Part.

Before you save the completed Web Part, change its title on the page. In the Appearance section of the Web Part Configuration pane (right side of your screen), select the HTML Form Web Part text, as shown in Figure 7-40.

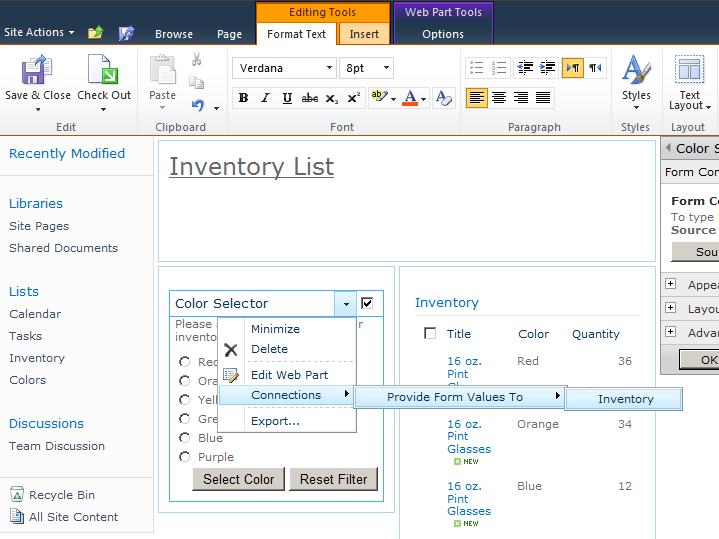
Now it’s time to connect the Web Parts to each other; let’s begin with the Color Selector. To connect Web Parts, they must be in Edit mode. You can check if you are by clicking the drop-down arrow. If the ensuing list doesn’t show the Connections menu item, your Web Part is not currently in Edit mode (although the page itself is). Select the Edit Web Part menu item, as illustrated in Figure 7-41.

If you click the drop-down arrow again, you should see the Connections menu; if this is not the case, one of two things is most likely happening:
Click Connections | Provide Form Values To | Inventory to set the connection to the Inventory Web Part, as shown in Figure 7-42.
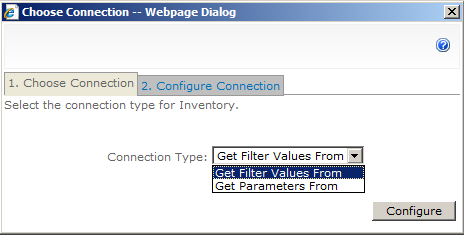
The Choose Connections dialog box opens, in which you are presented with two tabs: 1. Choose Connection, and 2. Configure Connection (see Figure 7-43).
Both of these steps are required to secure the connection between Web Parts. For step 1 (Choose Connection), select Get Filter Values From, and then click the Configure button, which will move you on to step 2.
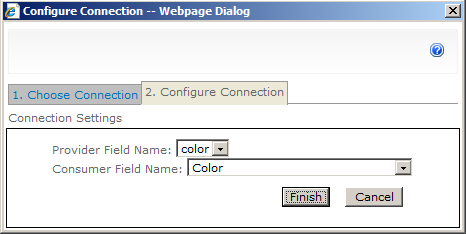
In the second step, choose the Provider Field Name (color) from the Color Selector Web Part. This was intentionally left in all lowercase (in step 3 of the HTML Form Web Part code) to distinguish it from the Consumer Field Name (Color). Click the Finish button to complete the connection, as demonstrated in Figure 7-44.
All that remains is to save the page. On the ribbon, on the Editing Tools tab, click the Save & Close button (see Figure 7-45).

The completed page appears, as shown in Figure 7-46. If you see no values in the Inventory Web Part, click the Reset Filter button in the Color Selector Web Part.
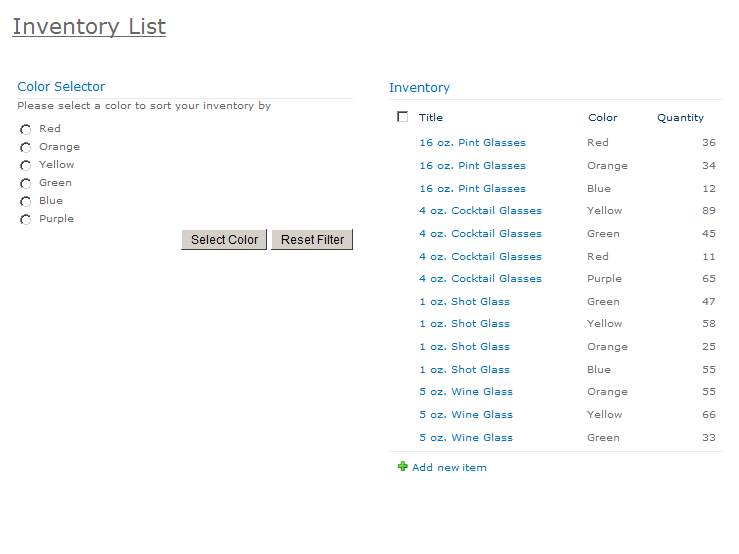
Select any color in the Color Selector Web Part, and then click the Select Color button. This passes the value to the Inventory Web Part to filter the result. For example, if you select Red, only red items are presented in the inventory list, as shown in Figure 7-47.
Notice the small, triangular icon adjacent to the Color field on the Inventory Web Part—we’ll talk about that next.

In case you missed it earlier, clicking the Reset Filter button removes the applied filter by reloading the page—don’t do this yet; let’s first have a look at how filtering a Web Part works.
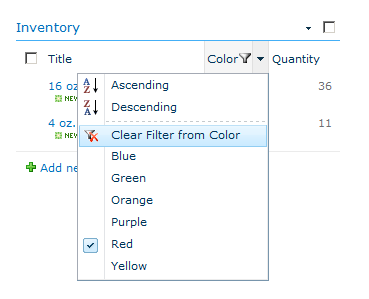
Filtering itself does not require a connected Web Part; in fact, you can filter within a single Web Part. On the Inventory Web Part, you could simply click the Color field to accomplish the same action. A drop-down menu appears (see Figure 7-48) with options to accomplish several tasks:
Choose a sort order (Ascending or Descending).
Choose to clear an applied filter from the field.
Choose a particular field value by which to filter the web part.
Occasionally, you will want to reverse this process and disconnect Web Parts on your page. This is a fairly straightforward process, but just in case you change your mind at a later date, you should document the existing Web Part connections.
To begin, select the drop-down list for the Color Selector Web Part, and then click Edit Web Part, as shown in Figure 7-49.

Click Connections | Provide Forms Values To | Inventory to indicate which connection you want to remove (see Figure 7-50).

The Configure Connections dialog box opens, as it did when you initially made this connection. Verify that the field you want to disconnect is selected, and then click the Remove Connection button, as shown in Figure 7-51.

This is your last chance—clicking OK at this point removes the connection for good, so a dialog box appears (see Figure 7-52), asking if you’re sure that you want to remove the connection. Click the OK button to remove the connection.
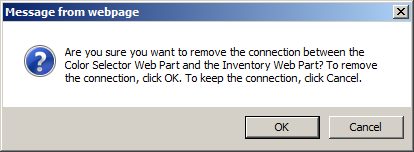
Figure 7-52. Before you disconnect the Web Part, a message appears, asking you to verify that the connection should be removed.
If you have no other changes that you want to make to this Web Part, click the OK button to close the Web Part Configuration pane (on the right side of your page), as shown in Figure 7-53.
