So, now that you’ve learned a little something about Web Parts, let’s put a few on a site. You will actually do this twice in this section: once to put a Web Part on a wiki page, and again to put a Web Part on a Web Part page. We will run through both scenarios so that you can see the subtle differences between them.
Tip
INSIDE OUT Different site templates default to different page types
The template you choose when creating a site determines the default page type it will use. Sites built using the Team Site template create wiki pages in the Site Pages library, whereas sites built using any other site template create a Web Part page at the root of the site; any additional Web Part pages are created within a document library.
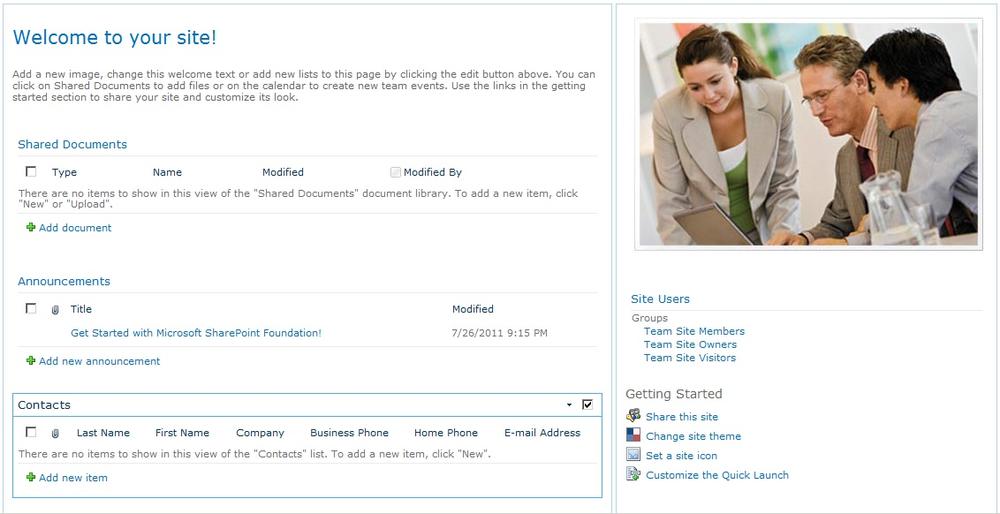
To begin, let’s open up a Team Site (see Figure 7-1). This site template is a true step forward from the Team Site template present in Windows SharePoint Services 3.0; it includes the Site Pages library, which is where all pages are stored.

Text, graphics, and other content can be added freely without the need for Content Editor Web Parts. Changes to a wiki page are also tracked, which gives you the ability to compare with previous versions.
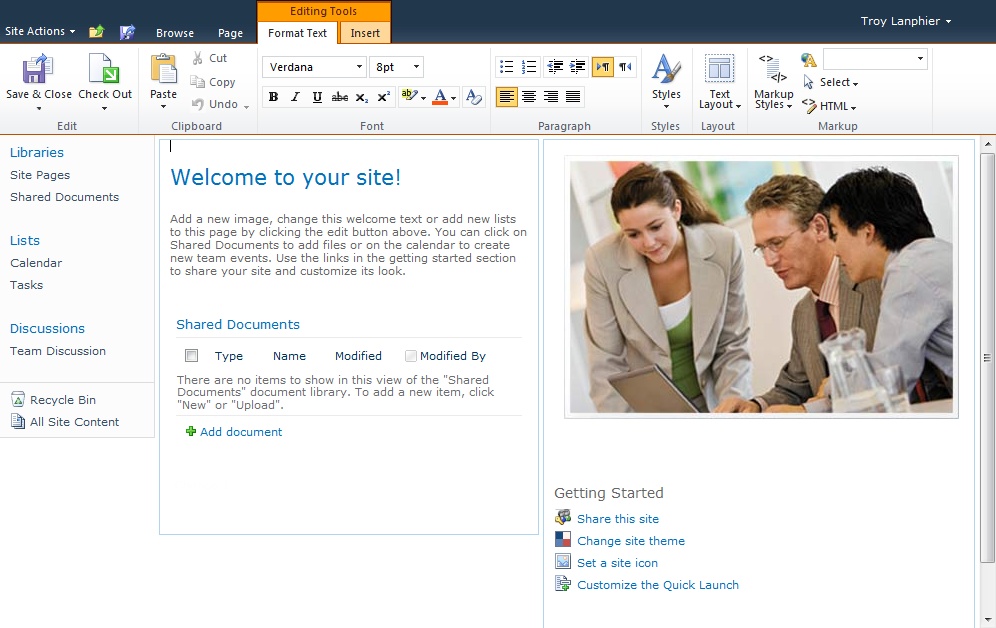
Next, we will begin editing the page by selecting the Page tab and then clicking the Edit button, as shown in Figure 7-2.

As this is a wiki page, edits are freeform; changes can be made by simply clicking in a content area (as indicated by the boxes around the content in Figure 7-3) and adding text, Web Parts, and other items. Click in the left content area, below the existing content.
To begin making changes to the page, in the Editing Tools tab group, select the Insert tab (see Figure 7-4). In the Web Parts section, you see three choices: Web Part, Existing List, or New List.

Essentially, the Existing List and New List buttons are simply shortcuts; you can use them to insert a Web Part, and at the same time, save some extra steps. Using Existing List, you can insert a Web Part that is based off of an existing list. If you do not already have a list and instead need to create one for use in a Web Part, you can choose New List, which creates a new list and then represents it on the page, saving you an extra step.
For this example, you will be adding a Web Part that does not represent a list or a library, so click Web Part.
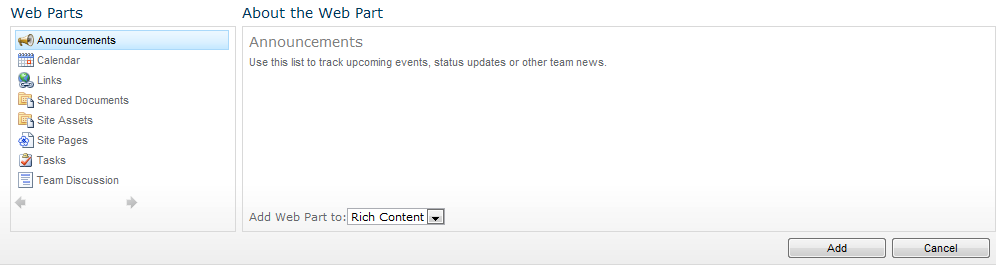
The Web Categories pane appears below the ribbon, displaying a series of Categories and Web Parts, as shown in Figure 7-5.

The core set of SharePoint Foundation Web Parts are broken up into categories, based on function. There are five main groupings that appear in any SharePoint Foundation 2010 installation. Table 7-1 presents these categories along with a brief description of their function.
Table 7-1. Web Part Categories
Category | Function |
|---|---|
Shows all Web Parts that represent lists or libraries within the SharePoint site. | |
Shows the Web Parts that are responsible for “rolling up” or aggregating data from different sources. | |
Contains Web Parts specifically built to consume input and relay it to other, connected Web Parts. | |
These Web Parts are heavily used, displaying text, graphics, and other content (such as Microsoft Silverlight applications). | |
Contains Web Parts that are responsible for showing content targeted toward specific users. |
For the sample site, select the Social Collaboration category, and then choose Site Users, as illustrated in Figure 7-6. This Web Part will be beneficial to our site because it displays users who belong to this site along with their online status (if available). Click the Add button to add this Web Part to the wiki page.

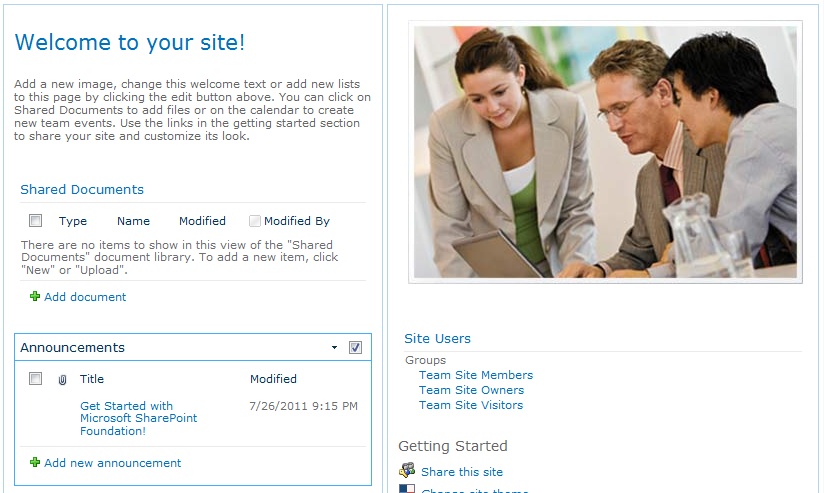
The Site Users Web Part appears in Figure 7-7. Because the left content area had been selected when the Web Part was added, that is where it appeared by default.

Let’s move the Site Users Web Part over to the right pane, under the photo but above the Getting Started Web Part. Drag the “Site Users” title bar from the left to the right content area (Figure 7-8).
Notice that the page is still in Edit mode (as indicated by the large squares around the content). Also notice that the existing Getting Started Web Part moved down when the new Site Users Web Part was inserted.

Here, the Site Users Web Part has been moved to the right content area, below the photo.
Next, you will add in a Web Part that represents an existing list. Click again at the bottom of the left content area; this is where the next action will take place.
In the Editing Tools tab group, select the Insert tab, and then click Existing List (see Figure 7-9). Each SharePoint list in a site has a corresponding Web Part by default; this Web Part is created alongside the list it represents.

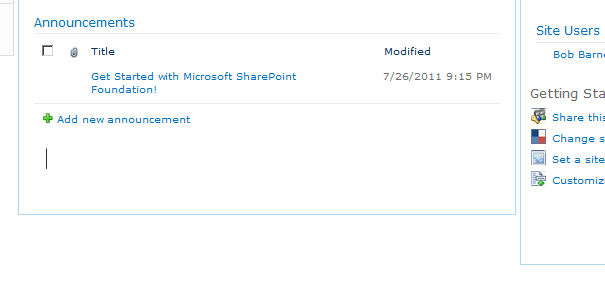
From the Web Parts section, select the Announcements Web Part (see Figure 7-10), and then click the Add button.
When the Web Part appears, note that it is in the content area and location that you selected earlier, as illustrated in Figure 7-11. If this is not the case, simply drag its title bar to where you want it located.
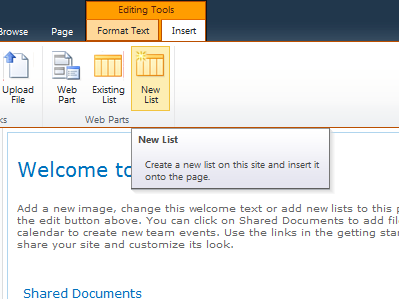
Now let’s build a new list and insert its Web Part at the same time. Click in the left content area below the Announcements Web Part that you just added, as shown in Figure 7-12.
The Navigation ribbon in SharePoint Foundation 2010 not only aids in grouping similar items together, but it also acts as a (sort of) macro functionality in certain instances; this is one of those instances. When you click New List from the Web Parts section (see Figure 7-13), you not only add a Web Part, but you generate the underlying SharePoint list.
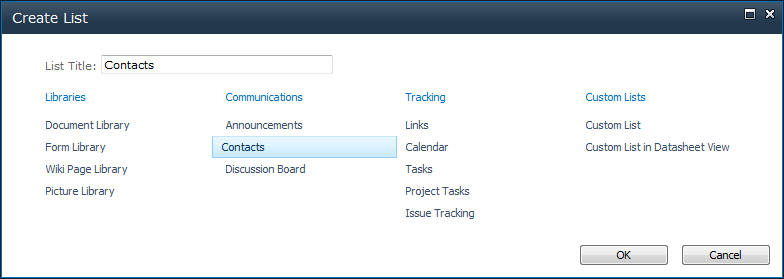
Add in the Contacts list title. In the Communications section, select the Contacts list type, and then click the OK button, as depicted in Figure 7-14.
The completed page appears, with the Announcements and Contacts Web Parts in the left content area and the Site Users Web Part in the right content area, as shown in Figure 7-15.