While there is little behavior difference between Web Parts on a wiki page and Web Parts on a Web Part page, let’s build a Web Part page to illustrate what the differences are.
Wiki pages are most often stored in the site pages library of a Microsoft SharePoint Foundation site, Web Part pages can be built in a document library, regardless of the library name.
Web Part pages are found in all but the Team Site template as the de facto page type and have a few interesting characteristics that make them different in behavior from their wiki page counterparts, such as:
No version control
No area for freeform content (graphics, images, and so on)
A very rigid structure that cannot be changed quickly—once a page layout is chosen, it cannot be altered by the site owner
We will pass quickly through the process of creating first a document library for the Web Part Pages, and then the Web Part Page itself. These topics have been covered previously in both Chapter 5 and Chapter 6.
To begin, click the Site Actions menu, and then select New Document Library, as shown in Figure 7-54.

Name your new library Catalogs, and use the Document Template. When your new library appears (see Figure 7-55), do not click the Add Document link because it will merely prompt you for a file to upload to the library.

On the ribbon, click Library Tools | Documents | New Document to begin the creation of a new Web Part page, as depicted in Figure 7-56.

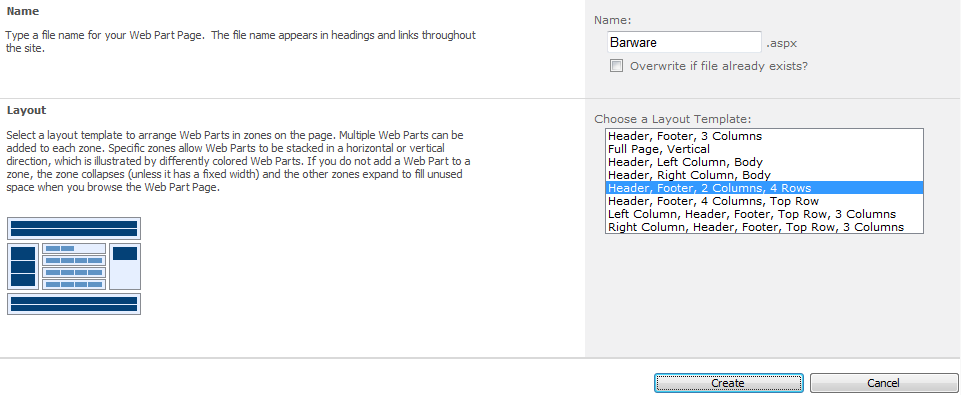
Next, choose the name and layout. For this example, use the title Barware and select the Header, Footer, 2 Columns, 4 Rows template (see Figure 7-57). Click the Create button.
When the new page appears, select the Header Web Part zone, click the Add A Web Part section inside it, as shown in Figure 7-58.

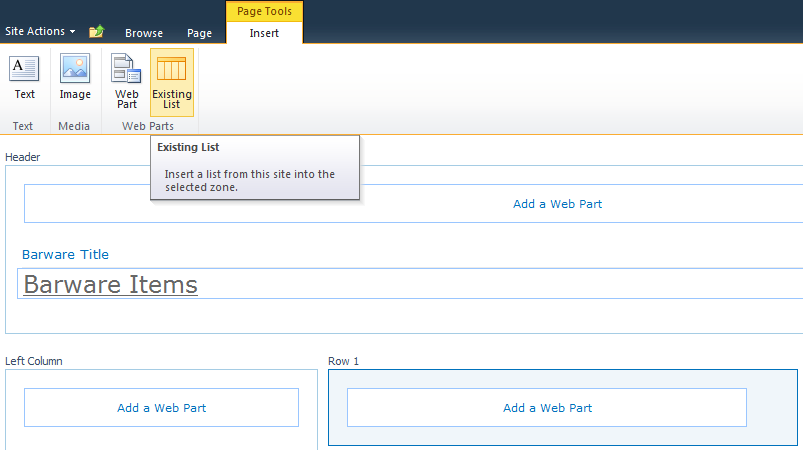
Add the first Web Part. The Page Tools menu provides four options:
Because it’s not possible to add freeform text to a Web Part zone, you need to add a Content Editor Web Part to start. On the Page Tools tab, click Insert, and then click the Text button, as shown in Figure 7-59, to add this Web Part to the Left Column Web Part zone.

Once the Web Part has been inserted, change its title to Barware Title, and then add content to it, as illustrated in Figure 7-60.

In case you forgot how to change the Title, here’s a hint—look to the right of the screen at the Web Part Properties (shown in Figure 7-61).

A couple of things are different in the Layout section of this Web Part, which you can see in Figure 7-62:

Tip
INSIDE OUT Working with Web Part zone indexes
You can have several Web Parts in a particular zone. If you want the one you added to appear at the top of the Web Part zone, set its Zone Index number to 0. The other Web Parts will automatically change their index number and move down the page.
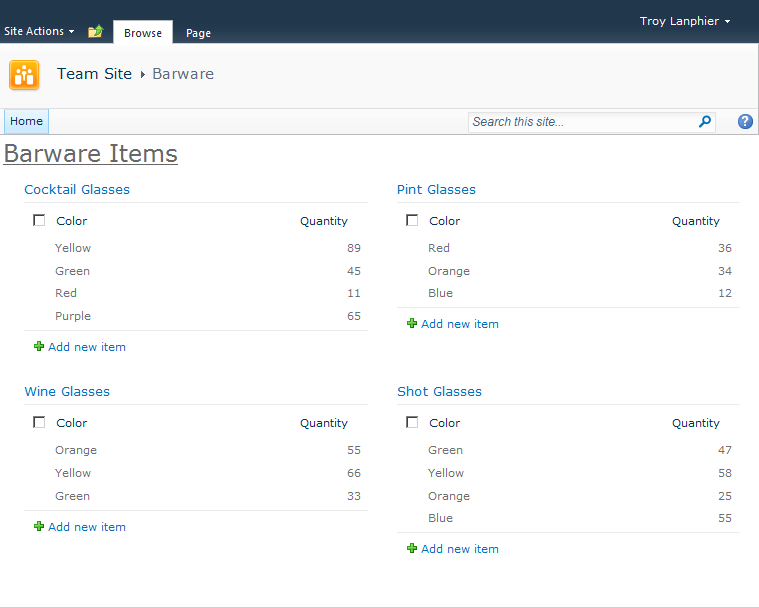
Next, you will insert an existing list. More important, you will insert this list four times. From earlier in this chapter, four library views were created that refer to the Title field:
Pint Glasses
Cocktail Glasses
Shot Glasses
Wine Glasses
The Row Web Part zones (Rows 1–4) in the middle of this page layout distribute Web Parts horizontally instead of vertically. Thus, when you set the Zone Index of a Web Part to 0, it becomes the leftmost Web Part).
The same Web Part on a page can display a particular list view. You will use this to your advantage by adding a Web Part for each view:
Select Row 1, and then click Insert | Existing List, as shown in Figure 7-63.
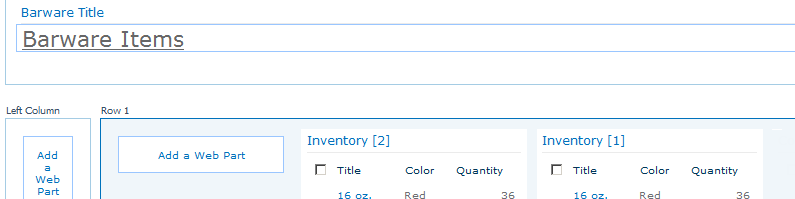
Choose the Inventory List, and then add the Web Part to Row 1 (see Figure 7-64) by clicking the Add button.
Repeat step 2 one more time.
You should now have two Inventory Web Parts in Row 1, as illustrated in Figure 7-65.
Choose the Inventory List, and then add the Web Part to Row 2 (not shown) by clicking the Add button.
Repeat step 4 one more time.
You should now have two Inventory Web Parts in Row 2 (not shown).
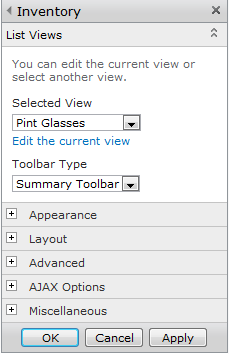
Select and edit one of the Web Parts. Then, change its view, as demonstrated in Figure 7-66.
A warning appears, notifying you that changing the view of a Web Part will break any existing Web Part connections (see Figure 7-67). Build your Web Parts and decide on a view before making Web Part connections.
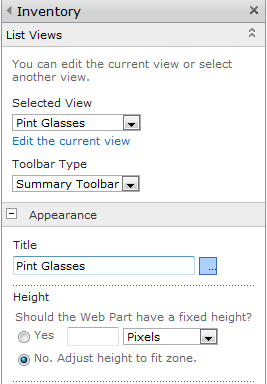
Alter the Title of the Web Part to match its view, as shown in Figure 7-68.
Repeat steps 6 and 7 for all four Web Parts. The finished page (still in Edit mode) should look something like Figure 7-69.
At this point, stop editing the page. On the Page tab, click the Stop Editing button, as depicted in Figure 7-70.
Click the Browse tab to show the completed page, as shown in Figure 7-71.