
The Basic Meeting Workspace template provides a site for collaboration that is specifically designed for meetings. There is a place for the agenda, a list of attendees, a place to list objectives, and a document library for the storage of documents relating to the meeting. You can, of course, add, delete, or modify the items in the site, but this template provides a platform from which you can get started. Meeting Workspaces are different from normal sites in that they can be directly tied to a meeting (or series of meetings) within Microsoft Outlook. When you create a meeting, you can choose to create a Meeting Workspace or link to an existing one. The Meeting Workspace can be also be used for multiple meetings, which creates a series of related meetings. Each of the document libraries and lists can show items just for an individual meeting or they can be made to show items that cross all meetings (series). Before you get into the options and how to use the workspace, you will create one with your browser.
Creating a Basic Meeting Workspace is similar to creating a regular a site with the Team Site template. But even though the process is similar, you will want to take more care in creating the Basic Meeting Workspace, especially if you are going to be using it for a series of meetings. The location of the meetings shouldn’t change and you won’t be able to create Subsites, so carefully choose where you want to locate the site. For this scenario, you will be creating a site for the weekly Engineering meeting; you will want to place it under the Engineering Team Site that you created earlier. You can do this by performing these steps:
Navigate to the Engineering site.
Click Site Actions, and then click Create Site (you must have permissions to create sites for this option to show up).
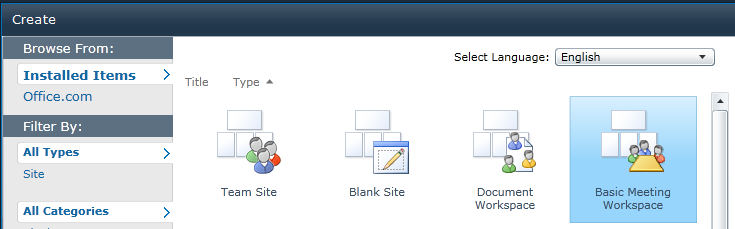
Click the Basic Meeting Workspace template, as shown in the following illustration.
In the Title text box, type Weekly Meeting.
In the URL text box, enter weekly.
Click Create.
You now have a new site that should contain the document libraries and lists.

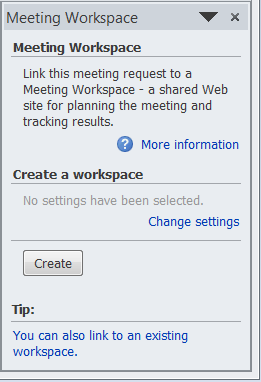
The Basic Meeting Workspace is now ready to use. The simplest way to use the new site is to send a link to the site in the meeting email, but you don’t truly realize the full power of the Meeting Workspace unless you connect to it via Outlook when you create a meeting. In the next section, you will learn how to link to an existing workspace.
When you create a meeting by using Outlook (2007 or 2010), you have the option to connect to an existing Meeting Workspace, or you can create a new one. In this scenario, you will connect to an Existing Workspace. Not only will the link show up in the meeting, but once you have connected more than one meeting to the workspace, you will see dates appear where the Quick Launch normally appears (for example, in Team Sites). But before you get to that, you will need to connect your first meeting. Connecting the workspace might not be straightforward the first time you do it, so let’s make sure that the Meeting Workspace icon is easily accessible by customizing the Quick Access Toolbar. To do this, perform the following steps:
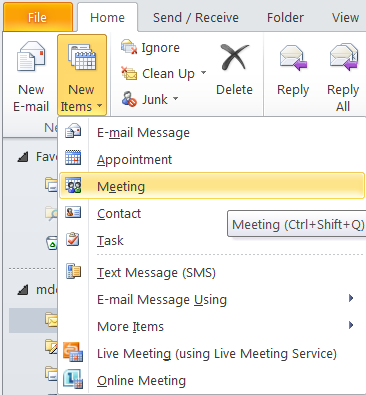
Open a new meeting by clicking New Items, and then click Meeting, as shown in the illustration that follows.
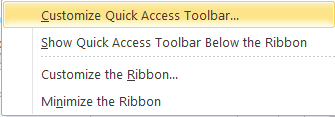
Right-click the ribbon, and then from the context menu that appears, click Customize Quick Access Toolbar.
Click Meeting Workspace from the list on the left.
Click the Add button.
The Meeting Workspace item moves to the right column.
Click the OK button at the bottom of the dialog box.
The Meeting Workspace icon should appear in the top level navigation bar of the Meeting item.

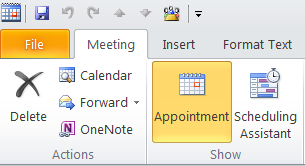
The Meeting Workspace icon will appear every time a meeting is created.
With the Meeting Workspace icon in place, it’s easy to connect any meeting workspace to a meeting. Although Meeting Workspaces can be reused multiple times, it makes sense to put a reasonable limit on the number of times that you want to use them. It becomes confusing and hard to navigate if there are too many meetings (especially different types of meetings) using the same workspace. Now you can use the newly-displayed icon to connect the meeting to the meeting workspace by performing the following steps:
On the meeting item, click the Meeting Workspace icon
The Meeting Workspace dialog box opens on the far right.
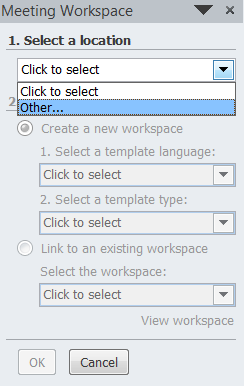
Click Create (or click You Can Also Link To An Existing Workspace).
The dialog box that follows replaces the previous one.
Choosing a location is the next step, but if this is the first time you have used this location, it will be empty. To add a new location click the drop-down list, and then click Other.
To access the Meeting Workspace, it is necessary to enter the URL of the site above the meeting workspace. For example, if the Site Collection is named Contoso and the Meeting Workspace is located in the Engineering Team Site name (with a URL name of eng), then the URL you want to enter is http://contoso/eng.
Click OK.
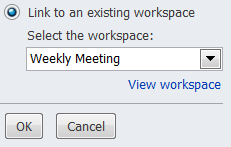
You can now select Link To An Existing Workspace and choose the workspace that was created earlier (Weekly Meeting).
Click OK, and then click Link to finish linking the meeting to the Meeting Workspace.
When you finish adding attendees and filling in the information for the meeting, it is ready to send. The link to the Meeting Workspace will appear in the body of the message, as shown in the following:


Tip
INSIDE OUT Creating workspaces from Outlook
It is perfectly acceptable to create the workspace directly from Outlook. You can even reuse it just the same as a Meeting Workspace created with the browser. Use caution with this method though. Although the template can be chosen, that is the only option available through this interface.
Once you have linked to a Meeting Workspace more than once, a new navigational element will appear on the left of the main content area (in a Team Site, this is where the Quick Launch section is located). For every meeting there will be a date shown, as shown in Figure 4-8.
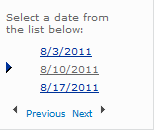
If there is more than one meeting on a given day, then there will be multiple instances of the same date and you might need to click on each one of them to find the meeting space you’re looking for. The Meeting Workspace should default to the next meeting that appears in the future. If you have many meetings that use a particular Meeting Workspace, you can use the previous and next links to go back to older meetings or forward to future meetings. When you click an item, the page will show the meeting time and location at the top, as illustrated in Figure 4-9.

The meeting description includes the subject, date, time, and location. With this information, it should be an easy task to identify any individual meeting. Clicking the >> (right angle bracket characters) displays the time zone in which the meeting occurs. This is important if you are meeting with people in different time zones.
Any document library or list can be converted to a series. A series is a document library or list that crosses all meetings. A good example of when to use a series is for a set of meetings about a particular project. Documents that pertain to the project such as blue prints or project plans could go in a series document library. From a user’s perspective, a series looks the same as any other document library or list. The only difference is that the items stay the same from one meeting to the next. While you can change a document library or list to be a series, it is a one-way street; you cannot change a series into a document library or list. The only way to go back would be to save off the items, delete the list or library, and then re-create it. After re-creating the list or library, it will still need the items added back to it. After the decision to turn a library or list into a series has been made, the browser can be used to make this happen. For example, if you want to convert the Objectives list to a series, perform the following steps:
On the home page of the Meeting Workspace, click the word Objectives to go to the Objectives list.
On the List Tools tab, click List, as shown here:
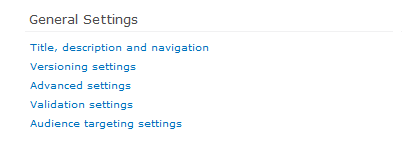
In the Settings group section on the far right of the ribbon, click List Settings.
In the General Settings section, click Advanced Settings.
Click OK to convert the list into a series


Once the decision to create a series has been made, all the items from the list that were separated by meeting times will be consolidated. These items will show up in every single meeting.