
Updating Permissions and Management
Creating and Modifying List and Library Views
LISTS and libraries can be used as repositories for almost anything that you want to store within the Microsoft SharePoint environment. With the help of new form dialogs and the introduction of the ribbon, the experience of reading, editing, and creating content has been greatly enhanced in SharePoint Foundation 2010.
Lists and libraries are a powerful solution for organizations that currently create content in many different types of applications that are then saved in various locations. If you have a collection of spreadsheets that you store and track on your desktop, it is very easy to import them directly into a SharePoint list so that they are available to a larger audience, but in a more secure manner. Why create a large number of Microsoft Excel spreadsheets or Microsoft Word documents on your desktop that are hard to keep track of or have many different mechanisms for collecting and presenting data when you can accomplish this quickly and store the content in lists and libraries? Once you have stored the data, you can configure Web Part pages to display the lists and libraries in your SharePoint site.
You will soon discover this is much easier than handcrafting a never-ending series of Excel spreadsheets, and it is certainly easier than developing custom code. This chapter explains how to create lists and libraries, including not only the standard types that come with SharePoint Foundation 2010, but also custom types that you design yourself to meet your specific needs. It goes on to explain how you can then utilize the powerful features of SharePoint Designer 2010 to display data via Really Simple Syndication (RSS) feeds or use workflows to automate specific tasks and receive content approval and feedback. The chapter also goes into detail about how you can use content types to standardize your organization’s procedures for capturing metadata and managing information.
This chapter concentrates exclusively on using a browser to create, modify, and display lists and libraries. SharePoint Designer 2010 can also perform these tasks, and Chapter 14, will explain that approach.
Whenever you want to add data to a SharePoint site, or whenever you want others to do so, you should first locate the proper list (or library). If an appropriate list or library does not exist, a new one needs to be created.
Tip
When deciding whether to create a new list or library or use one that already exists, it is important that you not duplicate efforts in SharePoint. A little investigation about what is currently available can go a long way toward upholding the “one version of the truth” philosophy.
If a list or library exists that meets your needs, store your content there. But what if your SharePoint site doesn’t contain a list or library that seems right for the type of information that you need to store? SharePoint Foundation 2010 list and library functionality is flexible in that if you need new ones, you can create them with ease and without expert knowledge of the product. The next two sections provide guidance for new list and library creation.
To begin creating a SharePoint list of any kind, open the site where you want the list to reside, click the All Site Content link at the bottom of the Quick Launch, and then click Create. This displays the Create page, as shown in Figure 5-1.
Note
It is also possible to access the Create page by clicking Site Actions, and then clicking New Document Library or More Options.
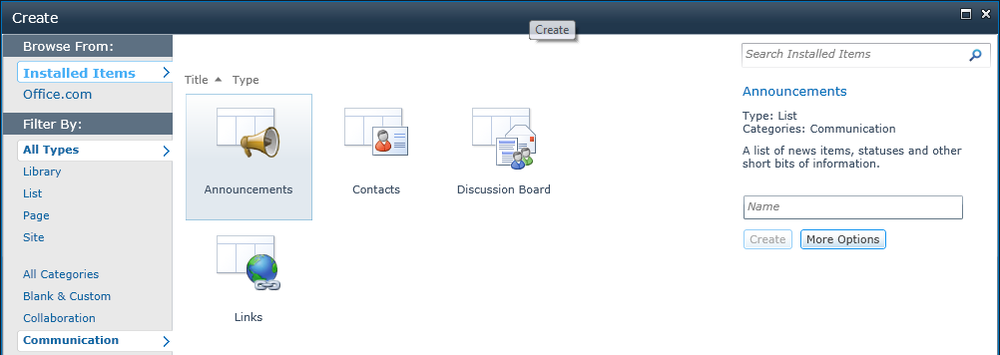
Figure 5-1. The Create page displays options for creating all available types of SharePoint lists, libraries, and pages.
The simplest lists to create are the built-in types that appear under the Communications and Tracking headings. Table 5-1 lists these types.
Table 5-1. Built-In SharePoint Foundation 2010 List Types
Although many aspects of working with these and other list types are the same, each built-in list type has properties that you cannot change; for example:
Site administrators or those with the appropriate permissions can easily create a new list from the built-in lists available in SharePoint Foundation 2010 by performing the following steps:
At the bottom of the Quick Launch, click All Site Content, and then click Create on the All Site Content page.
Either scroll through your options or under the Filter By heading, click List, and then select the type of list that you want to create, such as Issue Tracking or Project Tasks, as shown previously in Figure 5-1.
In the Name box, type in a name for the new list (this is a required field; see Figure 5-2).
Figure 5-2. Use the New page to name, describe, and set navigation details for a new SharePoint list.
The name you type here will appear at the top of the list’s page and will become part of the URL for the page and any related navigational elements.
To type in a Description and/or select if this list should appear in the Quick Launch, click More Options.
The Description field is optional, but it will appear at the top of the list in most views.
If you would like the new list to display in the site’s Quick Launch bar, select Yes in the Navigation section.
Click Create to complete the process.
The new list is created, but it will not contain any items, as shown in Figure 5-3.


Once the list exists, you can enter data, create new views, display views in web pages, or even modify the list’s data fields and features. You’ll learn how to do all of this later in this chapter.
For maximum flexibility when creating a new list, choose any one of the custom links under the Lists heading: Custom List, Custom List In Datasheet View, or Import Spreadsheet. Here’s how these links work:
Custom List This option displays the New page (see Figure 5-4) and then creates and displays a list with only the Title column displayed. Two columns, Created By and Modified By, are created behind the scenes to store information about the users who work with the content of the list.
In almost every case, you would use the instructions in the next section—“Modifying Lists”—to modify this starting point with additional fields and features.
Custom List In Datasheet View Like Custom List, this option displays the New page and creates a list with Title as the only column that is displayed. This option, however, opens the new list in the Datasheet view so that you can view and modify list items in a tabular interface.
Import Spreadsheet Creates a list from data contained in a spreadsheet.

With SharePoint Foundation 2010, you can create lists from templates so that lists that are already proven to work within the organization—or those that contain customizations—can be easily reused. List templates can be imported and exported to different Site Collections and can be made available to a larger audience.
If desired, a list template can contain the actual content that existed within the list when it was saved as a template. It can also retain any of its views. You create lists from list templates via the same process that you use when creating lists from built-in templates, as detailed earlier in this chapter. The list templates will display as available links on the Create page, as shown in Figure 5-5.

As discussed in earlier chapters, the main area for storing content in SharePoint Foundation 2010 is a library. Using a library, you can store, create, and manage files within your organization. If a library does not already exist within your organization that satisfies your needs, you can create a new one.
Site administrators or those with the appropriate permissions can easily create a new library from the available built-in libraries offered in SharePoint Foundation 2010 by performing the following steps:
Click All Site Content, and then on the All Site Content page, click Create.
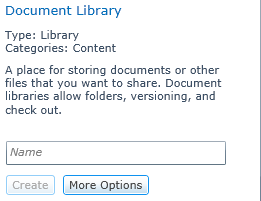
Under Library heading, click the type of library that you want (such as Document Library).
In the Name text box, type a name for the library, as shown in Figure 5-6.
The library name is required and displays at the top of the library page. It becomes part of the library’s URL and navigational elements.
If you want to add additional details, click More Options.
In the Description box, you can optionally type a description of the purpose of the library.
The description appears at the top of the library page.
To add a link to this library on the Quick Launch bar, verify that Yes is selected in the Navigation section.
To create a new version each time a file is checked into the library, select Yes in the Document Version History or Picture Version History section.
Depending on the type of library you are creating, a Document Template section might be available. It lists the compatible programs that are available as the default for creating new files. If content types are enabled, the default template is specified through the content type. In the Document Template section, in the drop-down list, select the type of file that you want to be used as a template for files that are created in the library.
Click Create.
Note
It’s likely that you will have several lists and libraries in use on your site. Because of this, it is highly recommended that you opt to type a description for each list or library that is created. By doing so, you can help alleviate confusion among team members as to what information should be stored in the list or library. The range of descriptions can be as simple as an explanation of what the library is, up to posting information regarding governance and usage policies for the list or library.
Site columns are metadata or columns that are defined at the Site Collection level and then allowed to be available through the Site Collection. Site columns can be created to ensure that relevant information on the content entered is made readily available to assist in locating information, through filtering or sorting as well as being used as triggers for workflows. Managing site columns is still very similar in SharePoint Foundation 2010 as it was in Windows SharePoint Services 3.0.
To manage site columns, perform the following steps:
Navigate to the top level of the Site Collection.
Click Site Actions, and then select Site Settings.
Under the Galleries heading, click Site Columns.
As in Windows SharePoint Services 3.0, you can manage site columns from the Site Column Page. To edit a particular site column, click its Name.
To create a new site column, follow steps 1 through 3, and then perform the following:
Click the Create button.
The New Site Column Page opens.
In the Name And Type section, type the name that you want in the Column Name text box.
Under The Type Of Information In This Column Is, select the type of data that should be entered into the new column.
In the Additional Column Settings section, type a description in the Description box to help users within the organization understand the purpose of the column and what data it should contain. This description is optional but recommended.
Depending on the type of column that you selected, more options might appear in the Additional Column Settings section. Select the additional settings that you want.
To require that the column contain information, click Yes. Also, if you would like to enforce unique values click Yes.
Click OK to create your new Site Column.