While local drafts are a reasonable way to work offline with SharePoint, it can become a bit unwieldy and cumbersome when you have to take a series of lists or libraries offline. But what if you do not know in advance what documents you will need to work with or for how long? It’s likely that neither your site owners nor co-workers will be pleased to find a series of libraries with all of the documents in Check Out mode. To avoid these scenarios, you might want to consider using SharePoint Workspace 2010.
SharePoint Workspace will need to be configured for your account—you should check with your farm administrator in advance to see if there is a defined set of instructions for how to connect within your organization.
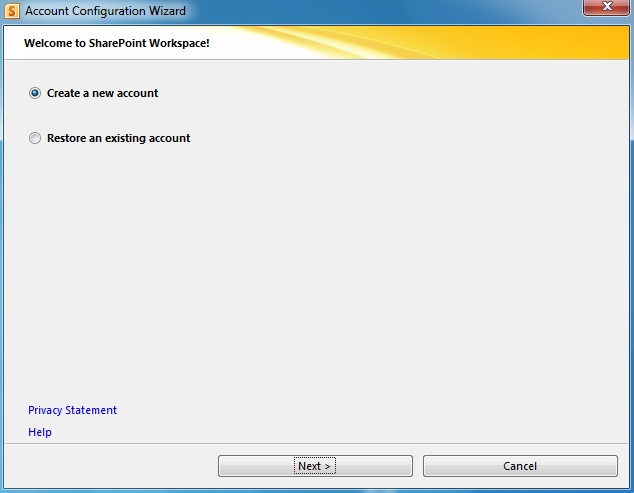
We will configure an account by using the out-of-the-box settings. To begin, from the Windows Start button, click All Programs | Microsoft Office | Microsoft SharePoint Workspace 2010. A dialog box appears (see Figure 12-46), prompting you to either create a new account or restore an existing account.
Tip
INSIDE OUT SharePoint Workspace availability
If you do not see Microsoft SharePoint Workspace 2010 as an option in your Office menu, you might want to check with your Help Desk/farm administrator to see if you have this license available—not all versions of Office have this functionality included. For details, see Chapter 11.
If you are in a larger organization, you might have been issued an Account Configuration Code and an Account Configuration Server, which will configure your SharePoint Workspace (see Figure 12-47) with all necessary information.

If you have this information:
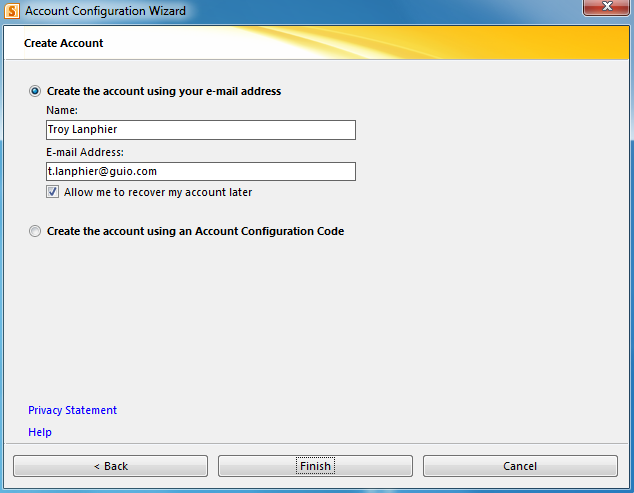
If you do not have an Account Configuration Code or Account Configuration Server information, then you will need to configure the SharePoint Workspace 2010 client manually (see Figure 12-48), by performing the following procedure:
SharePoint Workspace 2010 opens on your computer, showing the default configuration, as appears in Figure 12-49.

Before you begin using SharePoint Workspace 2010, it is recommended that you do the following:
Account Recovery has two core functions: you can restore a backup file when you have forgotten your password, and you can reconnect when your Windows logon has changed such that your SharePoint Workspace account no longer works correctly.
If you need to restore your SharePoint Workspace account backup file but have forgotten the password, enabling Account Recovery will allow you to use the Forgot Your Password option. Using this functionality, you can have an account reset code sent to your email address.
Having your account saved as a file is useful in the event that something happens to your Groove client installation and you are using a single computer. If you have multiple computers that you use to interact with your Groove account, the need for the account to be saved as a file is diminished.
Both of the preceding preferences are set from the same menu. To make these changes, select the File tab, and then in the Backstage view, click Options (see Figure 12-50).

Figure 12-50. Click Options in the Backstage view to make changes to the SharePoint Workspace preferences.
Next, click the Preferences button shown in Figure 12-51.

Select the Account tab (see Figure 12-52). At this point, you can choose whether to enable account recovery by selecting a check box. To save your account as a file, you must select the Save button under the label Save Account As File.

Next, provide a file name for your account, as shown in Figure 12-53, and then save it to a safe place.

Tip
INSIDE OUT What is a .grv file?
You might have noticed that the SharePoint Workspace account uses a .grv extension. This is because SharePoint Workspace shares some core functionality with Groove Server 2010. Groove Server 2010 is an add-on enterprise-level server product, which is capable of enhancing and centralizing functionality found in SharePoint Workspace. Go to http://office.microsoft.com/en-us/servers/groove-server-2010-features-and-benefits-HA101810271.aspx for detailed information about Groove Server 2010.
Now that your configuration is safe, it’s time to put your new SharePoint Workspace to work. With SharePoint Workspace 2010, mobile users can stay up to date with content located on a SharePoint farm by replicating SharePoint information and storing it offline on a local computer.
There are three distinct types of entities that you can create in SharePoint Workspace:
SharePoint Workspaces
Shared Folder Workspaces
Groove Workspaces
For the purposes of this chapter, we will be discussing the first two items, SharePoint Workspaces and Shared Folder Workspaces. Groove Workspace is not covered because it is an additional product that extends SharePoint Workspace functionality, in much the same way that SharePoint Server and Project Server extend SharePoint Foundation functionality.
There are certain items that cannot be synchronized in a SharePoint Workspace. These include:
Calendar/Events lists
Wikis
Blog sites
Form libraries
Slide libraries
Surveys
Site directories
OneNote notebooks stored in document libraries
IRM-protected document libraries
Tip
INSIDE OUT How information is stored on your computer
SharePoint Workspace actually uses three distinct storage mechanisms to store SharePoint information on a computer. You can find a complete discussion of these technologies and how they are utilized within SharePoint at http://blogs.msdn.com/b/sharepoint_workspace_development_team/archive/2010/03/12/sharepoint-workspace-and-the-office-document-cache.aspx.
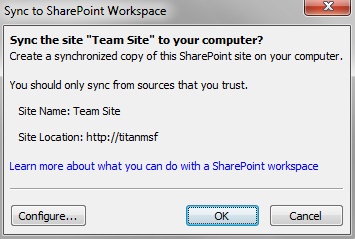
Configuring synchronization between a SharePoint site and SharePoint Workspace is a fairly straightforward process. Begin by opening the site to be synchronized in your web browser. On your SharePoint Site, select Site Actions | Sync To SharePoint Workspace, as shown in Figure 12-54.

A prompt appears, asking you to trust the SharePoint Site (see Figure 12-55). Click the OK button to continue.
To see the newly synchronized site, start SharePoint Workspace 2010, as shown in Figure 12-56.
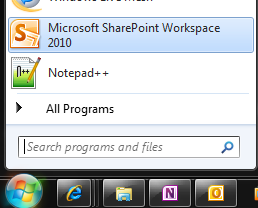
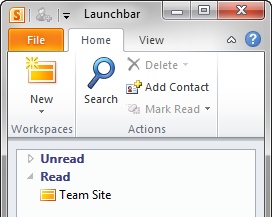
The Launchbar for SharePoint Workspace appears, as illustrated in Figure 12-57. Click the Team Site icon to open it.
The Team Site opens in SharePoint; two major panes appear, which are shown in Figure 12-58.

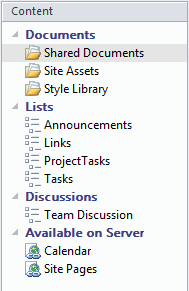
The Content pane on the left (presented in Figure 12-59), displays the items available from the SharePoint Workspace as well as links to items that are not available locally. From this menu, you can choose which library or list with which you want to interact.
The contents of the SharePoint list or library are shown in the right pane. In this example (see Figure 12-60), you can see that the top document is experiencing a synchronization issue, while the other three documents are in a checked out state.

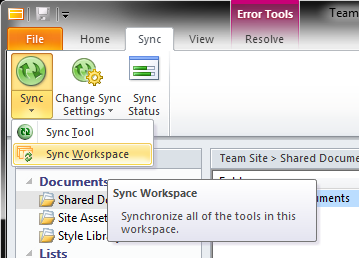
Because the computer is currently online, you can select the Sync button and choose Sync Workspace (shown in Figure 12-61). Let’s see if this resolves the issue.
Verify the current status by selecting the Sync Status button shown in Figure 12-62.
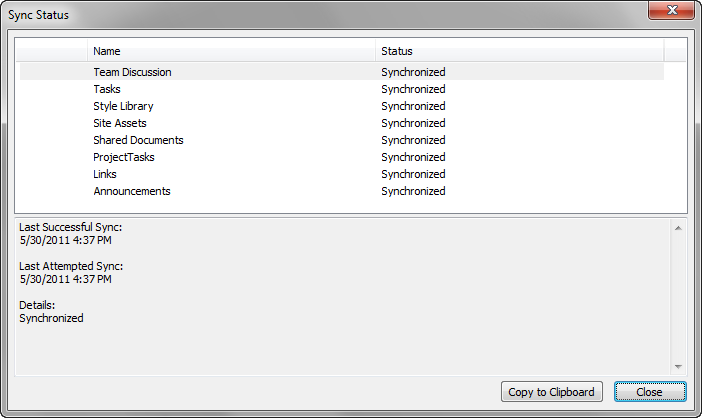
All of the libraries in the SharePoint Workspace are showing as synchronized (see Figure 12-63)—so far, so good. Now click the Close button.
Looking at the Content pane in Figure 12-64, it is apparent that the topmost document is continuing to have a synchronization issue. Let’s see what the issue is.

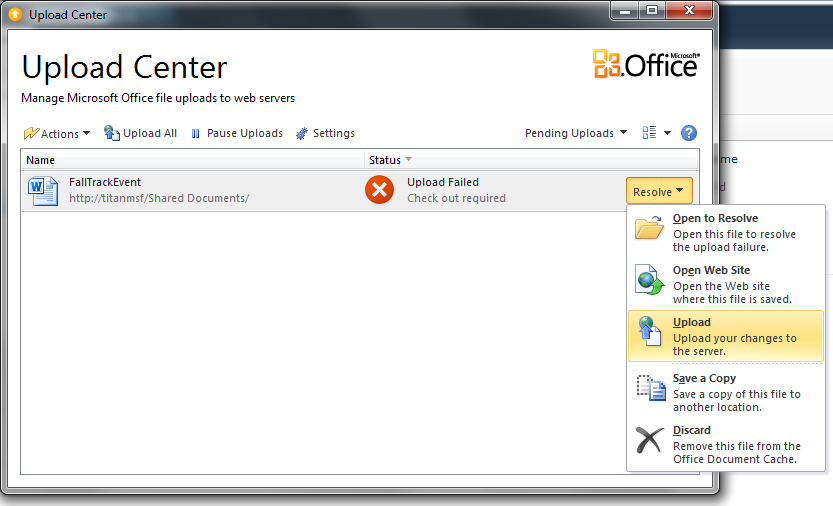
Double-click the item to open the Upload Center. Figure 12-65 shows that problem is the result of the document not being checked out in our SharePoint Team Site; therefore, it cannot be overwritten with the copy contained in SharePoint Workspace.

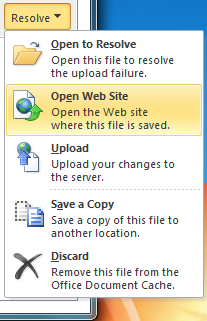
To begin resolving the issue, select the Resolve button from the menu. In this example, you need to open the website and check the document out. Select the Open Web Site menu item, as depicted in Figure 12-66.
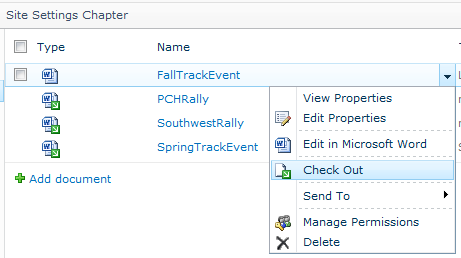
When the Team Site appears, click the list item menu next to the document, and then select Check Out, as illustrated in Figure 12-67.
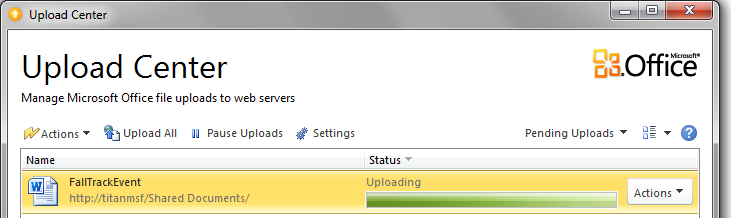
Return to the Upload Center and select Resolve, this time choosing to upload the document, as shown in Figure 12-68.
The document is shown pending upload in Figure 12-69.

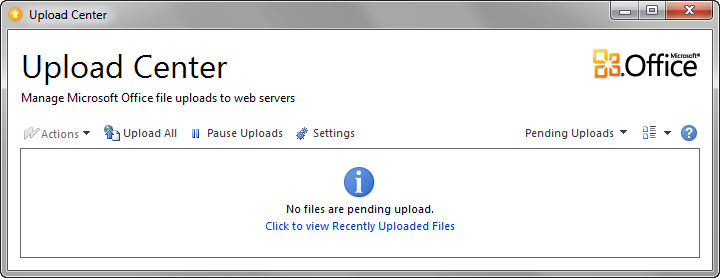
Finally, the document uploads (Figure 12-70).
The status of Upload Center changes, indicating that all files are uploaded (see Figure 12-71). Close the Upload Center.
The SharePoint Workspace updates (see Figure 12-72), indicating that the document has been uploaded but still in a checked-out state.

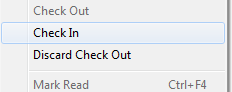
Right-click the document, and then select Check In, as shown in Figure 12-73.
Add Version Comments for the document (shown in Figure 12-74), and then select OK.

The updated document status is shown in SharePoint Workspace. Notice in Figure 12-75 that the document is no longer in a checked-out state.

Shared Folders is another concept that was originally introduced in Groove Workspace 2007. This technology provides an easy way to share documents in a folder that can be synchronized between different business users.
There are two different ways to build a Shared Folder: the first method is to build it from within SharePoint Workspace, the second is to build a folder on your computer and then choose to share it by using SharePoint Workspace.
Although you are not creating a SharePoint Workspace per se, Shared Folder relies on SharePoint Workspace 2010 to provide its core functionality. SharePoint Workspace 2010 is not available in every version of Office 2010; it is only installed as part of the Office Professional Plus 2010 edition (see Chapter 11 for details).
In the following examples, you will begin by building a Shared Folder, both from within SharePoint Workspace 2010 and in Windows Explorer itself. After that, you will see how to utilize the Shared Folder.
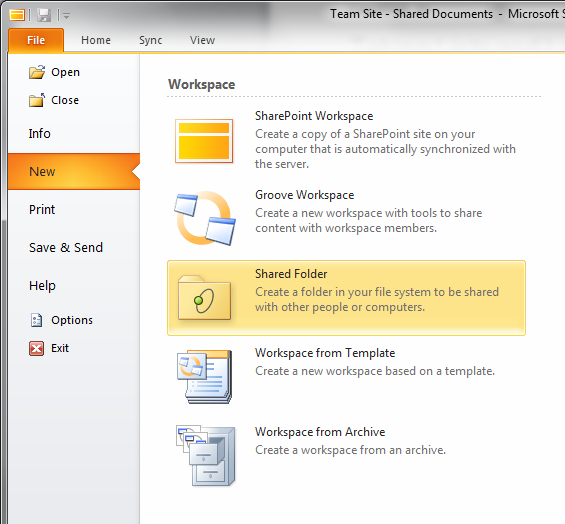
To begin sharing a folder in SharePoint Workspace 2010, select File | New | Shared Folder, as illustrated in Figure 12-76.
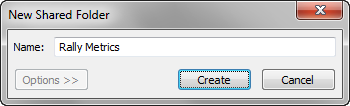
Give the new folder the name Rally Metrics, and then click Create (see Figure 12-77).
You are presented with three options:
In this example, you will create a new folder on the desktop (see Figure 12-78). Click the OK button.

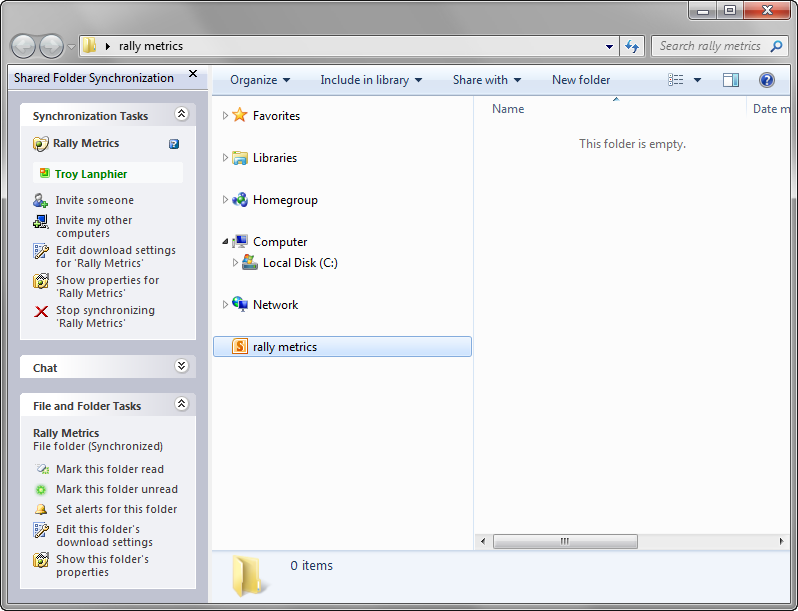
The new folder appears on the desktop and is ready for use.
This process is very similar to building a Shared Folder from within SharePoint Workspace 2010. Again, find a folder that you want to share on your system (see Figure 12-79). Note that this folder is not currently shared (there is no SharePoint Workspace icon on it).

Right-click the folder to open the shortcut menu (see Figure 12-80), select Shared Folder Synchronization, and then click Start Synchronizing.

SharePoint Workspace prompts you to verify that you want to share the folder, as shown in Figure 12-81. Click Yes to continue.

As in the previous section, the new folder appears on the desktop and is ready for use (Figure 12-82). Compare the folder’s appearance with its original state in Figure 12-79.

No matter which method you used, you now have a folder with which multiple users can share and store information on multiple client machines.
When you double-click the folder you shared, what appears to be a standard Windows Explorer session opens, as shown in Figure 12-83.
A new panel appears to the left of the Explorer window, containing three major sections: Synchronization Tasks, Chat, and File Folder Tasks, which are described here:
Synchronization Tasks This section provides you with mechanisms to administer your Shared Folder; inviting users, inviting other computers, and controlling properties and settings for your folder are under this menu.
Chat This provides you with the ability to send instant messages to others working on your folder.
File And Folder Tasks Use this section to carry out core administrative tasks such as marking a folder Read/Unread and viewing Download Settings and Properties.
Chat and File And Folder Tasks are fairly self-explanatory; once you understand the Synchronization Tasks, you should understand the Download Settings and Folder Properties items under File And Folder Tasks—so, let’s have a look at the Synchronization Tasks in detail.
Let’s walk through the process of administering this Shared Folder. To begin, you need to invite other users to share it. Select the Invite Someone link in the Synchronization Tasks section.
A dialog box appears, prompting you to select one or more users to invite to use the Shared Folder. Next, select the Role drop-down menu (the down arrow adjacent to Participant).
Notice that there are three roles available to select from. These roles (see Figure 12-84) do not control permissions within the folder—everyone sharing the folder has full rights to the folder. Roles simply govern the ability to make configuration changes for the Shared Folder.

Unless permissions have been changed in your Shared Folder for these roles, the rights of each role are as follows:
Next, write an invitation message (shown in Figure 12-85) that will be displayed in the email to your new invitee.

Notice the check box in the lower-left of the screen labeled Require Acceptance Confirmation. This setting means that when the person receiving this invitation accepts it, SharePoint Workspace will ask you to confirm that this person should have access to the Shared Folder.
Ironically, the invitation confirmation takes place whether you choose to select the option or not, as is demonstrated in Figure 12-86. Click OK to close the tip.

When you have completed the invitation, click the Invite button to send the invitation on its way.
Next, consider the following scenario: you have both a desktop computer for office use and a laptop for travel. Both of which have SharePoint Workspace 2010 installed, so you can choose to use the Shared Folder functionality. Only your desktop has the correct SharePoint Workspace 2010 account configured, but you need to get the laptop configured, as well.
The good news is that you do not necessarily need to get your corporate Help Desk involved to configure your laptop; SharePoint Workspace 2010 has a mechanism that allows you to export your account settings to another computer and connect that computer to your Workspace or Shared Folder.
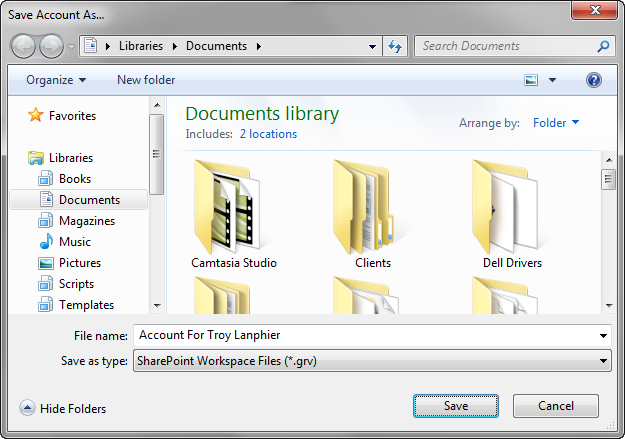
To begin the configuration process, select the Invite My Other Computers link. Figure 12-87 presents the configuration steps and shows how to use your account information on another computer. Select a location to store the file by using Browse, select Save, and then OK.

The saved file (.grv) can be copied to your other computer; if you double-click it, SharePoint Workspace will automatically configure the new computer using the settings provided in the file. Click Save to store the file in the location selected (see Figure 12-88) to store it for this use.
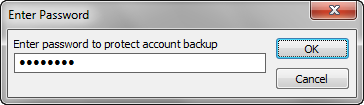
For security purposes, SharePoint Workspace requires that you generate a password for this backed up account. Adding a password, as shown in Figure 12-89, means that no one can get a copy of your backup file and automatically have access to the files that you have stored in the Shared Folder or SharePoint Workspace.
Enter a Password, and then select OK.
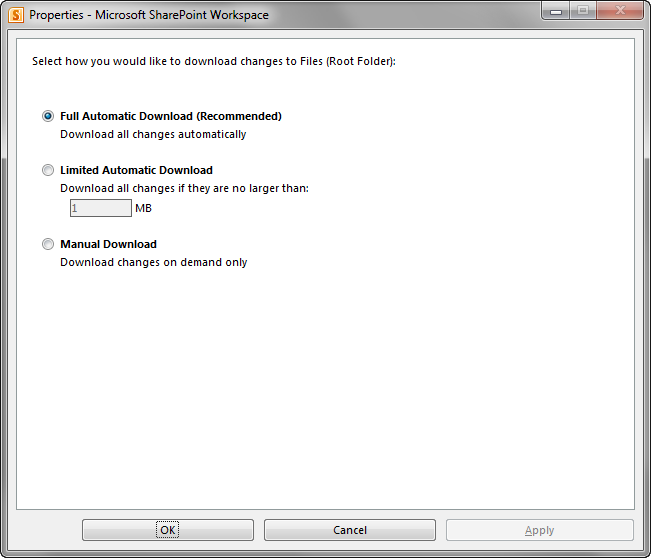
Download Settings (shown in Figure 12-90) allows you to specify what sort of changes should be synchronized. You can choose to perform a Full Automatic Download, a Limited Automatic Download (specifying the maximum size for downloaded changes), or a Manual (on-demand) Download.
Show Properties is a fairly detailed menu setting. From here, you can choose one of five tabs:
General (Figure 12-91) This displays folder creation information and the description as well as providing a choice as to whether the folder is downloaded automatically onto all computers for this user.
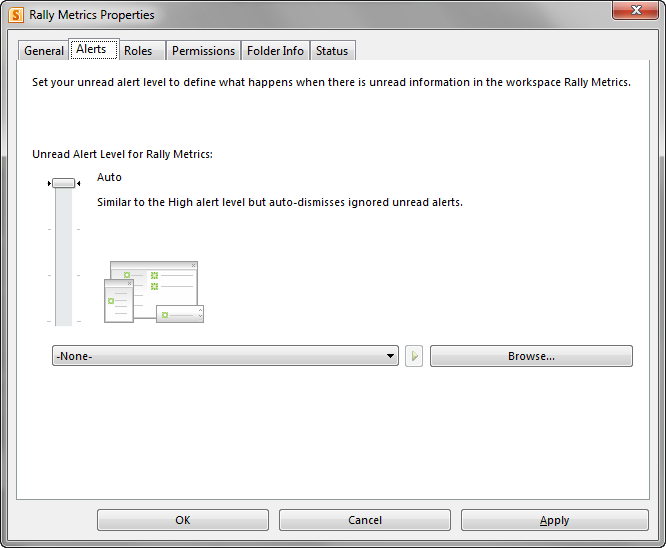
Alerts (Figure 12-92) You can specify the alert level for the folder (Auto, High, Medium, Off). You can also specify which notification sound is used for the alert.
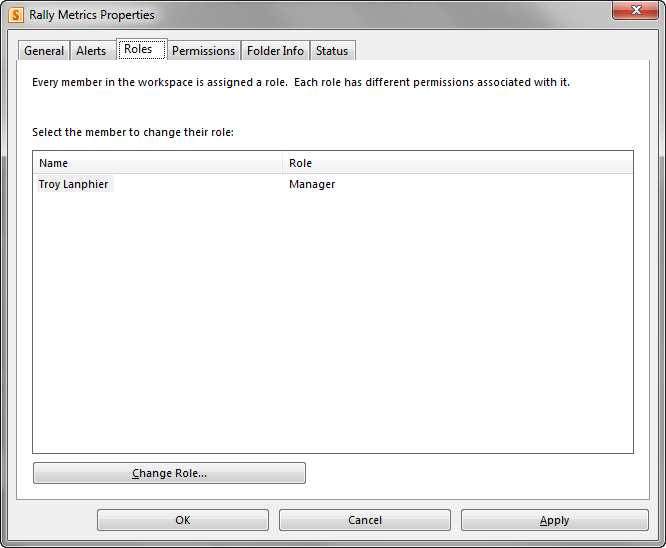
Roles (Figure 12-93) This tab lists all users for the Shared Folder and allows a manager to change the role held by each.
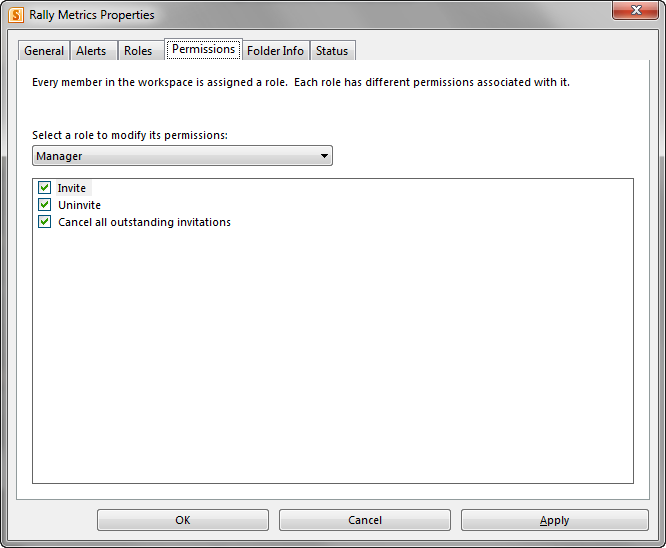
Permissions (Figure 12-94) Sets the Permission level (Invite, Uninvite, Cancel All Outstanding Invitations) that is available for each role level (Manager, Participant, Guest).
Folder Info (Figure 12-95) This tab details information about the folder itself such as which files are and are not synchronized as well as which are excluded from synchronization.

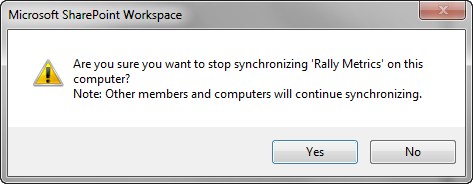
Using the last menu item under Synchronization Tasks, Stop Synchronizing (shown in Figure 12-96), you can discontinue the synchronization of items in your Shared Folder with those currently contained on your computer. Note that selecting to stop synchronization does not affect any other users or computers currently using the Shared Folder.