
Document workspaces are perfect for complicated documents that have input from multiple users and supporting documents. It also comes with an announcements list, tasks list, a discussion board, calendar, a links list, and a list of members. The only document library is the Shared Documents library. If you are going to have one large document and many supporting documents, I recommend creating a new document library to store just the main document. There are many kinds of documents that fit this description, but one that is particularly representative is the Disaster Recovery document or set of documents. This document should cover what to do in case of potential disasters. It involves input from a large number of stakeholders, is revised often (if it is kept up to date), and potentially has dozens of supporting files. Of course, once a publishable version of this document is finished, it should be copied to several other locations just in case SharePoint is the system that is suffering from the disaster. This type of document fits perfectly as a Subsite of the Engineering Team Site. Before, you can start using a Document Workspace site, you need to create one. Carry out the follow instructions to create a site for your disaster recovery document based on the Document Workspace template:
In your browser, open the location where the site is to be created (for example, http://contoso/eng).
Click Site Actions | New Site.
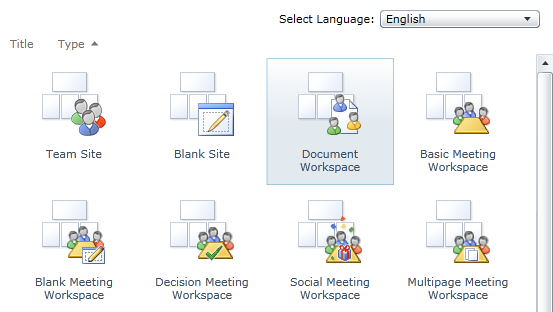
Select the Document Workspace template from the list of available templates, as shown in the following:
Provide a Title and URL name for the new site (for example, Disaster Recovery Document and disaster).
Click Create.
A site should now be created below the Engineering Team Site. It is ready for tasks to be assigned, important dates put on the calendar, and members to be added. Documents can be added to the Shared Documents library, which is perfectly adequate for smaller documents, but for more involved documents, it makes sense to create an additional document library. Because the Disaster Recovery Document is a complicated document, it deserves its own document library as well as having versioning enabled. The first step is to create a new document library. This can be done in one of two ways. The first is to choose More Options from Site Actions:
In the browser, navigate to the Document Workspace (http://contoso/eng/disaster).
Click Site Actions, and then click More Options, as illustrated in the following:
Select the Document Library template. Notice that the Document Workspace template is located next to it.
Provide a name for the document library in the Name section, and then click Create.

The document library is now created, but it doesn’t have any versioning, and there should be a link to the document library in the Quick Launch. While these can be changed in the List Settings, choosing New Document Library allows for setting options at the time of creation. To use this option, follow these instructions:
In the browser, navigate to the Document Workspace.
Click Site Actions, and then click New Document Library.
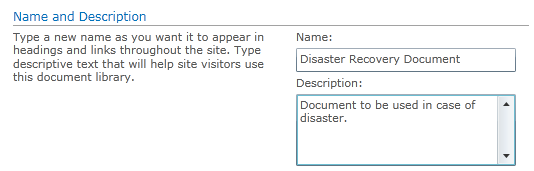
A dialog box opens, presenting several options. First, enter the Name and Description to identify this as the location of the master disaster recovery document.
Select whether to display the document library in the Quick Launch.
Because this is the main document, it should be located on the Home page, so either option is acceptable.
Select whether to have versioning turned on.
Because this is the main document, enabling versioning on is recommended.
The final option to consider is which document template to use. For this scenario, you will stick with the default Microsoft Word Document.
Because this document library houses only one document and it will probably be uploaded, it doesn’t make much difference which template you choose.
Click Create to generate the document library.


A document library has now been created to host the disaster recovery master document. It has versioning turned on, but it only has major versioning turned on and it is not limited in the number of versions. There is also no requirement that the document be checked out before it is edited. This will increase the likelihood that changes are overwritten. So, to make your document library more sophisticated and facilitate better collaboration (by keeping users from overwriting each other and notifying users if a document is checked out), you will need to look at some of the more advanced settings.
Tip
INSIDE OUT Versioning
Each version of the document is stored as a complete document within the database. Unlimited versions of very large documents can cause bloating of the database, increasing the amount of time to backup and restore. The recommend practice is to limit the number of versions on documents that are large and are changed frequently, and to take advantage of draft versions because they are deleted when a major version is published.
To modify these options, you will need to go to the version settings page for the document library. This can be done by following these steps:
Click the disaster recovery document library from the Quick Launch to go to home page of the document library.
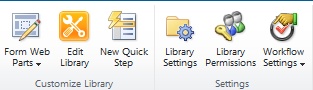
On the Library Tools tab, click Library, as shown in the following:
In the Settings section, click Library Settings.
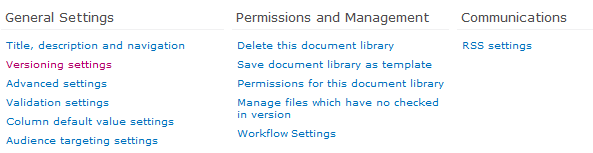
In the General Settings section, click Version Settings.
The version settings page should now appear in the browser.
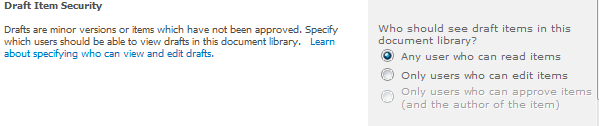
The first choice to consider is Content Approval. If you choose Yes, then changes to the document will need to be approved before members of the site (who do not have full control) can see them. For now, leave this set to No.
Select the Document Version History settings.
This section presents several options.
There are three main choices: No Versioning, Create Major Versions, and Create Major And Minor (Draft) Versions. This example uses the major and minor version but leaves the number of versions blank. That means they are unlimited.
Because we’re using Create Major And Minor (Draft) Versions for this example, the Draft Item Security option is available. This gives you the option to control who sees the drafts. There are three options but as this example didn’t choose to require content approval, that option is grayed-out.
The final option to configure is Require Check Out.
This is recommended if there are going to be several different people editing the same document. This prevents collaborators from overwriting each other (as long as they get the latest copy). To require check out, choose the Yes option.
Click OK to apply the changes.
The document library is ready to use with versioning (major and minor), and it requires check out to edit.


The disaster recovery document library is ready to be used. There is a link to the document library in the Quick Launch, but it would be even better to have the document accessible on the Home page. Then, users can open up the document with one click and it would be intuitively obvious which one was the primary document. To carry this out, you need to add the document library as a Web Part. To do so, perform the following steps:
Click Site Actions, and then click Edit Page, as shown in the following:
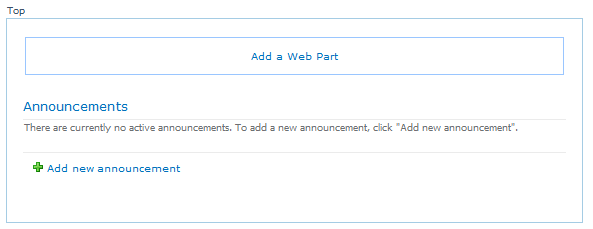
Click Add a Web Part in the Top web zone.
This places the document library in the same zone as Announcements by default.
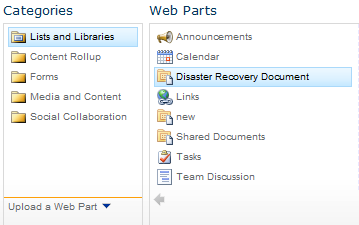
In the Categories section that appears in the upper-left corner, click Lists And Libraries, and then in the Web Parts section, click Disaster Recovery Document.
Click Add on the far right side of the page.
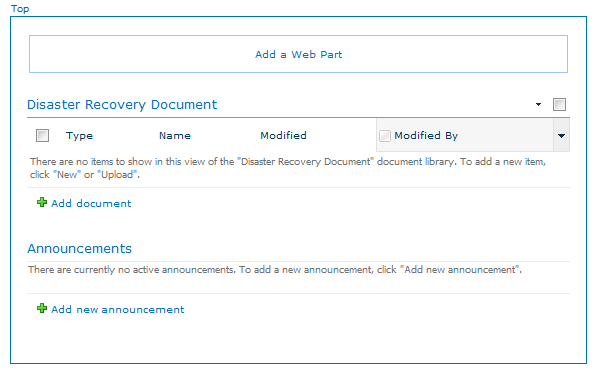
This adds the document library.
The Disaster Recovery Document library is now above Announcements, but you can place it farther down by dragging it below Announcements.

The Document Workspace is now ready to use and even has some built-in disaster recovery of its own with the addition of versioning and edit control. If this Document Workspace is used to create a completed document (rather than a living document that changes continually), it’s best to save the document to another site or location and then delete the Document Workspace, freeing up valuable resources and keeping your SharePoint Foundation installation clean. This will help to keep your crawl times shorter, the content databases smaller, and improve the time it takes to restore.