Lists are a concept that was very familiar to information workers long before SharePoint existed. List information is entered in a tabular format, which displays column header information to prompt the user for corresponding field values. Both worksheet (Excel) and database (Access) users employ lists; the difference primarily being that Excel captures list information in worksheets within a workbook, whereas Access captures this information in tables for use inside a relational database.
Within SharePoint, lists are maintained within a site. These lists are interactive and capable of having their content displayed in one or more Web Parts. OK, so there’s nothing fancy there—people have been showing key performance indicators (KPIs) from within Excel sheets for a long time now. SharePoint, however, takes the notion of lists to the next level by making them extensible via a concept known as web services.
SharePoint provides web services to allow other programs and websites to display and interact with list content. SharePoint list content can be displayed in a Web Part, subscribed to as a Really Simple Syndication (RSS) feed, or displayed in a client program (such as Excel or Access).
An Excel workbook can be used to display the content of a SharePoint list; by default, this is a one-way, read-only connection. This list information can be refreshed in the Excel client so that the user can get an “at a glance” view of content as it changes on the SharePoint site.
In earlier versions of SharePoint, Excel was used as a two-way connection to a SharePoint list, allowing information to be both read from and written to the list. This behavior was deprecated (removed and no longer supported by Microsoft) beginning with Windows SharePoint Services 3.0 and Microsoft Office SharePoint Server 2007.
Tip
INSIDE OUT Moving away from Excel integration with SharePoint lists
While it is technically possible to use the Excel 2007 add-in for synchronizing tables with SharePoint lists, it would be a good idea to avoid this and move toward using Microsoft Access as quickly as you can become accustomed to it. Using the 2007 add-in has its own set of issues, not the least of which is the requirement that you save the file in .xls (Office 97-2003) format instead of the XML-based .xlsx (Office 2007 and 2010) version.
SharePoint list information that has been brought into an Excel workbook can be manipulated in the same way as any other Excel content. Pie charts, graphs, conditional analysis, and other functionality works exactly the same as it would with standard Excel data.
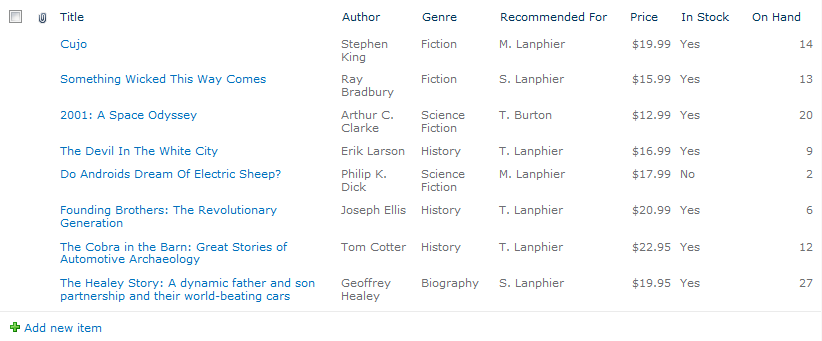
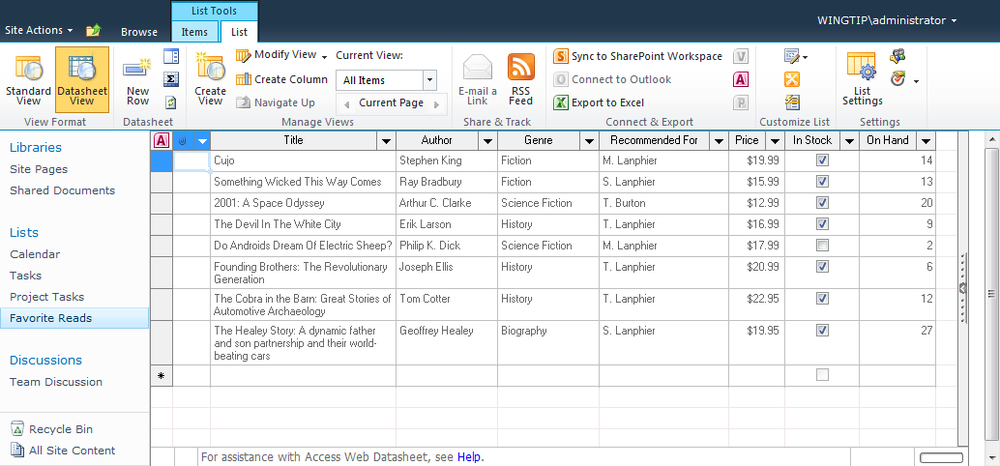
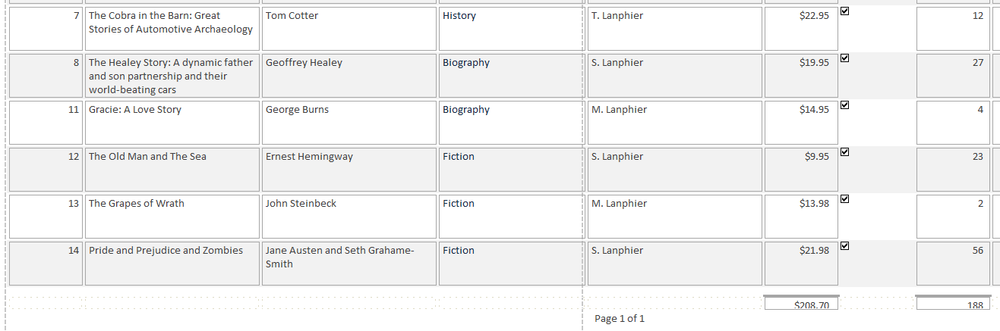
Figure 11-9 depicts a SharePoint list that contains books and short stories. This list also happens to include the number of books that are on hand for sale. We will be taking the information from this list and analyzing it in Excel.
To begin analyzing the data, we must first establish the connection between SharePoint and Excel by performing the following procedure:
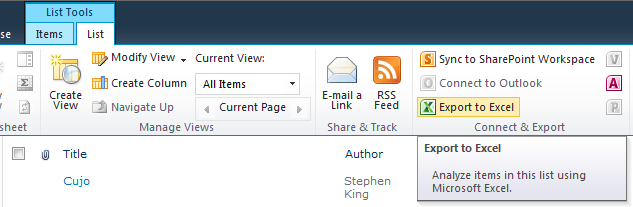
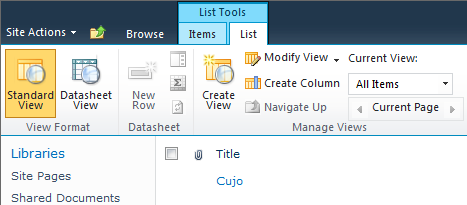
On the ribbon, on the List Tools tab, select the List tab. In the Connect & Export group, click the Export To Excel button (see Figure 11-10).
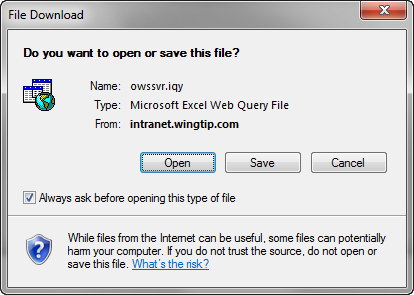
A File Download window appears on your desktop (see Figure 11-11). The file being downloaded always displays as OWSSVR.IQY; this is the name that will always appear when you make this type of connection. When the connection has been established between SharePoint and Excel, the resulting Excel Workbook can be saved with whatever name you prefer.
A security notice appears. This setting is used to prevent Excel from running untrusted workbooks when downloaded from a web browser and gives you a chance to verify the file before opening it. Click the Enable button to allow the data connection between Excel and your SharePoint list (Figure 11-12).

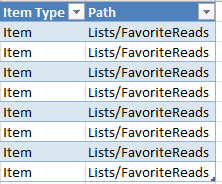
The data connection between SharePoint and Excel is now in place. Figure 11-13 shows that all of the columns from the SharePoint list are represented in your Excel worksheet, along with a couple of new additions, Item Type and Path.

Two extra columns appear in your Excel workbook that were not apparent in your SharePoint list (see Figure 11-14). Item Type is a field that indicates whether the row item is a particular item or a folder within the list. Path displays the folder path of the item within the list.
If these columns are not required for analysis within your Excel worksheet, you can delete them without adverse effect.
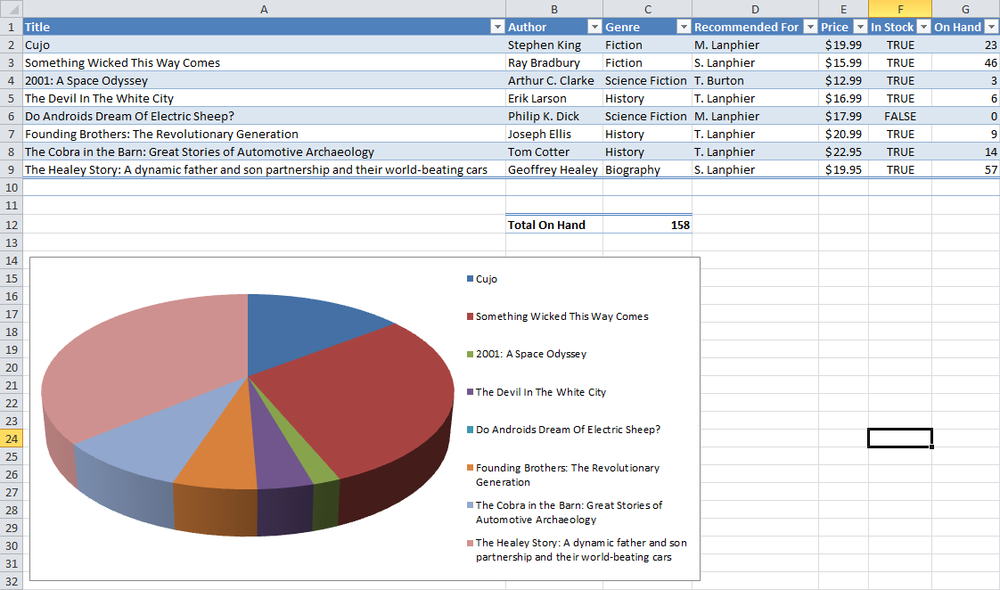
Excel has evolved over time to become a key player in Business Intelligence. Data retrieved from SharePoint can be easily analyzed like any other Excel data. In the sample presented in Figure 11-15, the total amount of books on hand is calculated, and a 3-D pie chart shows the distribution of books on hand by title.
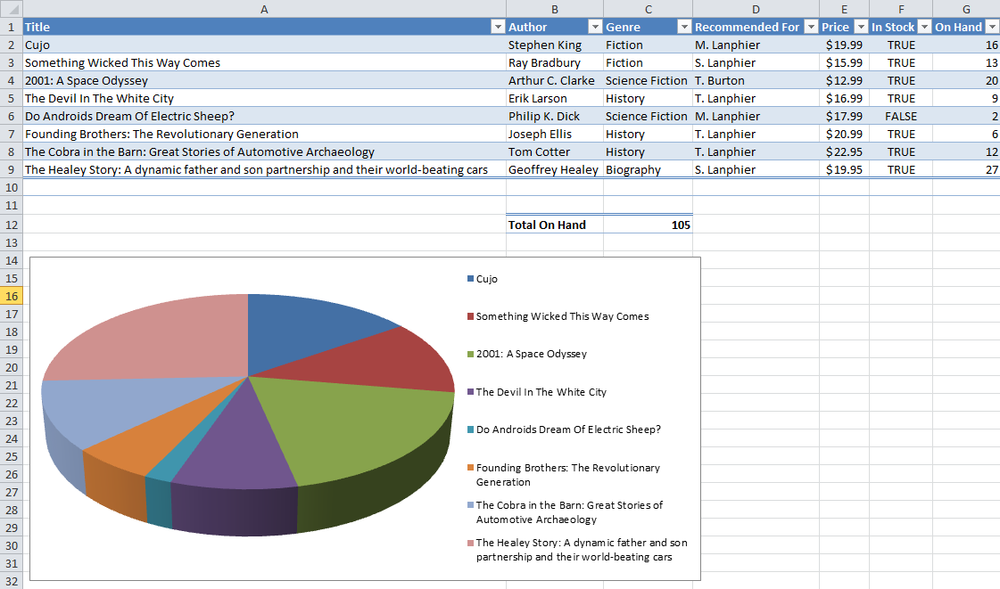
As the quantity of books changes, the distribution also changes. Items can be changed in the SharePoint list and these changes can be reflected in the Excel workbook. The book quantities in the SharePoint list have been changed from their previous values, as shown in Figure 11-16.

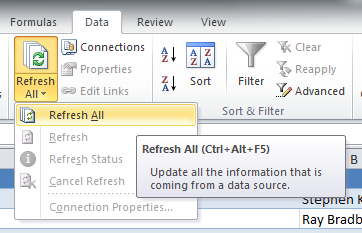
For these book quantity changes to reflect in the Excel worksheet, it must be manually updated to include the new values from the SharePoint list. On the ribbon in Excel, on the Data tab, click the Refresh button to update the values in the worksheet, as illustrated in Figure 11-17.
The updated values from the SharePoint list are presented in the Excel workbook; Figure 11-18 shows that the book total and 3-D pie chart are also updated.
As with Excel, Microsoft Access can be used to display the content of a SharePoint list; the key difference between the two concerns two-way synchronization. Excel is the more appropriate tool for retrieving KPI-style information from a SharePoint list (such as graphs and charts), whereas Access is well suited for interacting and reporting on SharePoint list content.
In addition to altering content in a SharePoint list (such as adding a new row/item to the list), Access can do more detailed tasks such as modifying the structure of the list itself and generating reports. In this section, we will not only interact with SharePoint list content, but also generate SharePoint lists directly from within Access.
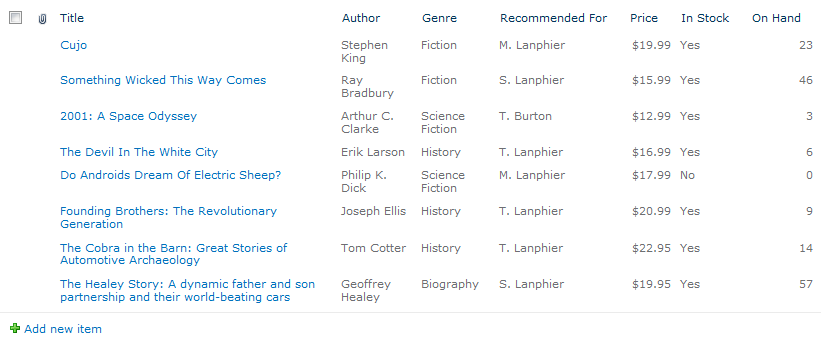
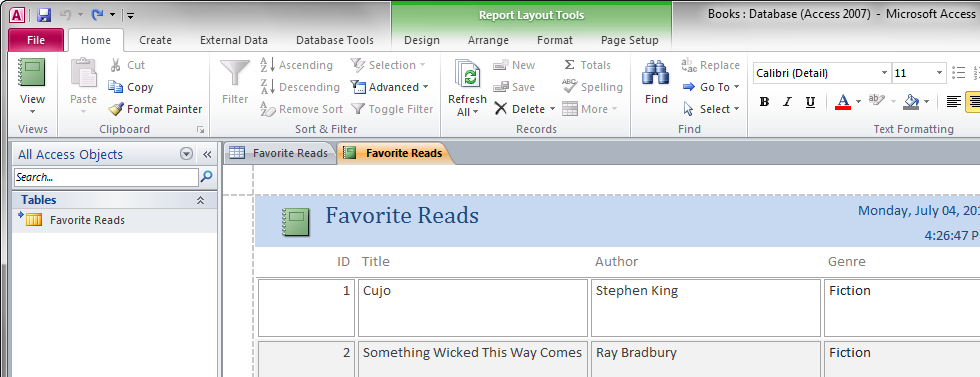
As in the previous example, we will use the SharePoint list called “Favorite Reads,” shown in Figure 11-19. We begin this section by showing how this list can be modified and presented in reports. We then progress to building a new SharePoint list from within the Access client.
There are three distinct ways by which Access can be connected to a SharePoint list:
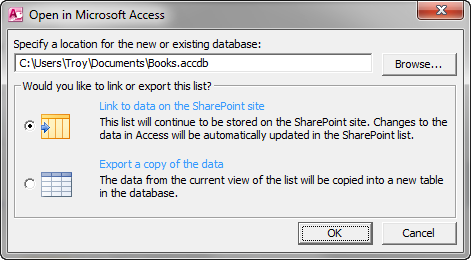
The Open With Access command establishes a connection between a list in SharePoint and a corresponding table within an Access database (known as an Access Linked Table). As the connection is created, Access gives you the opportunity to carry out one of the following tasks:
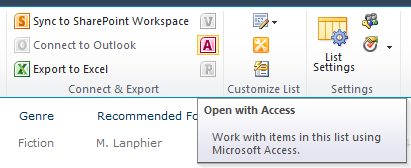
Open the SharePoint site in your web browser and navigate to the list. On the ribbon, on the List Tools tab, select the List Tab. In the Connect & Export group, click the Access logo button, as shown in Figure 11-20.
You have the option of opening up a new or existing database and choosing whether the new table is linked to the SharePoint list. In this example, we will leave the link intact, creating a linked table within an Access database, as illustrated in Figure 11-21.
Because the link is being requested from a web browser, your security settings in Access might display a Security Warning (see Figure 11-22) prompting you to verify that you want to open active content. Because this information is being requested from a trusted source (in this case, our intranet), click the Enable Content button.
The linked table appears within Access. If the contents of the table do not immediately appear on your screen, simply double-click the icon of the table that you want to view (in this example, Favorite Reads).
A yellow alert bar labeled Save Changes (see Figure 11-23) appears, giving you the opportunity to save your Access database to a SharePoint site; if this is encouraged by your IT staff, go ahead and do so; otherwise, you can also choose to save this database to your client computer. Either way, it wouldn’t hurt to save this database before you begin making changes.

Unlike the Open With Access command, the SharePoint List command is executed from within Access. To begin the process, an Access database must first be created (unless you already have an existing one to which you want to add a table).
Open Access on your computer and display the Backstage view. On the New tab, select Blank Database. In the right panel, toward the bottom, fill in the File Name (Books, in this example), and then select Create (see Figure 11-24).

The newly created database appears in Access 2010. Note that the title bar indicates that the database is compatible with Access 2007.
Tip
INSIDE OUT A note about Access file formats
If you are not familiar with Access, you should know that both Access 2007 and 2010 use the same format for their databases, which is known as Access 2007. This is not an error, nor is it a special exception caused by linking the table to a SharePoint list.
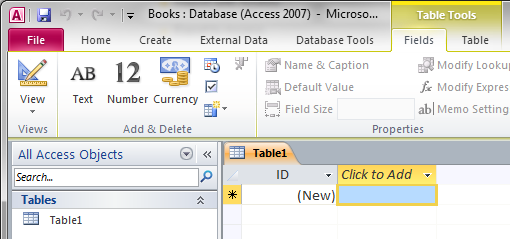
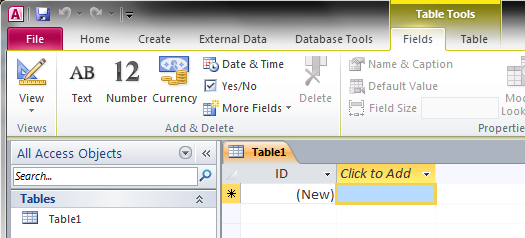
When a new database is created, a corresponding default table named Table1 is also created (see Figure 11-25). Let’s leave this table in for now; we’ll compare it to our SharePoint linked table later, before removing it altogether.
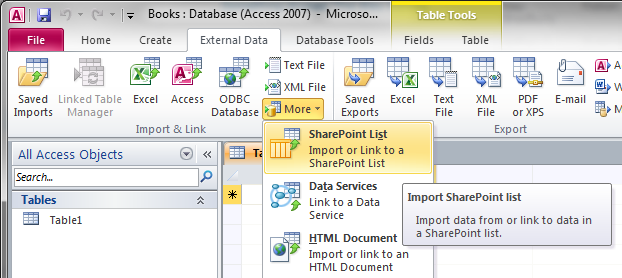
Now that a database exists, we can build a linked table (see Figure 11-26) which connects to a SharePoint list. On the ribbon, select the External Data tab. In the Import & Link group, select the More drop-down menu, and then click the SharePoint List menu item; this will begin the linking process.
In the Get External Data window, enter the URL of the site (not the list itself) to which you want to connect. You also need to decide how and where you want to store data in the current database. You have two choices:
In our example, we want to link to the data source by creating a linked table. Click the Next button to proceed, as depicted in Figure 11-27.

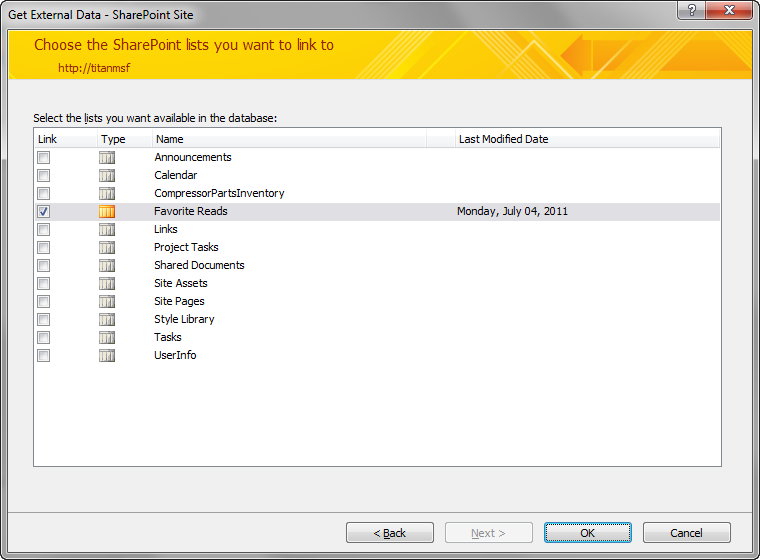
Access allows you to choose from a list on the SharePoint site. For this example, choose the Favorite Reads list (see Figure 11-28), and then select OK.
You might see the message shown in Figure 11-29 appear briefly, indicating that the linking process is underway.
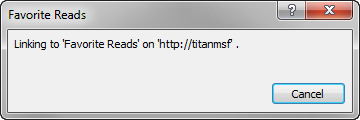
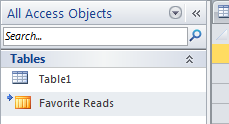
Figure 11-30 demonstrates that the linked table appears in Access as it did in the previous section.

Take note of the two different Table types in this database (see Figure 11-31). Currently, there is a standard Access table called Table1; there is also a linked table that we just created, called Favorite Reads. These tables can co-exist within the same database.
If you want, you can remove default Table1 table, leaving just the SharePoint linked table, as illustrated in Figure 11-32.

At this point, you can add other tables to the database (linked or otherwise).
Similar to the Open With Access command, you execute the Track This List command from within your SharePoint site. This command has three options:
The first two options should be familiar to you if you’ve looked over the last two sections. You use Track This List In Access to create a linked table that connects to your SharePoint List. Export To Access copies your list to an Access Table without retaining a link.
The third option, Report With Access, is something new altogether; it creates the ability to report interactively against a SharePoint list. Because we’ve covered the creation of linked (and nonlinked) tables already, this section focuses on this third option.
When you first open the list, the Browse tab on the ribbon is selected by default, as shown in Figure 11-33. Select the List Tools tab, and then select List.
The Track This List command is not present in the Standard View. To access it, in the View Format group, select Datasheet View, as shown in Figure 11-34.

The Datasheet View of the list appears (see Figure 11-35); if you’ve never used this view in SharePoint, just know that it is a grid view, very similar to how data appears in an Excel workbook.
On the far right side of the screen, locate the Task Pane slider bar. The menu you’re looking for is hiding in this section of the screen. Hover your cursor over the bar until it turns blue, and then click the bar or arrow to expand the Task Pane, as demonstrated in Figure 11-36.

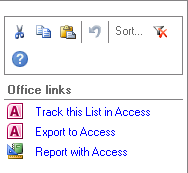
When the Task Pane opens, it shows the Office links menu (see Figure 11-37). Note the Track This List In Access and Export To Access links. Click the Report With Access link.
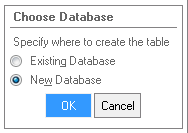
Creating a report involves the creation of a linked table, which must be contained within a database (either an existing or a new one). For this example, choose New Database, and then click the OK button, as illustrated in Figure 11-38.
Similar to the previous examples, call this database Books (see Figure 11-39), and again note that Access 2010 builds databases in the Access 2007 Databases format (compatible with Access 2007 and 2010). Click the Create button.

The new report appears (Figure 11-40). Note that both a linked table and a report were created in the past few steps.
At this point, you can continue to modify this report to your requirements. Remember that this report is related to the linked table, and the linked table is updated when the SharePoint site is updated. We will examine how this interaction works in the next section.
Tip
INSIDE OUT Additional SharePoint information in Access
An extra bonus provided by Access and SharePoint is the inclusion of the UserInfo table in your database (not shown above in the tables section). Although we won’t go into detail about this table, it is added to any database that is linked to SharePoint, and in it, you can find site information like user names, email addresses, phone numbers, and so on.
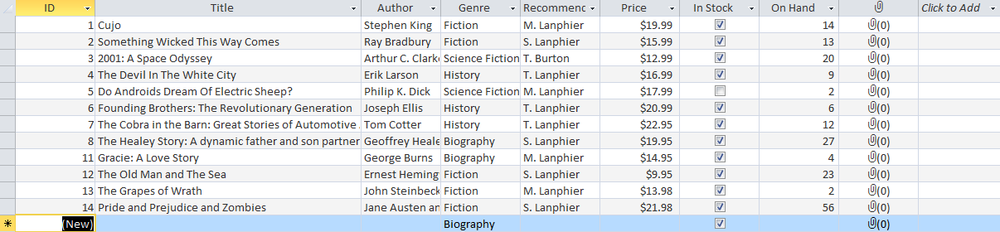
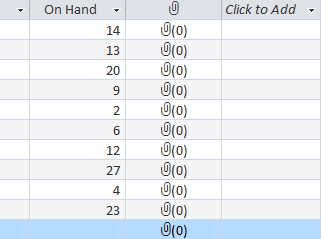
Have a look at the Favorite Reads table (see Figure 11-41); this table is identical to those we generated previously. It shows columns that have been linked from the SharePoint list. We will start adding a column from this view in the next section, but for now, let’s add a couple of new books to the SharePoint list from Access.

Any items added to this database are updated automatically on the SharePoint site. Click the row with the * (asterisk) character, and then begin adding a few items.
Also note the items that have previously been added and deleted from this SharePoint list. This is indicated by the gap between items 8 and 11. At one point, there must have been books #9 and #10 (this ID number is issued automatically by SharePoint), but these items were deleted before we opened this linked table. The new items and the gap are shown in Figure 11-42.
Books added to the linked table are also updated automatically in the corresponding SharePoint list. Refreshing the web browser, you can see the new books in the list, as demonstrated in Figure 11-43.

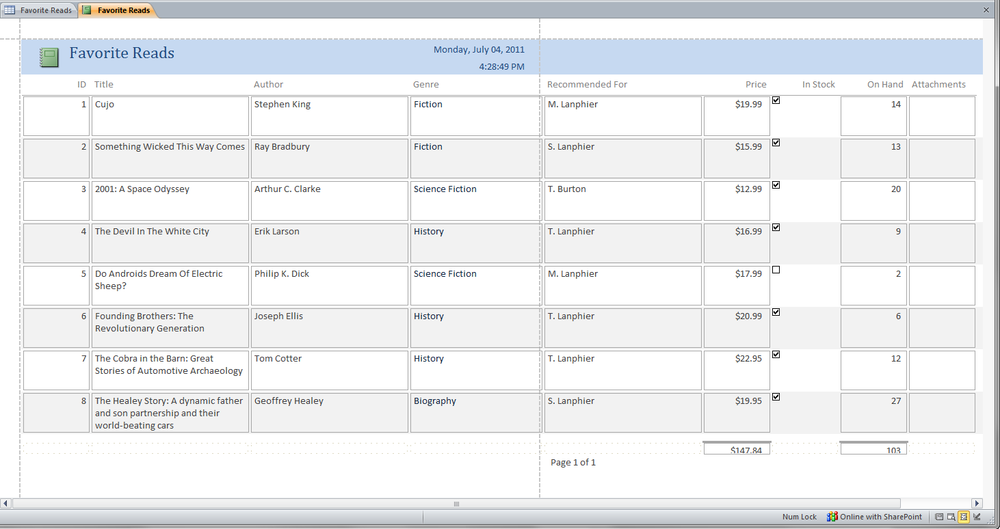
Of course, we had built a report for this linked table/SharePoint list, so let’s have a look at the changes in the report. Switch back to Access, and then click the Favorite Reads tab with the icon just to its left (which indicates that this is a report). Figure 11-44 shows that nothing has changed and that the person editing the report has added a total to the On Hand column.
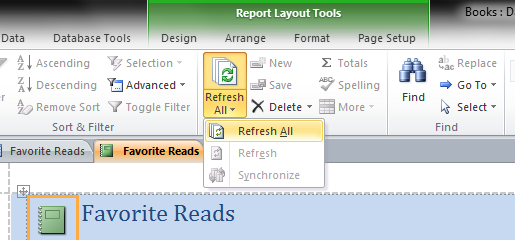
For the changes to appear in the Access report, you need to refresh the data being pulled from the SharePoint list. This is always the case with the Access client—although SharePoint is automatically updated from Access, Access must be manually refreshed to pull data that is changed from within SharePoint.
Refreshing the content within Access is as simple as clicking the Refresh All button (see Figure 11-45) on the Access ribbon.
The resulting data refresh updates data in both the linked table and the report, as illustrated in Figure 11-46.
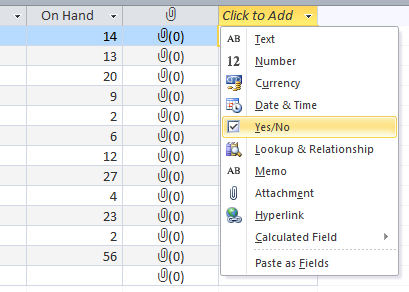
Access provides an easy way to add columns to a SharePoint list. The column, its field type, and its values can all be added without ever opening a web browser. In this exercise, you will add a new column to the Favorite Reads list.
Clicking the Table tab for Favorite Reads displays the current information in the list. Notice the column on the far right called Click To Add (see Figure 11-47); that’s where you will start.
To add a new column, select the Click To Add header at the top of the column. A menu appears that presents a selection of field types (see Figure 11-48), which are identical to those provided for any SharePoint list. For this example, click the Yes/No field.
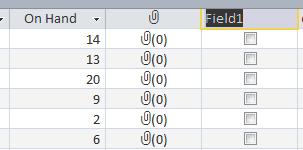
The newly added field appears as Field1, as shown in Figure 11-49. Note that it does not as yet have a name.
Type the name Hardcover?, and then select which books in the table are hardcover versions, as demonstrated Figure 11-50.

If you refresh the SharePoint list in your web browser, it’s likely that it has already been updated with the new column and values, as illustrated in Figure 11-51.

Let’s take a moment to review—we’ve displayed, modified, and updated the contents of a SharePoint list from a linked table within Access 2010. The one thing we haven’t (yet) done is create and populate an entire SharePoint list from within Access.
Fortunately, Access provides this functionality. Let’s try it out. Begin by building a new database as you did for the example of the SharePoint list command. Your new database should look like the one shown in Figure 11-52.
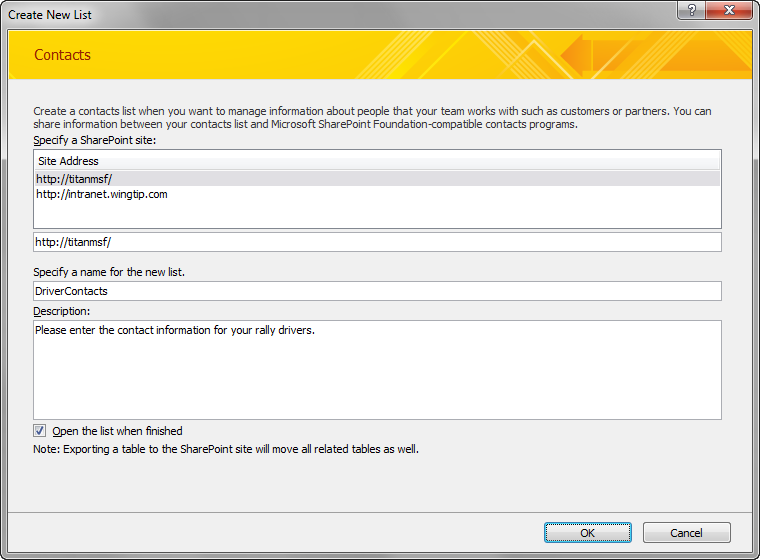
On the ribbon, select the Create tab, and then click the SharePoint Lists button to display its drop-down menu (see Figure 11-53). Click the Contacts item.

Next, you are prompted to enter the URL of a SharePoint site, (for this example, use http://titanmsf). You also need to enter the name for the new list, and optionally, enter a description, as well (see Figure 11-54). Note that although DriverContacts is two distinct words, there is no space between them—you’ll see why in the next few steps.
The new SharePoint list is created and the linked table is built and added to your database. Notice that because you chose to use the Contact List template, the appropriate list columns were selected and added to the table/list, as shown in Figure 11-55.

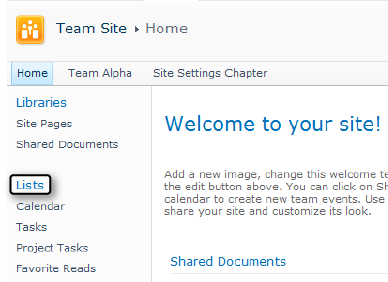
Let’s have a look at what this linked table looks like in SharePoint. Upon opening the site, you see…well, nothing.
That’s right; the newly created list does not appear in the Quick Launch on the left side of the screen. The new list would appear under the Lists heading, but instead, it’s conveniently hidden so that we might configure its permissions, appearance, and so on.
Click the Lists heading (highlighted by the box in Figure 11-56) to configure the appearance of the library.
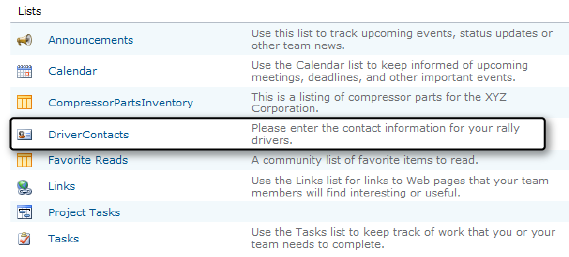
When the Lists page appears, so too does the newly created list, DriverContacts (see Figure 11-57). Click its link to begin editing the list.
When the list appears in the browser, open the List tab within the List Tools tab group on the ribbon. Note that all of the values that you populated earlier in Access have already made their way to the SharePoint list (see Figure 11-58).

In the Settings group, select the List Settings button to begin changing the appearance of this list. The List Settings page opens, as shown in Figure 11-59.
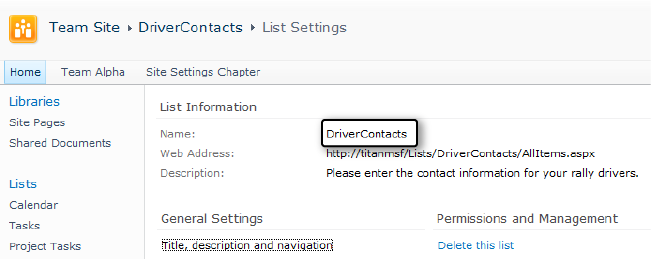
Here’s where you find out why we left the space out of “DriverContacts.” Notice that the Name and Web Address fields make use of the name from the list:
Name: DriverContacts
Web Address: http://titanmsf/Lists/DriverContacts/AllItems.aspx
If we had left the space in the list name when creating the list, the name would have been correct, but the web address would be kind of strange, as demonstrated in the following (notice the “%20” characters between Driver and Contacts):
Name: Driver Contacts
Web Address: http://titanmsf/Lists/Driver%20Contacts/AllItems.aspx
Tip
INSIDE OUT Avoiding escaped characters in SharePoint URLs
See anything different in the web address? The space character has been replaced by its “escaped value” equivalent. Special characters (a space in this particular case) are not allowed in a web address, so SharePoint replaces them with something web browsers can understand. This is not a SharePoint-specific phenomenon, but rather an Internet standard that SharePoint observes.
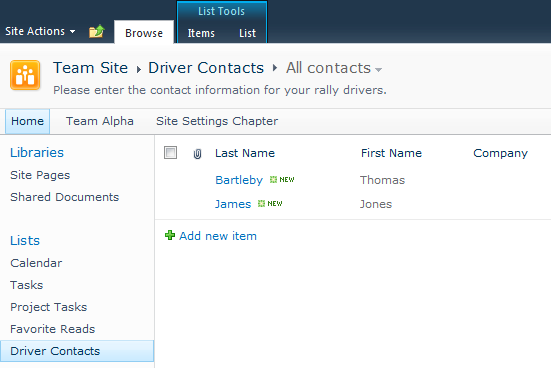
In the General Settings section, select the Title, Description And Navigation link. On the General Settings page (see Figure 11-60), in the Name field, add a space between “Driver” and “Contacts.” This only changes the Name field, not the Web Address.
While you’re here, you should choose to have the list show on the Quick Launch. Notice that the navigation breadcrumb currently reads “Team Site > DriverContacts > List Settings > General Settings.” Select the Yes option, and then click the Save button to save these changes.

Notice that the breadcrumb now reads “Team Site > Driver Contacts > List Settings.” Also notice that this list appears under the Lists section of the Quick Launch, as shown in Figure 11-61.

Selecting the Driver Contacts link in the breadcrumb shows the completed list, as shown in Figure 11-62.