
It seems like everyone has a blog these days, and with the Blog template in SharePoint Foundation 2010, you can create one, too. Creating a blog with the browser is similar to creating other websites and workspaces. The first decision to make is where to create the blog. In this example, you will create a blog for the Engineering Team Site created earlier in this chapter. A blog located here should contain posts related to the Engineering team. This could be anything that the team comes up with. The more blog posts the better. They can always be trimmed down later. Most blogs start off with lots of enthusiasm and contributions, but that enthusiasm eventually dwindles and the contributions become few and far between if there is not a champion for the blog. This doesn’t mean that a single individual has to be the person that contributes all the posts, but having a person that contributes and reminds others to also contribute will help to make the blog worthwhile for years to come. But before you worry about that, you need to accomplish the first step, which is to create the blog:
Browse to the site where the blog is to be located (for example, http://contoso/eng).
From the list of templates, select the Blog template, as shown in the following screenshot:
Enter a Title and URL name. For this example, type Engineering Blog and Blog, respectively.
Click Create to generate the new blog.
Once you create a blog, a sample blog post will be created.

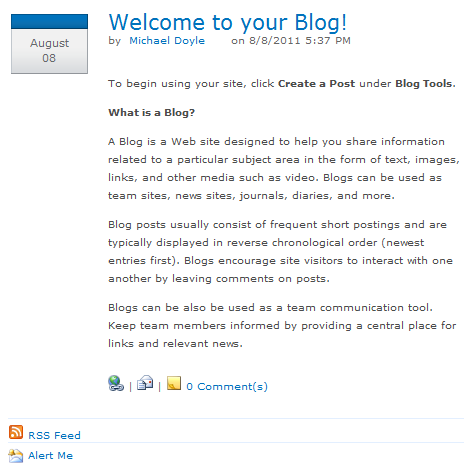
The blog site comes with lots of features built in. Notice the Really Simple Syndication (RSS) Feed and the Alert Me at the bottom of the preceding screenshot. These two options provide update methods when a person enters a new blog post. You can leave comments on the blog post, email it, and make it a permanent link in the Favorites list of your browser. Now that the blog site has been created, new blog posts can be created. It is probably a good idea to go ahead and delete the default entry, but you will focus on creating a new one. Before you do that, you should create some proper categories (instead of Category 1, Category 2, and Category 3). Follow these instructions to add a new category:
Browse to the Home page of the blog.
Click Add new category.
The New Item dialog box opens.
Categories are just a list of titles. Add a Title to the New Item dialog box, and then click Save.
A new category has just been added. Having proper categories can greatly speed up the time it takes for a person to find a particular blog post. If the content of the blog is technical in nature, then categories are a necessary part of creating blog posts. People will come to rely on blog posts for answers to difficult decisions. The Blog Tools appear for people who can contribute to the blog. The tools available are shown in Figure 4-20.

From the Blog Tools, you can create posts, manage posts, manage comments, and click the launch blog program link to post a new blog post. If you don’t specify a blog program (via the browser) it will default to Word. When you open Word and post, you will be asked to enter credentials but other than that it’s easy to use Word to publish your blog posts. You are now ready to start creating blog posts and sharing information with your fellow workers. Just remember, the more people share on blogs, the quicker other users will find the information needed to solve their problems.