
One of the tools in Maya’s effects arsenal is called Paint Effects. Using Paint Effects, you can create a field of grass rippling in the wind, a head of hair or feathers, or even a colorful aurora in the sky. Paint Effects is a rendering effect found under the Rendering menu. It has incredible dynamic properties that can make leaves rustle in the wind or trees sway in a storm. Although it doesn’t use the same dynamics engine as particles or rigid bodies, Paint Effects uses its own dynamics calculations to create natural motion. It’s one of Maya’s most powerful tools, with features that go far beyond the scope of this introductory book. Here you’ll learn how to create a Paint Effects scene and how to access all the preset brushes to create your own effects.
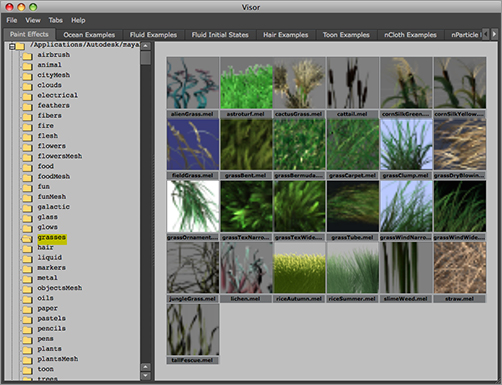
Figure 12-40: The preset grass brushes in the Visor window
Paint Effects uses brushes to paint effects into your 3D scene. The brushes create strokes on a surface or in the Maya modeling views that produce tubes, which render out through Maya’s software renderer. These Paint Effects tubes have dynamic properties, which means they can move according to their own forces. Therefore, you can easily create a field of blowing grass.
Try This Create a field of blowing grass and flowers; it will take you all of five minutes.
1. Start with a new scene file. Maximize the perspective view. (Press the spacebar with the Perspective window active.)
2. Switch to the Rendering menu set (press F6). Choose Paint Effects ⇒ Get Brush to open the Visor window. The Visor window displays all the preset Paint Effects brushes that automatically create certain effects. Select the Grasses folder in the Visor’s left panel to display the grass brushes available (see Figure 12-40). You can navigate the Visor window as you would navigate any other Maya window, using the Alt key and the mouse buttons.
3. Click the grassWindWide.mel brush to activate the Paint Effects tool and set it to this grass brush. Your cursor changes to a Pencil icon.
4. In the Perspective window, click and drag two lines across the grid, as shown in Figure 12-41, to create two Paint Effects strokes of blowing grass. If you can’t see the grass in your view panel, increase Global Scale in the Paint Effects Brush Settings to see the grass being drawn onto the screen.
5. To change your brush so you can add some flowers between the grass, choose Paint Effects ⇒ Get Brush, and select the flowers folder. Select the dandelion_Yellow.mel brush. Your Paint Effects tool is now set to paint yellow flowers.
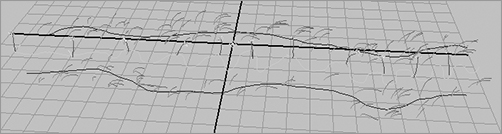
6. Click and drag a new stroke between the strokes of grass, as shown in Figure 12-42.
Figure 12-41: Click and drag two lines across the grid.
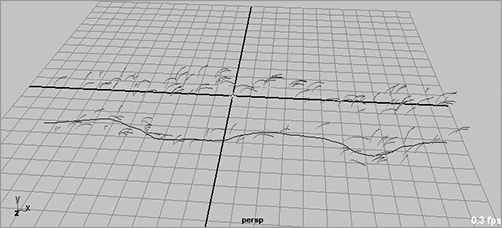
Figure 12-42: Add new strokes to add flowers to the grass.
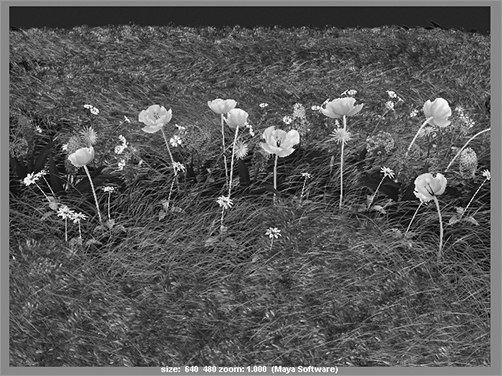
7. Position your camera, and render a frame. Make sure you’re using Maya Software and not mental ray to render through the Render Settings window and that you use a large enough resolution, such as 640 × 480, so that you can see the details. Render out a 120-frame sequence to see how the grass animates in the wind. Figure 12-43 shows a scene filled with grass strokes as well as a number of different flowers.
After you create a Paint Effects stroke, you can edit the look and movement of the effect through the Attribute Editor. You’ll notice, however, that there are a large number of attributes to edit with Paint Effects. The next section introduces the attributes that are most useful to the beginning Maya user.
Figure 12-43: Paint Effects can add realistic flowers and grass to any scene.
Paint Effects Attributes
It’s best to create a single stroke of Paint Effects in a blank scene and experiment with adjusting the various attributes to see how they affect the strokes. Select the stroke, and open the Attribute Editor. Switch to the stroke’s tab to access the attributes. For example, for an African Lily Paint Effects stroke, the Attribute Editor tab is called africanLily1.
Each Paint Effects stroke produces tubes that render to create the desired effect. Each tube (you can think of a tube as a stalk) can grow to have branches, twigs, leaves, flowers, and buds. Each section of a tube has its own controls to give you the greatest flexibility in creating your effect. As you experiment with Paint Effects, you’ll begin to understand how each attribute contributes to the final look of the effect.
Here is a summary of some Paint Effects attributes:
Brush Profile Gives you control over how the tubes are generated from the stroke; this is done with the Brush Width attribute. This makes tubes emit from a wider breadth from the stroke to cover more of an area.
Shading and Tube Shading Gives you access to the color controls for the tubes on a stroke.
Color1 and Color2 From bottom to top, graduates from Color1 to Color 2 along the stalk only. The leaves and branches have their own color attributes, which you can display by choosing Tubes ⇒ Growth.
Incandescence1 and 2 Adds a gradient self-illumination to the tubes.
Transparency1 and 2 Adds a gradient transparency to each tube.
Hue/Sat/Value Rand Add some randomness to the color of the tubes.
In the Tubes section, you’ll find all the attributes to control the growth of the Paint Effects effect. In the Creation subsection, you can access the following:
Tubes per Step Controls the number of tubes along the stroke. For example, this setting increases or decreases the number of flowers for the africanLily1 stroke.
Length Min/Max Controls how tall the tubes are grown to make taller flowers or grass (or other effects).
Tube Width1 and Width2 Controls the width of the tubes (the stalks of the flowers).
In the Growth subsection, you can access controls for branches, twigs, leaves, flowers, and buds for the Paint Effects strokes. Each attribute in these sections controls the number, size, and shape of those elements. Although not all Paint Effects strokes create flowers, all strokes contain these headings; some may or may not be active. Each stroke has its own settings.
The Behavior subsection contains the controls for the dynamic forces affecting the tubes in a Paint Effects stroke. Adjust these attributes if you want your flowers to blow more in the wind.
Paint Effects are rendered as a post process, which means they won’t render in reflections or refractions as is. They’re processed and rendered after every other object in the scene is rendered out. But they play back in the work panels to give you feedback on your dynamic settings.
You can also convert Paint Effects to polygonal surfaces that will render in the scene along with any other objects so that they may take part in reflections and refractions. To convert a Paint Effects stroke to polygons, select the stroke and choose Modify ⇒ Convert ⇒ Paint Effects to Polygons. The polygon Paint Effects tubes can still be edited by most of the Paint Effects attributes mentioned so far; however, some, such as color, don’t affect the poly tubes. Instead, the color information is converted into a shader that is assigned to the polygons. It’s best to finalize your Paint Effects strokes before converting to polygons, to avoid any confusion.
Paint Effects is a strong Maya tool and you can use it to create complex effects such as a field of blowing flowers. A large number of controls to create a variety of effects come with that complexity. Fortunately, Maya comes with a generous sampling of preset brushes. Experiment with a few brushes and their attributes to see what kinds of effects and strange plants you can create.