
Open the Hypershade by choosing Window ⇒ Rendering Editors ⇒ Hypershade. In the left column of the Hypershade window, you’ll see a listing of Maya shading nodes (Figure 7-1). The first section displays surface nodes, a.k.a. material nodes or shader types. Of these shader types, five are common to other animation packages as well. You’ll use two of these later in this chapter.
Figure 7-1: The Maya shading nodes

To understand a bit more about shaders, consider what makes objects appear as they do in the real world. The short answer is light. The way light bounces off an object defines how you see that object. The surface of the object may have pigments that affect the wavelength of light that reflects off it, giving the surface color. Other features of that object’s surface also dictate how light is reflected.
For the most part, shader types address the differences in how light bounces off surfaces. Most light, after it hits a surface, diffuses across an area of that surface. It may also reflect a hot spot called a specular highlight. The shaders in Maya differ in how they deal with specular and diffuse parameters according to the specific math that drives them. As you learn about the shader types, think of the things around you and what shader type would best fit them. Some Maya shaders are specific to creating special effects, such as the Hair Tube shader and the Use Background shader. It’s important to learn the fundamentals first, so we’ll cover the shading types you’ll be using right off the bat.
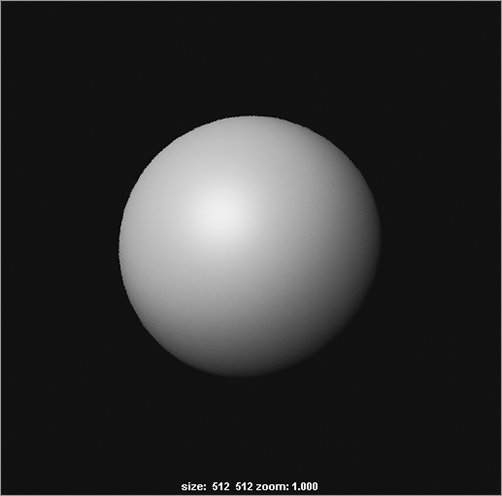
Figure 7-2: A Lambert shader

The Lambert Shader Type
The most common shader type is Lambert, an evenly diffused shading type found in dull or matte surfaces. A sheet of paper, for example, is a Lambert surface.
A Lambert surface diffuses and scatters light evenly across its surface in all directions. (See Figure 7-2.)
The Phong Shader Type
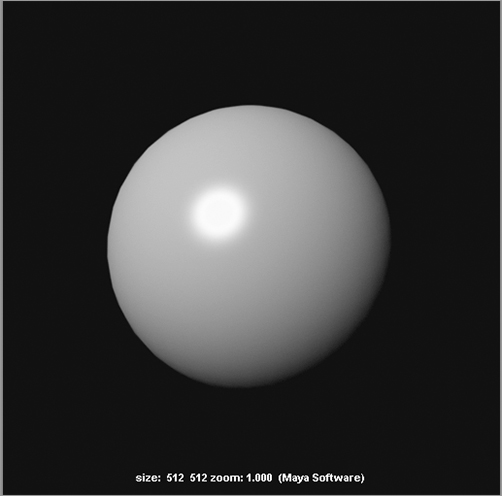
Phong shading, named after its developer, Bui Tuong-Phong, who created it in 1975, brings to a surface’s rendering the notions of specular highlight and reflectivity. A Phong surface reflects light with a sharp hot spot, creating a specular highlight that drops off sharply. (See Figure 7-3.) You’ll find that glossy objects such as plastics, glass, and most metals take well to Phong shading.
Figure 7-3: A Phong shader
The Blinn Shader Type
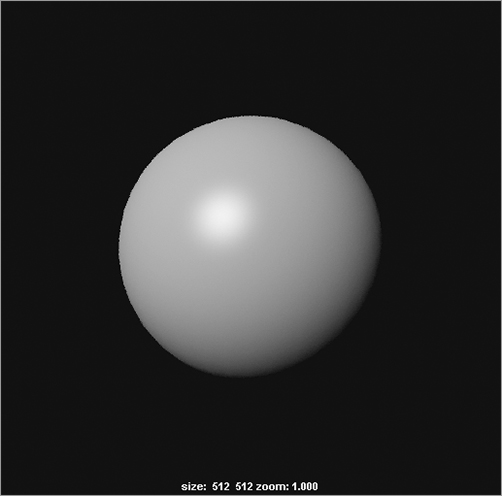
Also named after its developer, James Blinn, the Blinn shading method brings to the surface a highly accurate specular lighting model that offers superior control over the specular’s appearance. (See Figure 7-4.) A Blinn surface reflects light with a hot spot, creating a specular that diffuses somewhat more gradually than a Phong. The result is a shader that is good for use on shiny surfaces and metallic surfaces.
Figure 7-4: A Blinn shader
The Phong E Shader Type
The Phong E shader type expands the Phong shading model to include more control over the specular highlight. A Phong E surface reflects light much as a regular Phong does, but it has more detailed control over the specular settings to adjust the glossiness of the surface. (See Figure 7-5.) This creates a surface with a specular that drops off more gradually and yet remains sharper than a Blinn. Phong E also has greater color control over the specular than do Phong and Blinn, giving you more options for metallic reflections.
Figure 7-5: A Phong E shader
The Anisotropic Shader Type
The Anisotropic shader is good to use on surfaces that are deformed, such as a foil wrapper or warped plastic. (See Figure 7-6.)
Anisotropic refers to something whose properties differ according to direction. An Anisotropic surface reflects light unevenly and creates an irregular-shaped specular highlight that is good for representing surfaces with directional grooves, like CDs. This creates a specular highlight that is uneven across the surface, changing according to the direction you specify on the surface. In contrast with Blinn and Phong types, the specular highlight is evenly distributed to make a circular highlight on the surface.
The Layered Shader Type
A Layered shader allows the stacking of shaders to create complex shading effects, which is useful for creating objects composed of multiple materials. (See Figure 7-7.) By using the Layered shader to texture different materials on different parts of the object, you can avoid using excess geometry.
You control Layered shaders by using transparency maps to define which areas show which layers of the shader. You drag material nodes into the top area of the Attribute Editor and stack them from left to right, the left being the topmost layer assigned to the surface.
Figure 7-6: An Anisotropic shader

Figure 7-7: A Layered shader
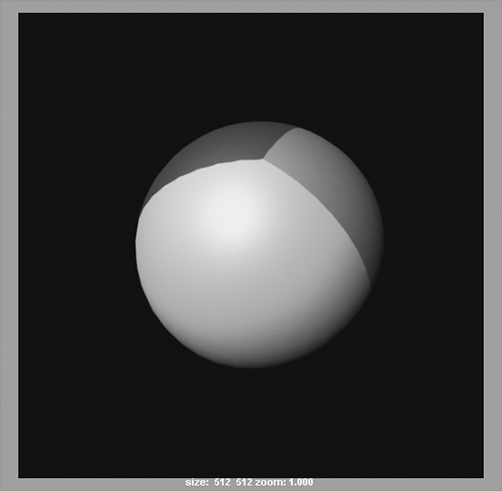
Layered shaders are valuable resources to control compound and complex shaders. They’re perfect for putting labels on objects or adding dirt to aged surfaces. You’ll use a Layered shader in the axe-texturing exercise later in this chapter.
The Ramp Shader Type
Figure 7-8: A Ramp shader in its Attribute Editor

A Ramp texture is a gradient that can be attached to almost any attribute of a shader as a texture node. Ramps can create smooth transitions between colors and can even be used to control particles. (See Chapter 12, “Maya Dynamics and Effects,” for how a ramp is used to control particles.) When used as a texture, a ramp can be connected to any attribute of a shader to create graduating color scales, transparency effects, increasing glow effects, and so on. You’ll use Ramp textures later in this chapter.
The Ramp shader is a self-contained shader node that automatically has several Ramp texture nodes attached to its attributes. These ramps are attached within the shader itself, so there is no need to connect external Ramp texture nodes. This makes for a simplified editing environment for the shader because all the colors and handles are accessible through the Ramp shader’s own Attribute Editor, as shown in Figure 7-8.
To create a new color in any of the horizontal ramps, click in the swatch to create a new ramp position. Edit its color through its Selected Color swatch. You can move the position by grabbing the circle right above the ramp and dragging left or right. To delete a color, click the box beneath it.
Ramp textures are automatically attached to the Color, Transparency, Incandescence, Specular Color, Reflectivity, and Environment attributes of a Ramp shader. In addition, a special curve ramp is attached to the Specular Roll Off to allow for more precise control over how the specular highlight diminishes over the surface.