
In this section, you’ll set up and render an animated camera to move over 25 frames of a wine bottle still life.
Set your current project to Lighting, and then load still_life_render_v01.mb from the Lighting project on the CD. You’ll adjust your render settings and some shader properties to make the wine bottle look more like glass.
Selecting Render Settings Options
Set your resolution and quality settings in the Render Settings window:
1. Open the Render Settings window, and select Maya Software. Click the Maya Software tab.
2. From the Quality drop-down list box, select Production Quality. This presets the appropriate settings to produce a high-quality render.
3. Click the Common tab. Set Frame/Animation Ext to name.#.ext, set Start Frame to 1, set End Frame to 25, and set Frame Padding to 2.
4. From the Image Format drop-down list box, select TIFF.
5. Make sure Renderable Camera is set to camera1. In the Image Size section, set Presets to 640 × 480.
Setting Up the Scene
Now, set up some of the objects in the scene. The wine bottle has been imported into the still life scene, and three wine glasses have been added. All the lights are in place, as is the camera.
Start by setting up this scene to raytrace to get true reflections and refractions:
1. Turn on refractions for the Glass shaders. In the Hypershade, select the Glasses material, and open the Attribute Editor. In the Raytrace Options section, click the Refractions check box, and set Refractive Index to 1.2. Set Reflection Limit to 2. Select the Wine_Bottle material, and repeat the previous steps.
2. Because your lights’ shadows are set to shadow maps, you need to change them to raytraced shadows. Remember that semitransparent objects cast solid shadows unless shadows are raytraced, so the glasses and wine bottle will cast shadows as if they were solid and not glass. In the Outliner, select spotLight1. In the Attribute Editor, in the Shadows section, enable Use Ray Trace Shadows. Notice that the shadow map options turn off. Repeat these steps for the remaining two shadow-casting lights: spotLight4 and spotLight3. Figure 11-27 shows the three shadow-casting lights in the scene in white.
3. Open the Render Settings window, and turn on raytracing in the Raytracing Quality section. Set Reflections to 2.
Figure 11-27: Shadow lights
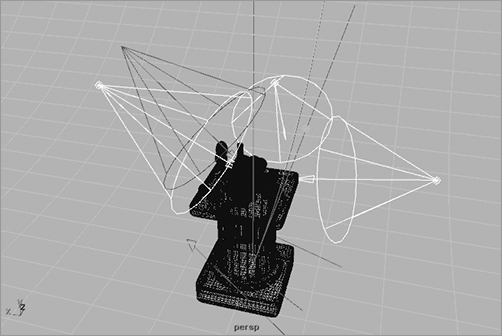
You can’t select all three lights at once to turn on raytraced shadows in the Attribute Editor. Any adjustments you make in the Attribute Editor affect only the most recently selected object, not multiple selections.
Setting Up the Camera
Next, you’ll set up the camera to render the scene:
1. Open the camera’s Attribute Editor through the camera1 panel (choose View ⇒ Camera Attribute Editor).
2. Select the Display Film Gate option in the Display Options section to turn on a dashed green box in the camera1 panel. Enable the Display Resolution option. Notice that the two boxes aren’t aligned.
3. Because the resolution is 640 × 480, you’ll use a 1.33 aspect ratio. Select 35mm TV Projection from the Film Gate drop-down list box. The two green boxes now align. Although it’s not absolutely necessary to match the resolution with the film gate, it’s definitely good practice to do so, especially if you’ll later insert CG in live-action videos.
4. As soon as you change the film gate, the framing of the scene changes. You must move the camera out to frame the entire still life. If you try to use the Alt key and mouse button combinations to zoom out, you’ll notice that you can’t move the camera in this scene: the movement attributes for the camera have been locked to prevent accidental movement that would disrupt the shot.
5. To unlock the camera, choose View ⇒ Select Camera. The camera’s attributes appear in the Channel Box. Some are grayed out, signifying that they’re locked and can’t be changed. Highlight the locked attributes, and right-click Unlock Selected in the Channel box.
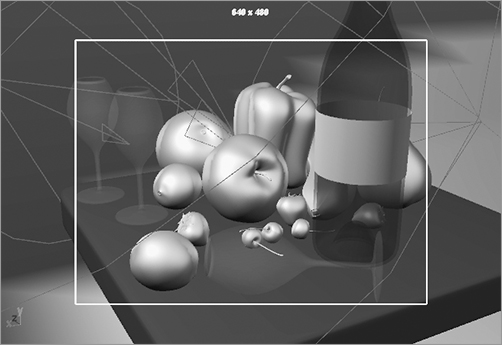
Figure 11-28: The camera view at the beginning of the animation

6. Create an animated camera move to pull out and reveal the still life slowly over 25 frames. Set your Range slider to 1 to 25 frames. Go to frame 1. The camera1 view should be similar to that shown in Figure 11-28. Select all three Translate and Rotate channels in the Channel Box, and right-click Key Selected to set keyframes for the first camera position.
7. Zoom (actually, truck) the camera out by pressing Alt+right-click to a wider framing to reveal the entire still life. Highlight the Translate and Rotate channels again in the Channel box, and set keyframes for them. (See Figure 11-29.)
Scrub your animation, and you’ll see a pullout revealing the full scene.
You can lock the camera to prevent accidentally moving the view after you set your keyframes, especially if Auto Keyframe is on. Select the Translate and Rotate attributes in the Channel Box, and right-click Lock Selected.
Figure 11-29: Pull out the camera.
Batch Rendering and Playing Back the Sequence
Now, you’re ready to render out the 25-frame sequence. Choose Render ⇒ Batch Render.
Because you’re raytracing this scene at full resolution, this render should take anywhere from 20 minutes to an hour. To chart the progress of the render, open the Script Editor by clicking its icon on the Help line or by choosing Window ⇒ General Editors ⇒ Script Editor.
To see the frames play back, you’ll need a program that can load the images in sequence and play them back for you. You can also import the image sequence into a compositing or editing program, such as Adobe After Effects or Premiere, to play back as a clip and edit as you like.
You can also use FCheck, a frame viewer that is included with Maya. This small and surprisingly powerful program plays back your images in real time so that you can judge your finished animation. To use FCheck, follow these steps:
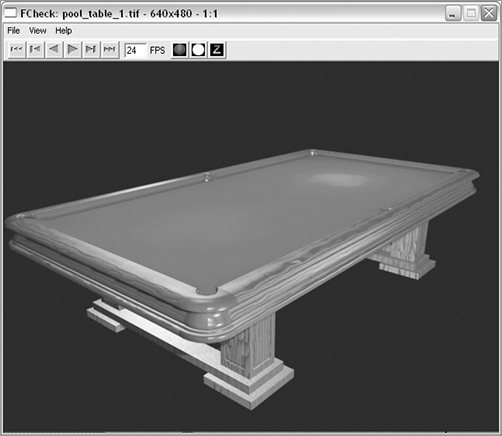
1. In Windows, choose Start ⇒ All Programs ⇒ Autodesk ⇒ Autodesk Maya 2010 ⇒ FCheck to open the FCheck window, as shown in Figure 11-30.
Figure 11-30: FCheck, shown here with a sample image, plays back your rendered sequence.
2. Choose File ⇒ Open Animation.
3. In the file browser, find your Images folder in your project, and click the first frame of the sequence you want to play back. FCheck loads the images frame by frame into RAM and then plays them back in real time. Just set your playback speed and use the VCR controls to play back your sequence.