Tips for Using and Animating Lights
When you’re lighting a scene, invoking a lighting mode in your Perspective or Camera view panel will give you great feedback regarding the relative brightness and direction of your lights. Most computer system’s graphics cards can handle a maximum of eight lights in Lighted mode; some professional cards can handle more.
You invoke Lighted mode by pressing the number 7 on your keyboard (not through the number pad on the side). You must first be in Shaded mode (press 5) or Texture mode (press 6) for Lighted mode. Remember that Lighted mode displays linked lights as if they’re lighting the entire scene. This can cause some confusion, so it’s wise to take notes on any light linking in your scene.
Maya’s IPR renderer is also useful when lighting a scene. This almost-real-time updating renderer will give you a high-quality render of your scene as you adjust your lights. Chapter 11 will explore the IPR renderer.
Animating a Light
Any attribute of a light can be animated in the same way that you animate any other object attribute. You can’t, however, animate a light’s type. To edit a light’s animation, you need only select the light and open the Graph Editor to access its keyframes. You can set keyframes on Intensity, Penumbra Angle, Color, and so on within the Channel Box or the Attribute Editor. Right-click the name of the attribute, and choose Key Selected from the shortcut menu.
By animating a light’s intensity, you can simulate the real-world appearance of a light turning on or off. To turn on a light, create a quickly increasing curve so that its brightness arcs up slowly at first before climbing to full brightness. This animation mimics the way real lights turn on and off better than simply enabling or disabling them in your scene.
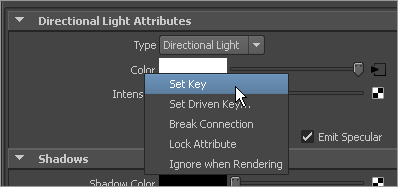
Animating the color of a light, as well as the color of a shader, sets keyframes for the color’s RGB values as three separate keyframes. The Graph Editor shows a separate curve for the red, green, and blue channels of color when you animate a light’s color. You can set all three keys at once by right-clicking the color attribute in the Attribute Editor and choosing Set Key from the context menu, as shown in Figure 10-69.
Figure 10-69: Set a key for the light.
In addition, lights can be animated to be moved, scaled, and rotated like any other object. For further study, try animating the lighting for the simple scene(s) you set up to practice lighting from the previous section. Try creating animated lights to simulate a candle illuminating your scene, or a campfire, or the flashing emergency lights you would find in your average space-station airlock.
Using the Show Manipulator Tool for Lights
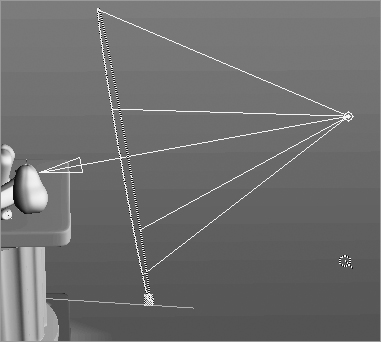
An easy way to manipulate lights is to use their special manipulator (invoked by pressing T). For example, pressing T, or clicking the Show Manipulator icon (![]() ) in the Tool Box, to select the Show Manipulator tool with a Spot light selected gives you two Translate manipulators in the view panel, as shown in Figure 10-70.
) in the Tool Box, to select the Show Manipulator tool with a Spot light selected gives you two Translate manipulators in the view panel, as shown in Figure 10-70.
This allows you to move the source or target of the light to aim it better. By clicking the cyan circle that appears below the source’s Translate manipulator, you can toggle through a number of manipulators to adjust the Spot light’s settings, such as cone angle (two clicks clockwise) and penumbra angle (three clicks clockwise). The manipulator for cone angle is shown in Figure 10-71.
A Source and Target Translate manipulator is available for all light types through the Show Manipulator tool as well.
Figure 10-70: Using special manipulators to place and orient the Spot light
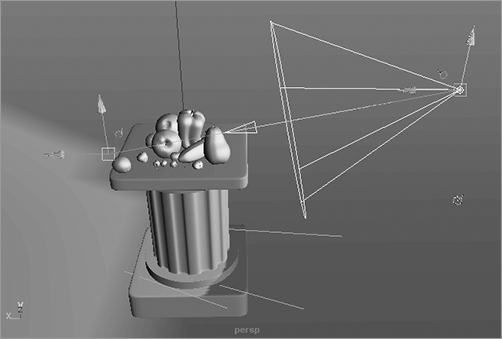
Figure 10-71: Adjusting the cone angle interactively with the special manipulator