
Now that you’ve experienced the mechanics of subdivision surface modeling and editing, you’re ready to work on another model. The next subdivision exercise asks you to create a teakettle. You’ll fashion the kettle from simple polygon shapes and then refine it using subdivisions.
Creating the Base Polygon Model
Figure 5-83: Scale the outer edges inward.
To create the base poly mesh for the kettle, follow these steps:
1. The main body of the kettle begins as a poly cylinder. Choose Create ⇒ Polygon Primitives ⇒ Cylinder ⇒ ❒ to open the Options box. Set Axis Divisions to 8, and set Height Divisions to 4.
2. To create the lid, create another poly cylinder with 8 subdivisions around the axis and 2 for the height. Scale it to fit as a lid on the first cylinder.
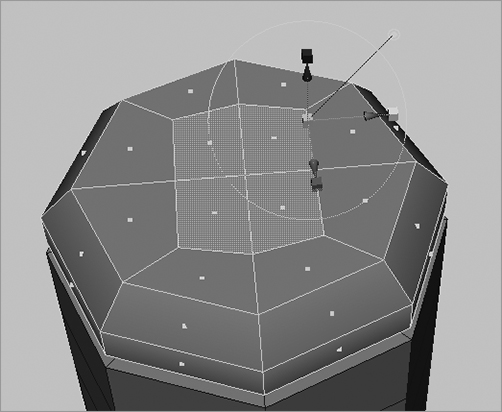
Figure 5-84: Delete every other edge of the top surface.
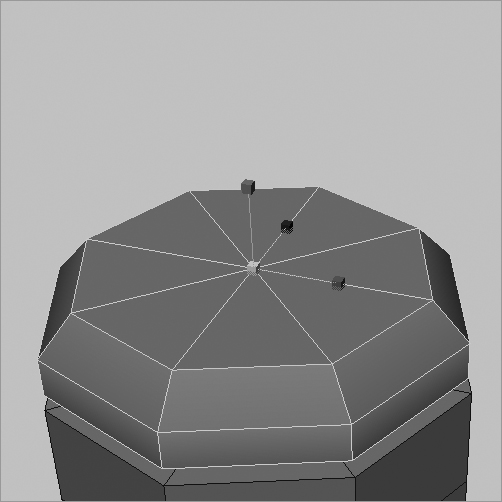
3. Select the upper row of poly edges on the lid, and scale them all in to create a bevel, as shown in Figure 5-83. Select every other edge on the top surface and delete them, as shown in Figure 5-84.
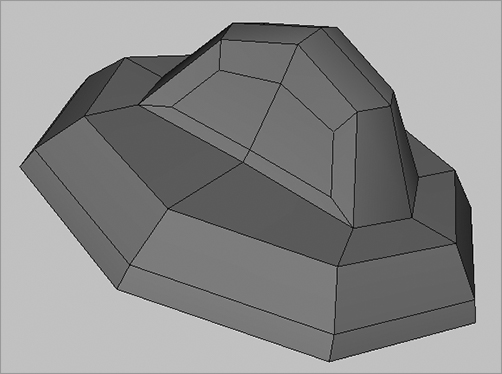
4. Select the poly edges of the main cylinder, and scale them out increasingly larger as you work your way down. Delete every other edge of the top surface as you did with the lid. Your kettle should look like the one in Figure 5-85.
Figure 5-85: Creating the overall shape
5. Select the lid’s top four faces. You can create a handle by extruding these faces and scaling them in. First, make sure the option Edit Mesh ⇒ Keep Faces Together is enabled. This option lets you extrude these faces properly by keeping the poly faces together during the extrude operation. Now, select the four faces again, and choose Edit Mesh ⇒ Extrude ⇒ ❒. Choose Edit ⇒ Reset Settings to make sure the settings are correct, and click Extrude. Use the scale handles to scale the extruded faces in, as shown in Figure 5-86.
If instead of following these directions you chose Edit Mesh ⇒ Extrude and use the special scale handles shown in Figure 5-87, your faces may all separate.
Figure 5-86: By default, faces extrude separately.
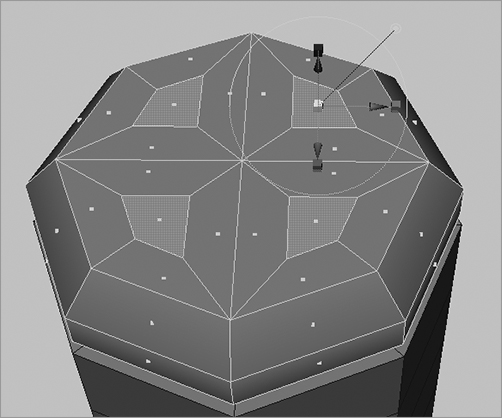
Figure 5-87: The Keep Faces Together command allows you to extrude the faces together.
6. With those four faces still selected, extrude the faces again, but this time pull them up and scale them in a bit, as shown in Figure 5-88.
Figure 5-88: Pulling up the lid’s handle

7. Select the side faces of the lid’s new handle, and extrude the faces inward using the scale handle to create detail on the handle.
8. Select the edges that make up the lid handle, and move them to round out the handle, as shown in Figure 5-89.
Figure 5-89: Round out the handle by moving the edges.
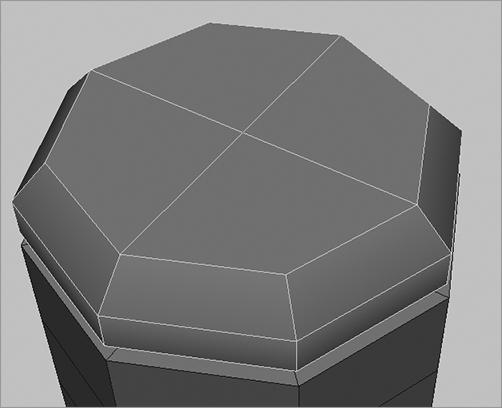
9. Select the four faces on the top of the kettle, and extrude them. Scale the faces in, and pull them up to round the top of the kettle, as shown in Figure 5-90.
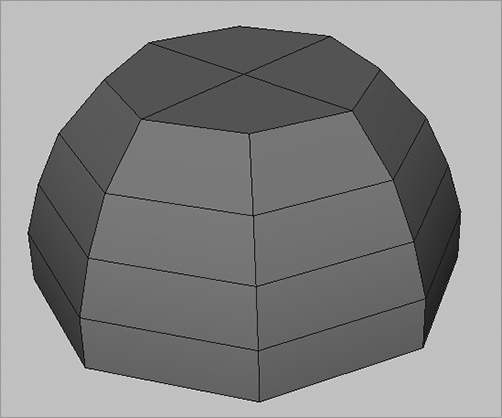
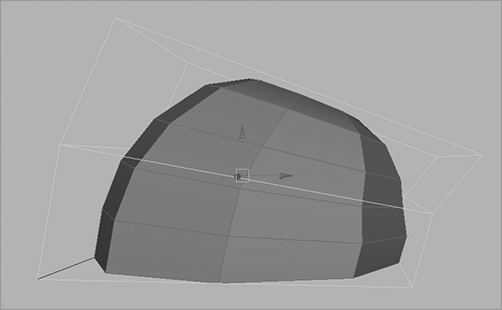
10. Select the kettle, and apply a lattice to it by choosing Create Deformers ⇒ Lattice (in the Animation menu set). In the Channel Box, with the new lattice select, set S Divisions to 2, T Divisions to 3, and U Divisions to 2. Adjust the lattice to bend the kettle back to create the front. Figure 5-91 shows the lattice’s final position. When you have the proper shape, select the kettle, and delete its History to delete the lattice.
Figure 5-90: Round off the top of the kettle.

Figure 5-91: Use the lattice to bend the kettle.
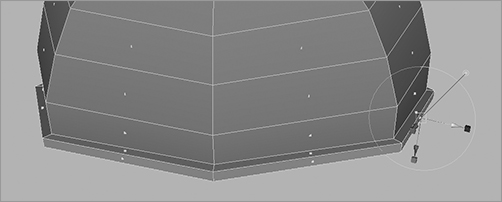
11. Just before you convert the kettle to a subdivision surface, you need to create more detail at the bottom of the kettle so the subdivision surface won’t round out and you’ll still have a flat bottom. In the Side or Front view panel, select the kettle. Go to the Polygons menu set (F3), choose Edit Mesh ⇒ Insert Edge Loop Tool, and use the Insert Edge Loop tool to create a new division along the bottom of the kettle, as shown in Figure 5-92.
Figure 5-92: Use the Insert Edge Loop tool to create a straight division line across the bottom.
12. Select all the new faces along the bottom, and extrude them to create a lip that runs around the kettle’s bottom, as shown in Figure 5-93. Be sure that Edit Mesh ⇒ Keep Faces Together is still selected; otherwise, the faces will separate. Luckily, the Keep Faces Together option appears at the top of the Edit Mesh menu whenever you access the tools in that menu, so you can verify that it’s enabled without too much bother.
13. Save your scene file, and load the Kettle_Model_v01.ma file from the Tea_Kettle project on the CD to compare your work up to this point.
Figure 5-93: Creating the base
Converting to Subdivisions
When you complete the base polygon model for the kettle, you can convert it to a subdivision surface to round it out and make it smooth. To convert the kettle, follow these steps:
1. Select the kettle, and choose Modify ⇒ Convert ⇒ Polygons to Subdiv. Select the lid, and convert it as well.
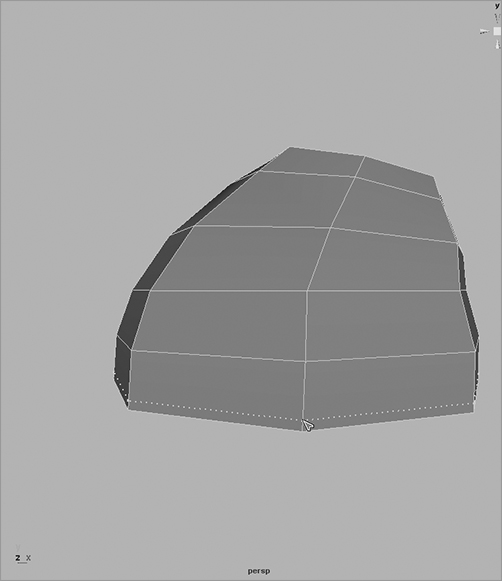
2. Select the converted kettle and the lid, and press 3 to view them in High-Resolution mode. Position the lid on top of the kettle. Your model should be similar to that in Figure 5-94.
3. The only items you still need to model are the spout and a handle. For the handle, create a subdivision torus (choose Create ⇒ Subdiv Primitives ⇒ Torus). Scale, rotate, and place the torus above and around the lid on top of the kettle.
4. With the handle selected, choose Subdiv Surfaces ⇒ Polygon Proxy Mode in the Surfaces menu set. Using the vertices on the polygon proxy, make the handle thinner and elongate it upward, as shown in Figure 5-95.
Figure 5-94: The subdivision kettle and lid
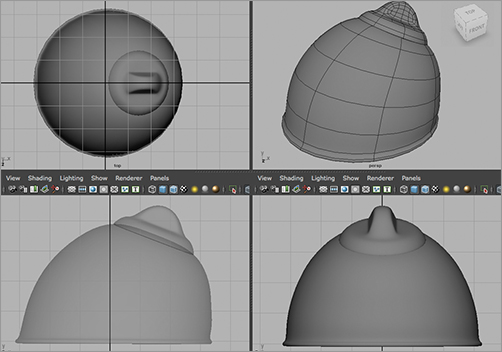
Figure 5-95: The kettle’s handle

5. Return to Standard mode with the handle selected (choose Subdiv Surfaces ⇒ Standard Mode). To make the handle smoother, you can refine it and add more subdivisions. Switch to Component mode so the vertices of the handle display as 0s. Right-click the handle, and choose Refine Selected from the marking menu. New vertices appear as 1s. The handle should now be much smoother. Make any modeling adjustments to your liking. Using the right mouse button and the marking menu’s Display Level command, switch between level 0 and level 1 displays as needed.
6. To create the spout, create a subdivision cylinder. Switch to Component mode to select the faces (not the vertices). Right-click the cylinder, and choose display level 2. Select the inside circle of faces on the top of the cylinder, as shown in Figure 5-96. Move them down into the cylinder to hollow it out, but create a thickness to the spout at the same time, as also shown in Figure 5-96.
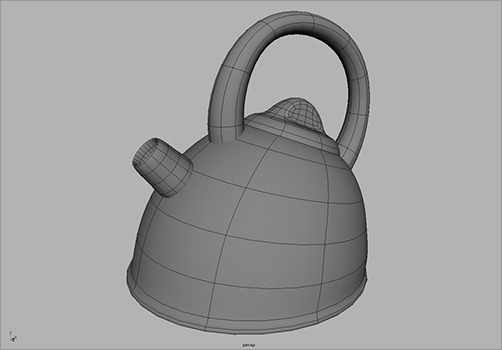
7. Position the spout on the kettle. Move the vertices to flare out at the bottom of the spout where it meets the kettle. Figure 5-97 shows the completed kettle. Save your file.
Figure 5-96: Hollow out the spout.
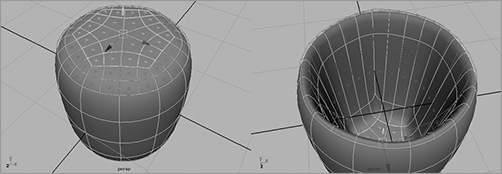
Figure 5-97: The completed subdivision teakettle
Converting Back to Polygons
Most models created with subdivision surfaces should be converted back to polygons after the modeling is finished and rendering setup is ready to begin. Because subdivisions are a more intricate surface type than polygons, you’ll probably have better performance while animating if you work with a polygonal model rather than a subdivision. Professionals frequently use subdivision tools and surfaces to create their models but then convert back to polygons after they’re finished to avoid excessive memory usage while rendering.
This is a simple procedure, similar to the earlier exercise in which you converted NURBS surfaces to polygons. Here you’ll convert the kettle back to polygons:
1. Select the subdivision kettle and its handle, spout, and lid, and choose Modify ⇒ Convert ⇒ Subdiv to Polygons ❒ to open the Options box shown in Figure 5-98.
Figure 5-98: The Convert Subdiv to Polygons Options box

2. Select Adaptive for Tessellation Method. This option usually yields the best results.
3. The Divisions Per Face slider controls how smoothly the object is converted to polygons. For the best results, select each piece of the kettle separately and convert the pieces one by one, adjusting the Divisions Per Face value appropriately. A division value of 2 will work for everything but the handle, which requires a division value of at least 3 to remain fairly smooth.
At a division factor of 1, your kettle will look jagged. Turn it up to 2, and you’ll notice a faithful conversion to polygons.
More often than not, you’ll want to take a model as far as possible before you convert it to polygons, but you should always save the original subdivision version in case it needs to be modified. This way, you can revert to your subdivision file, make your changes, and reconvert to polygons to render out the changes.
Taking the Kettle Further
Try creating more detail for the kettle or experimenting with your own designs. An easy addition is a whistle cap for the spout. You can also create a matching set of teacups and saucers with subdivision surfaces. With the skills you’ve acquired here, you should feel confident to tackle an entire kitchen full of models.