It’s inevitable. Sooner or later, someone will ask you to animate a flying logo or flying text for something or other. As late-1980s as that may sound, animating flying text—at least, the way you’ll do it here—can teach you a thing or two about path animation and lattice deformers. You can use the following steps to animate pretty much anything that has to twist, wind, and bend along a path; this technique isn’t just for text.
First, you’ll need to create the text. To do so, follow these steps:
1. In a new scene, select Create ⇒ Text ❒. In the option box, enter your text, and select a font to use (see Figure 8-32). In this case, stick with Times New Roman. Set the Type to Bevel.
Setting the Type attribute to Poly for your text creates curve outlines for the text and planar faces for the letters, for a flat-text effect. Setting the Type Creation option to Curves gives you just the curve outlines. Finally, using Trim to create your text makes the letters out of flat planar NURBS surfaces. However, no surface history is created with text. To allow you to edit the text later, you must re-create the text and/or font type as needed.
2. Leave the rest of the creation methods at their defaults. Doing so creates the text as beveled faces to make the 3D text, as shown in Figure 8-33.
3. When you have the text, you need to create a curve for it to animate along. Using either the CV or EP Curve tool, create a winding curve like a roller coaster for the logo, as shown in Figure 8-34.
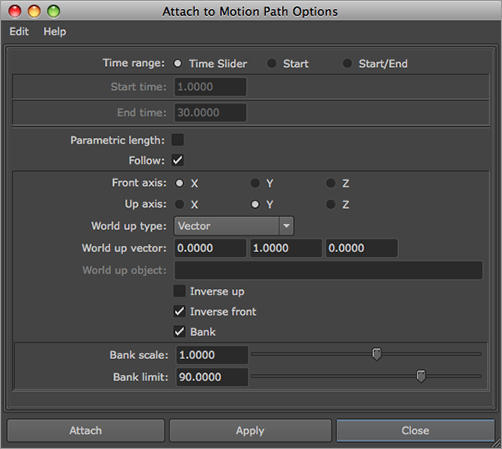
4. Just as you did with the axe exercise, you’ll assign the text object to this curve. Set your frame range to 1–100. Select the text, Shift+select the curve, and, in the Animation menu set, choose Animate ⇒ Motion Paths ⇒ Attach to Motion Path ❒. Set the Front Axis to X and the Up Axis to Y, and select the Bank check box, as shown in Figure 8-35.
Depending on how you create your curve and text, you may need to experiment with the Front Axis and Up Axis attributes to get the text to fly the way you want. Notice that history is created with the path animation, so you can adjust the axes’ attributes after the fact to see how they work on the curve you have.
Figure 8-32: The Text Curves Options window
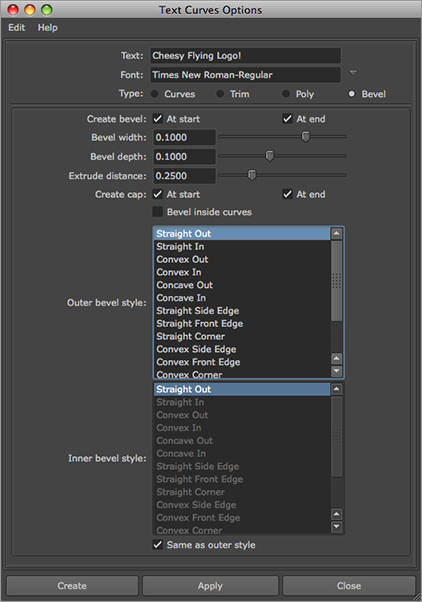
Figure 8-33: Creating the 3D text for the flying logo
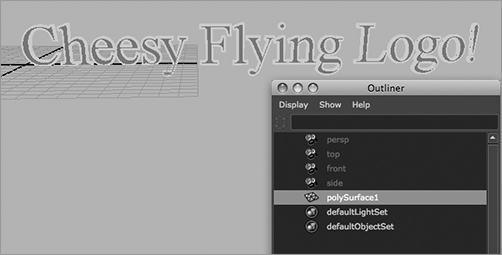
Figure 8-34: Create a curve path for the text to follow.
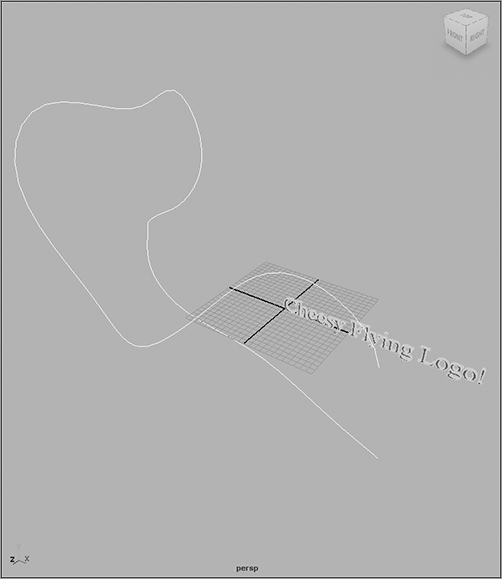
Figure 8-35: The Attach to Motion Path Options window
5. Orbit the camera around to the other side, and you can see the text on the path, as shown in Figure 8-36. Notice the U Value attribute: this is the position of the text along the curve from 0 to 1. Scrub the animation, and the text should glide along the curve.
6. The text isn’t bending along with the curve at all yet. To accomplish this, you need to add a lattice that bends the text to the curvature of the path. Select the text object, and choose Animate ⇒ Motion Paths ⇒ Flow Path Object ❒.
7. In the option box for the Flow Path Object, shown in Figure 8-37, set Divisions: Front to 120, Up to 2, and Side to 2, and select Curve for Lattice Around. Make sure the Local Effect box is unchecked. Doing so creates a lattice that follows the curve, giving it 120 segments along the path. This lattice deforms the text as it travels along the path.
8. Scrub your animation, and you see a fairly strange result: parts of the text explode out from the lattice, as shown in Figure 8-38.
9. The geometry is going outside the influence of the lattice, and this is causing the strange behavior. To fix the situation, select the lattice and base node, and scale up the lattice and its base node together to create a larger size of influence around the path (see Figure 8-39).
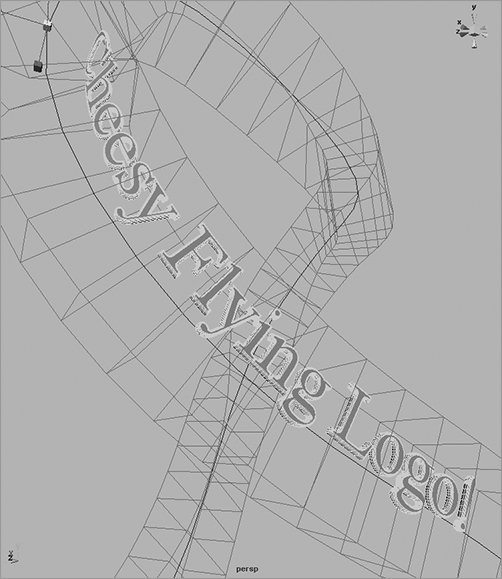
Scrub your animation to check the frame range and how well the text flies through the lattice. When the lattice and its base are large enough to handle the text along all of the path’s corners and turns, voilà—Cheesy Flying Logo! (See Figure 8-40.)
Figure 8-36: The text is on the path.
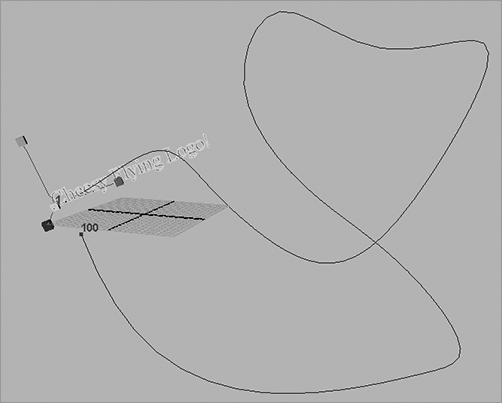
Figure 8-37: The Flow Path Object Options window
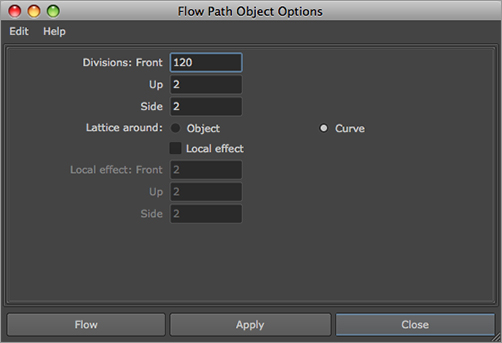
Figure 8-38: The geometry doesn’t fit the lattice well.

Figure 8-39: Scale the lattice and its base node to accommodate the flying text.

Figure 8-40: Cheesy Flying Logo! makes a nice turn.