
A typical workflow for creating an nParticle effect in Maya breaks out into two parts: motion and rendering. First, you create and define the behavior of particles through emission. An emitter is a Maya object that creates the particles. After you create fields and adjust particle behavior within a dynamic simulation, much as you would do with rigid body motion, you give the particles renderable qualities to define how they look. This second aspect of the workflow defines how the particles come together to create the desired effect, such as steam. You’ll make a steaming locomotive pump later in this chapter.
To create an nParticle system, follow these steps:
1. Make sure you’re in the nDynamics menu set, choose nParticles ⇒ Create nParticles, and select Cloud. Choose nParticles ⇒ Create nParticles ⇒ Create Emitter ❒. The option box gives you various creation options for the nParticle emitter, as shown in Figure 12-15.
The default settings create an Omni emitter with a rate of 100 particles per second and a speed of 1.0. Click Create. A small round object (the emitter) appears at the origin.
2. Click the Play button to play the scene. As with rigid body dynamics, you must also play back the scene using the Play Every Frame option. You can’t scrub or reverse-play particles unless you create a cache file. You’ll learn how to create a particle disk cache later in this chapter. But for the most part, particles need to be played back to run properly.
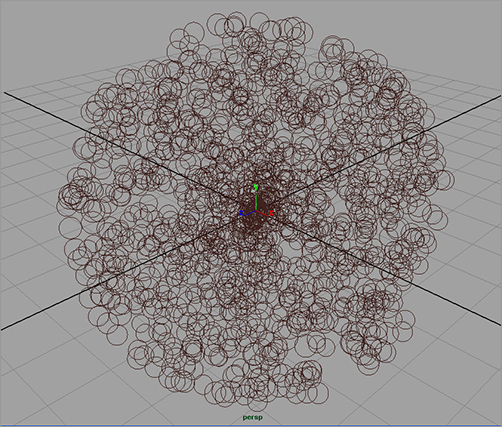
You’ll notice a mass of round circles streaming out of the emitter in all directions (see Figure 12-16). These are the nParticles.
Figure 12-15: Creation options for an nParticle emitter

Figure 12-16: An Omni emitter emits a swarm of cloud particles in all directions.
Emitter Attributes
Figure 12-17: Cloud nParticles sprayed in a specific direction

You can control how particles are created and behave by changing the type of emitter and adjusting its attributes. Here are the most often used emitters:
Omni Emits particles in all directions.
Directional Emits a spray of particles in a specific direction, as shown in Figure 12-17.
Volume Emits particles from within a specified volume, as shown in Figure 12-18. The volume can be a cube, a sphere, a cylinder, a cone, or a torus. By default, the particles can leave the perimeter of the volume.
Figure 12-18: Cloud nParticles emit from anywhere inside the emitter’s volume.
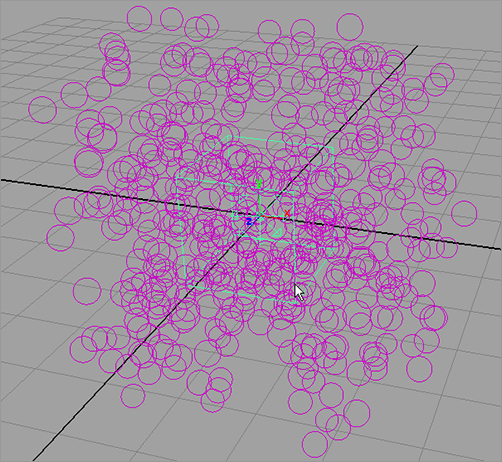
Figure 12-19: An emitter with a Min and Max Distance setting of 3 emits Cloud nParticles three units from itself.

After you create an emitter, its attributes govern how the particles are released into the scene. Every emitter has the following attributes to control the emission:
Rate Governs how many particles are emitted per second.
Speed Specifies how fast the particles move out from the emitter.
Speed Random Randomizes the speed of the particles as they’re emitted, for a more natural look.
Min/Max Distance Emits particles within an offset distance from the emitter. You enter values for the Min and Max Distance setting. Figure 12-19 shows a Directional emitter with a Min and Max Distance setting of 3.
nParticle Attributes
After being created (or born) and set into motion by an emitter, nParticles rely on their own attributes and any fields or collisions in the scene to govern their motion, just like rigid body objects.
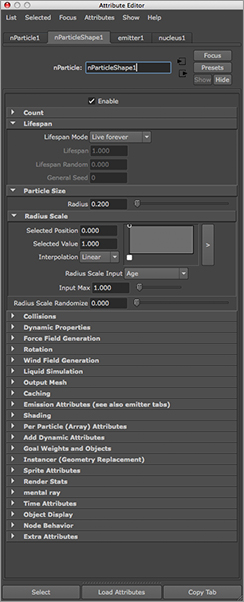
In Figure 12-20, the Attribute Editor shows a number of tabs for the selected particle object. Particle1 is the particle object node. This has the familiar Translate, Rotate, and Scale attributes, like most other object nodes. But the shape node, particleShape1, is where all the important attributes are for a particle, and it’s displayed by default when you select a particle object. The third tab in the Attribute Editor is the emitter1 node that belongs to the particle’s emitter. This makes it easier to toggle back and forth to adjust emitter and particle settings.
Figure 12-20: nParticle attributes
The Lifespan Attributes
When any particle is created, or born, you can give it a lifespan, which allows the particle to die when it reaches a certain point in time. Giving particles a lifespan is a good idea for a variety of reasons. As you’ll see with the steaming locomotive later in the chapter, a particle that has a lifespan can change over that lifespan. For example, a particle may start out as white and fade away at the end of its life. A lifespan also helps keep the total number of particles in a scene to a minimum, which helps the scene run more efficiently.
You use the Lifespan mode to select the type of lifespan for the nParticle:
Live Forever The particles in the scene can exist indefinitely.
Constant All particles die when their Lifespan value is reached. Lifespan is measured in seconds, so upon emission, a particle with a Lifespan of 1.0 will exist for 30 frames (in a scene set up at 30fps) before it disappears.
Random Range This type sets a lifespan in Constant mode but assigns a range value via the Lifespan Random attribute to allow some particles to live longer than others for a more natural effect.
LifespanPP Only This mode is used in conjunction with expressions that are programmed into the particle with Maya Embedded Language (MEL). Expressions are an advanced Maya concept and aren’t used in this book.
The Shading Attributes
The Shading attributes determine how your particles look and how they will render. Two types of particle rendering are used in Maya: software and hardware. Hardware particles are typically rendered out separately from anything else in the scene and are then composited with the rest of the scene. Because of this compound workflow for hardware particles, this book will introduce you to a software particle called Cloud. Cloud, like other software particles, can be rendered with the rest of a scene through the software renderer.
With your particles selected, open the Attribute Editor. In the Shading section, you’ll find the Particle Render Type drop-down menu (see Figure 12-21).
Figure 12-21: The Particle Render Type drop-down menu

The three render types listed with the (s/w) suffix are software-rendered particles. All the other types can be rendered only through the hardware renderer. Select your render type, and Maya adds the proper attributes you’ll need for the render type you selected.
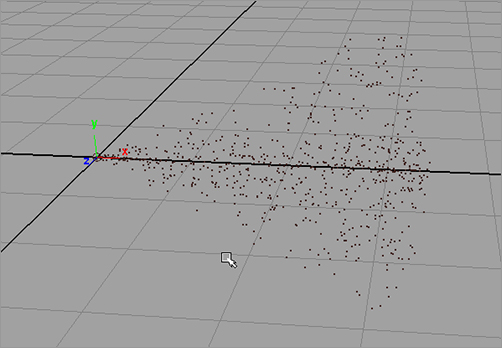
For example, if you select the Points render type from the menu, your particles change from circles on the screen to dots, as shown in Figure 12-22.
Several new attributes that control the look of the particles appear when you switch the Particle Render Type. Each Particle Render Type has its own set of render attributes. Set your nParticles back to the Cloud type. The Cloud particle type attributes are Threshold, Surface Shading, and Opacity. (See Figure 12-23.)
In the Shading heading, shown in Figure 12-24 for the Cloud nParticles, are controls for the Opacity Scale, Color, and Incandescence attributes. They control how the particles look when simulated and rendered. Notice how each of these controls is based on ramps.
Figure 12-22: Dots on the screen represent Point particles.
nParticles are already set up to allow you to control the color, opacity, and incandescence during the life of the particle. For example, by default, the Color attribute is set up with a white to cyan ramp. This means that each of the particles will begin life white in color and will gradually turn cyan toward the end of its lifespan, or Age.
Likewise, the Particle Size heading in the Attribute Editor contains a ramp for Radius Scale that works much the same way as the Color attribute just described. In this case, you use the Radius Scale ramp to increase or decrease the size of the particle along its Age.
Figure 12-23: Each Particle Render Type displays its own set of attributes.
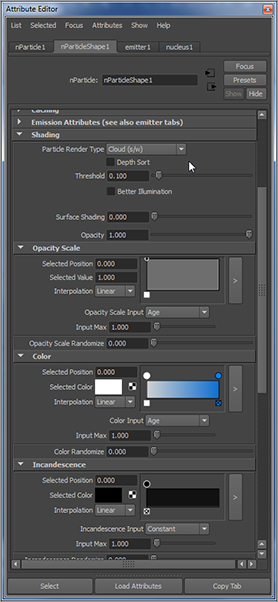
Figure 12-24: Controls for Opacity Scale, Color, and Incandescence attributes

nCaching Particles
It would be nice to turn particles into cash, but I can only show you how to turn your particles into a cache. You can cache the motion of your particles to memory or to disk to make playback and editing of your particle animation easier. To cache particles to your system’s fast RAM memory, select the nParticle object you want to cache, and open the Attribute Editor. In the Caching section, under Memory Caching, select the Cache Data check box. Play back your scene, and the particles cache into your memory for faster playback. You can also scrub your timeline to see your particle animation. If you make changes to your animation, the scene won’t reflect the changes until you delete the cache from memory by selecting the particle object and unchecking the Memory Cache check box in the Attribute Editor. The amount of information the memory cache can hold depends on your machine’s system RAM.
Although memory caching is generally faster than disk caching, creating a disk cache lets you cache all the particles as they exist throughout their duration in your scene and ensures that the particles are rendered correctly, especially if you’re rendering on multiple computers or across a network. You should create a particle disk cache before rendering.
If you make changes to your particle simulation but you don’t see the changes reflected when you play back the scene, make sure you’ve turned off any memory or deleted any disk cache from previous versions of the simulation.
Creating an nCache on Disk
After you’ve created a particle scene, and you want to be able to scrub the timeline back and forth to see your particle motion and how it acts in the scene, you can create a particle nCache to disk. This lets you play back the entire scene as you like, without running the simulation from the start and by every frame.
To create an nCache, switch to the nDynamics menu, select the nParticle object, and choose nCache ⇒ Create New Cache. Maya will run the simulation according to the timeline and save the position of all the particle systems in the scene to cache files in your current project’s datacache folder. You can then play or even scrub your animation back and forth, and the particles will run properly.
If you make any dynamics changes to the particles, such as emission rate or speed, you’ll need to detach the cache file from the scene for the changes to take effect. Choose nCache ⇒ Delete Cache. You can open the option box to select whether you wish to delete the cache files physically or merely detach them from the current nParticles.
Now that you understand the basics of particle dynamics, it’s time to see for yourself how they work.