Understanding Clip Art
The Microsoft Clip Gallery, available from within Office 2000, includes thousands of ready-made illustrations, photographs, sound files, and video clips to use in your presentations. You can search the gallery by keyword or category to find the right clip, import your own clips to the gallery, or download clips from the Microsoft Clip Gallery Live Web site.
→ To learn about adding sound clips in PowerPoint, see "Inserting Your Own Sound File."
→ For details on including movie clips in your presentation, see "Inserting Your Own Movie File."
The Microsoft Clip Gallery includes clip art images in the following formats:
Tip
You can also add images in the Portable Network Graphics (PNG) and Bitmap (BMP) formats.
Inserting Clip Art
The quickest way to add clip art to your PowerPoint presentation is to select one of the AutoLayouts from the New Slide dialog box that includes clip art such as Text & Clip Art or Clip Art & Text.
![]() To access this dialog box, shown in Figure 11.5, select the New Slide button or choose Common Tasks, New Slide from the Formatting toolbar.
To access this dialog box, shown in Figure 11.5, select the New Slide button or choose Common Tasks, New Slide from the Formatting toolbar.
Figure 11.5. The New Slide dialog box includes two AutoLayouts that include clip art.

→ To learn more about the kinds of available slide layouts in PowerPoint, see "Understanding Slide Layouts."
Tip
If you use the AutoContent Wizard to create your presentation, it may already have a slide that contains a placeholder for clip art.
→ For further explanation on how to use this wizard and why you might want to use it, see "Using the AutoContent Wizard."
Figure 11.6 shows a sample slide with a clip art placeholder.
Figure 11.6. You can start adding clip art by double-clicking the placeholder.

Double-click the clip art placeholder to open the Microsoft Clip Gallery, shown in Figure 11.7.
Tip
 You can also insert clip art into an existing slide by clicking the Insert Clip Art button on the Drawing toolbar or by selecting Insert, Picture, Clip Art. If you use either of these ways to insert clip art, the dialog box is called Insert Clip Art, rather than Microsoft Clip Gallery.
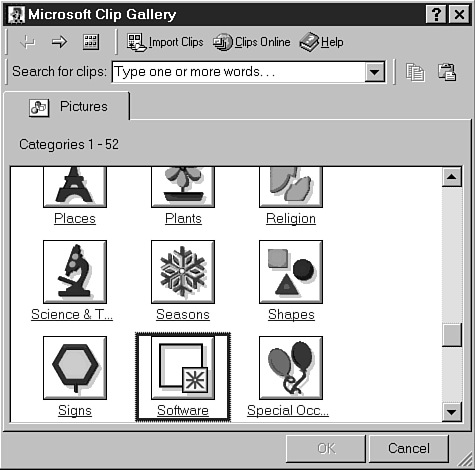
The Microsoft Clip Gallery contains 51 categories of clip art, ranging from animals to backgrounds to photographs to Web elements. To insert a clip art image from the gallery into your presentation, follow these steps:
Click the category whose images you want to view. The clip gallery displays a series of individual images relating to that category, as shown in Figure 11.8.
Figure 11.7. PowerPoint opens the Microsoft Clip Gallery.
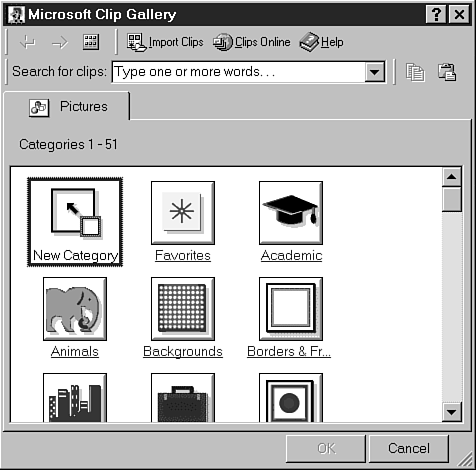
Figure 11.8. You can display clip art by category.

Tip

 Use the navigation buttons, Back and Forward, to go back and forth between categories you've selected.
Click the image you want to insert in your presentation. A menu with several buttons appears, as shown in Figure 11.9.
Figure 11.9. This menu provides several clip art options.

 Clip art images don't display in the Microsoft Clip Gallery?
See the Troubleshooting section at the end of the chapter.
Figure 11.10 shows a sample clip art image in a presentation.
Working with the Microsoft Clip Gallery
After you are in a clip gallery category, you can find out additional information about each image, recategorize it, or add it to a favorites folder.
To determine the file format of a specific clip art image, place the mouse over it to display a tip that lists the image's file format as well as related keywords, as displayed in Figure 11.11.
Figure 11.10. Using clip art can enliven a presentation.

Figure 11.11. Use the mouse to get information about file format.

Click the image to display a floating menu using the following four buttons.
Insert Clip Inserts the selected clip into the PowerPoint presentation and closes Microsoft Clip Gallery.
Preview Clip Previews the clip in a preview window, shown in Figure 11.12.
Figure 11.12. Use the preview window to see what a clip art image looks like up close.

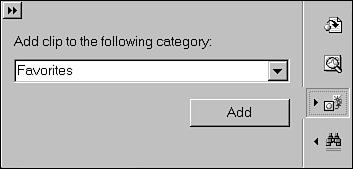
Add Clip to Favorites or Other Category Enlarges the menu to display a drop-down list that enables you to add this image to a Favorites category or any other existing category (see Figure 11.13). Click Add to close.
Figure 11.13. You can add clip art to other categories or a favorites list.
Note
After you add a clip to the Favorites category, it's available under this category button when you open Microsoft Clip Gallery.
Find Similar Clips Enlarges the menu, shown in Figure 11.14.
Figure 11.14. If one image isn't quite right, look for other similar images.
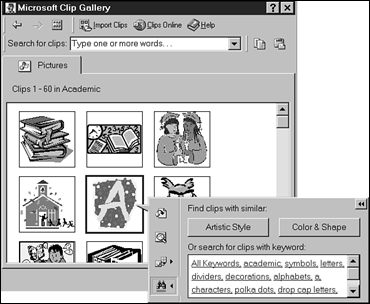
Click the Artistic Style or Color &Shape button to have Microsoft Clip Gallery search for related clips and display them. Or, select one of the related keywords to display images that match that keyword.
Tip
You can also search for clips by entering a keyword in the Search for Clips field at the top of Microsoft Clip Gallery and pressing Enter. When you use this feature, you can select previous entries from the drop-down list.
Creating a New Category
To create a new category, click the New Category button in the main Microsoft Clip Gallery window. The New Category dialog box displays, shown in Figure 11.15.
Enter a new category name in the Enter New Category field and click OK. This category now displays as its own category button, as shown in Figure 11.16, with an icon matching that of the Favorites category.
Figure 11.15. Create your own categories to organize images.

Figure 11.16. You can easily identify new categories you've created.
Tip
To delete or rename this or any other category icon, right-click and choose either Delete Category or Rename Category from the menu.
Recategorizing Clip Art Images
To recategorize a clip art image, right-click it and choose Clip Properties from the menu. Click the Categories tab, shown in Figure 11.17.
Scroll down the available categories, placing and removing check marks as necessary to appropriately categorize the image.
Click the Keywords tab, illustrated in Figure 11.18, to change the keywords associated with the image.
To add a keyword, click the New Keyword button, which opens the New Keyword dialog box (see Figure 11.19).
Figure 11.17. Recategorizing clip art images makes them easier to find.

Figure 11.18. Associate keywords with clip art to make them easier to retrieve.
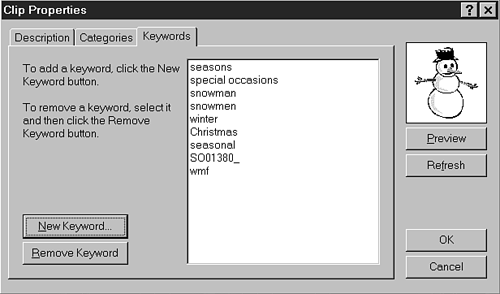
Figure 11.19. You can add and remove keywords if you want.

Enter a new keyword and click OK.
To remove a keyword, select it in the list and click the Remove Keyword button.
Importing Clips
PowerPoint also has the capability to organize and categorize clip art images you already store elsewhere on your computer by importing them into the clip gallery. The Microsoft Clip Gallery supports importing WMF, CGM, GIF, JPEG, BMP, and PNG file formats.
To import a file, follow these steps:
 Click the Import Clips button from the Insert Clip Art or Microsoft Clip Gallery dialog box. Figure 11.20 displays the Add Clip to Clip Gallery dialog box.
Figure 11.20. Select an image to import in this dialog box.

Select the folder where the image is located from the Look In drop-down list.
Select the file you want to import. You can narrow your choices in the Files of Type drop-down list.
In the Clip Import Option group box, specify whether you want to copy the file, actually move it into the clip gallery, or let the clip gallery find the clip in its current folder.
Click Im_port. The Clip Properties dialog box displays (see Figure 11.21).
On the Description tab, you can enter a descriptive word or phrase about the image.
On the Keywords tab, you can add or delete keywords associated with this image.
→ For more details about categorizing your images, see "Recategorizing Clip Art Images."
Tip
![]()
![]()
 You can add a drawing object that you create in PowerPoint to the clip gallery. Simply select the object, copy it, click Insert Clip Art on the Drawing toolbar, select the clip art category in which it belongs, and paste it in.
Tip
To delete a clip art image, select it and press the Delete key.
Getting Clip Art Images Online
If the existing clip art images don't suit your needs, you can download additional clip art from Microsoft's online library of images on the Web.
To download online clips, follow these steps:
 From the Microsoft Clip Gallery, click the Clips Online button. PowerPoint displays a dialog box which verifies that you can connect to the Internet.
Tip
To access online clips and other Web-connected PowerPoint features, you must have Internet access either through a company intranet site or through your own account with an Internet service provider.
Click OK to proceed. The licensing agreement for the Microsoft Clip Gallery Live Web site opens (see Figure 11.22).
Figure 11.22. Download new and seasonal clip art images from this Web site.

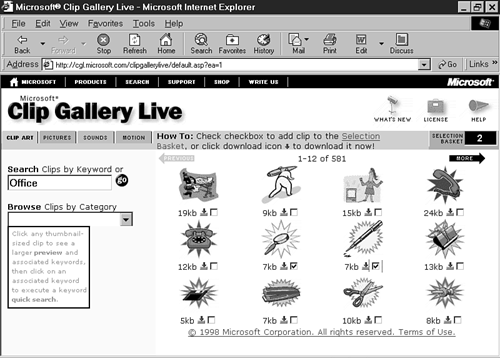
Click the Accept button to accept the licensing agreement and continue. Under the Clip Art tab, the Clip Gallery Live displays groups of clip art as well as a search engine that lets you Search Clips by Keyword or Browse Clips by Category (see Figure 11.23).
Figure 11.23. You can download images into the selection basket.
Tip
The Microsoft Clip Gallery Live Web site also includes photographs, sounds, and videos.
To download clips, select the check box beneath each image to place it in the selection basket.
Click the Selection Basket hyperlink when you're done to display the basket of selected images.
Click Download Now!, shown in Figure 11.24.
Figure 11.24. You can choose whether to open or download the clip.

The clips are downloaded and displayed in the Microsoft Clip Gallery (see Figure 11.25).
Figure 11.25. Select your new downloaded images from the Microsoft Clip Gallery.

Note
To download an individual clip, select it, and it previews in the box below the Browse Clips by Category drop-down list. Click the image in the preview box to open the File Download dialog box.
Modifying Clip Art Images
After you insert a clip art image into a PowerPoint presentation, you can modify it to suit your needs. Using the Picture toolbar, you can make both minor and major adjustments to an inserted clip such as changing its color or adjusting its contrast. Table 11.2 describes each button on the Picture toolbar.
Recoloring a Clip Art Image
You can recolor a Windows metafile image (WMF), such as a clip art image, after you place it in a PowerPoint presentation. This can be very useful, particularly if you want the image to match the colors of a selected design template.
 Can't recolor your image?
See the Troubleshooting section at the end of the chapter.
To recolor a WMF image, follow these steps:
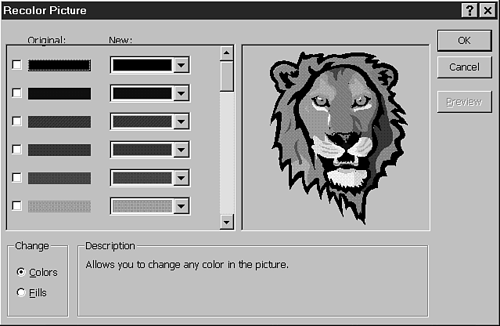
 Select the image you want to recolor and click the Recolor Picture button on the Picture toolbar. The Recolor Picture dialog box opens, as shown in Figure 11.26.
Select the Colors option button to change the actual image colors or the Fills option button to change background colors.
Note
Selecting Fills doesn't affect line colors.
Place a check mark next to the Original color you want to change.
Select a New color from the drop-down list of colors.
Tip
Click More Colors from the drop-down list of colors to open the Colors dialog box, which offers a wide array of custom colors from which to choose.
Figure 11.26. Change the color of a WMF image to match your presentation.
→ To learn more about applying colors to objects, see "Specifying Color."
→ For details on color theory, see "Using Color."
Click the Preview button to view the suggested color changes before you make them.
Formatting Clip Art Images
When you place a clip art image in your presentation, you can make changes to its lines, size, and position in the Format dialog box. Chapter 12, "Creating and Formatting Objects." describes how to use this dialog box in detail.
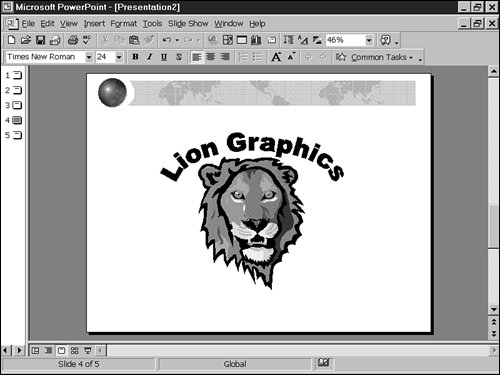
You can also combine clip art with WordArt pictures to create a complete graphic image such as a logo, an example of which is shown in Figure 11.27.
To create this image, place both a WordArt picture and clip art on the slide and adjust their position to create the image you want. You should also group these two images together to make them one.
→ For instructions on how to group PowerPoint objects, see "Grouping Objects."
Figure 11.27. Combine WordArt and clip art to make an interesting logo or title.
