
Using the Outlining Toolbar
You can use the Outlining toolbar to help organize and rearrange your slides in the outline pane. To display the toolbar, choose View, Toolbars, Outlining. It appears vertically on the left side of the outline pane. Table 5.1 lists the buttons on this toolbar.


Tip
You can move the Outlining toolbar to another location on the screen by dragging the move handle (above the Promote button) to another location.
Promoting and Demoting Outline Points
You can demote outline headings and promote and demote subheadings to reorganize and rearrange your presentation. Promoting a first level subheading makes it become a heading (slide title) in a new slide. Promoting a secondary level subheading (such as indented text or lower level bullet) moves it up to the next level.
 For example, if you select the text of a second level bullet in the outline and click the Promote button, the bullet becomes a first level bullet. (See Figures 5.2 and 5.3.)
Figure 5.2. The bulleted list item you want to change is currently indented.
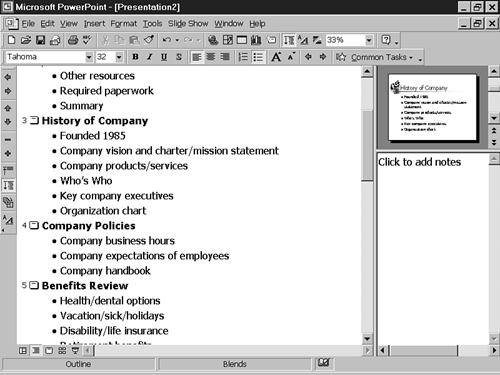
Figure 5.3. Promoting the bulleted list item moves it up one level, but doesn't change its location.

If you promote a first level bullet, it becomes a slide title and PowerPoint inserts a new slide into the presentation.
Note
Promoting indented text outdents it.
![]() The Demote button works in much the same way as the Promote button. Demoting a subheading such as a first level bullet moves the bullet point to a second level bullet. Demoting other text indents the text.
The Demote button works in much the same way as the Promote button. Demoting a subheading such as a first level bullet moves the bullet point to a second level bullet. Demoting other text indents the text.
Demoting an outline heading (slide title) deletes the slide and moves its text content to the bottom of the previous slide. PowerPoint verifies this action before doing it if your slide contains notes or graphics.
 Do you lose notes and graphics when demoting?
See the Troubleshooting section at the end of the chapter.
Do you lose notes and graphics when demoting?
See the Troubleshooting section at the end of the chapter.
Moving Outline Points Up and Down
![]() In addition to promoting and demoting outline points, you can also move the location of each point. For example, to move a numbered list item from the second to the first position in the list, select that second item and click the Move Up button.
In addition to promoting and demoting outline points, you can also move the location of each point. For example, to move a numbered list item from the second to the first position in the list, select that second item and click the Move Up button.
 Or, let's say you want to move the first of three bulleted list items from one slide to the top of the list in the following slide. To do this, click the Move Down button three times. (See Figures 5.4 and 5.5.)
Figure 5.4. The original bullet position.
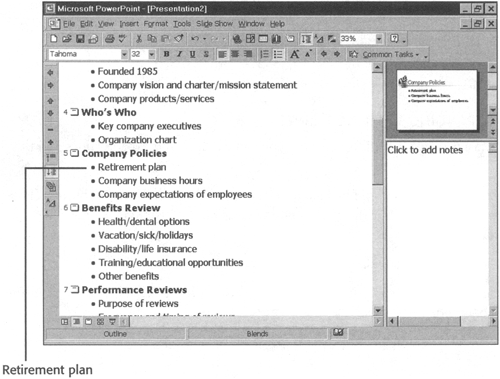
Figure 5.5. Its position after clicking the Move Down button three times.

Tip
![]() To undo moves of more than one position, you should click the Undo button the same number of times that you clicked the Move Up or Move Down button.
To undo moves of more than one position, you should click the Undo button the same number of times that you clicked the Move Up or Move Down button.
→ To learn more about the different ways you can organize slides in PowerPoint, see "Rearranging Slides,"
Tip
Use Slide Sorter view to view your actual slides as you rearrange them.
→ For details on this view, see "Using the Slide Sorter View,"
Collapsing and Expanding Outline Points
To make things easier to read in a long outline, you can collapse and expand slides and their body text.
![]() To collapse the body text of an individual slide, select it and click the Collapse button. The slide number and title remain, but the related body text is hidden from view. Figure 5.6 shows a collapsed slide.
To collapse the body text of an individual slide, select it and click the Collapse button. The slide number and title remain, but the related body text is hidden from view. Figure 5.6 shows a collapsed slide.
 Select the slide again and click Expand to display the hidden text.
![]() To collapse the entire outline, click the Collapse All button. Figure 5.7 illustrates an outline that is entirely collapsed.
To collapse the entire outline, click the Collapse All button. Figure 5.7 illustrates an outline that is entirely collapsed.
![]() To display the outline details again, click the Expand All button.
To display the outline details again, click the Expand All button.
Figure 5.6. Collapsing a slide hides its body text.


Tip
If you want to collapse and expand more than one slide, but not all slides, press Shift, choose the consecutive slides, and then click the Collapse or Expand button. Note that the slides you select must be consecutive.
Collapsing and expanding your outline make it easier to print as well. You can print an entire outline in detail; only certain sections in detail; or only a collapsed, summary outline.
→ To learn how to print outlines, see "Printing an Outline,"
Creating a Summary Slide
You can create a slide that summarizes the outline headings (the slide titles) for all, or selected, slides in your presentation. You can then use this slide to introduce your presentation, to highlight the areas you're going to discuss, or to close your presentation by summarizing it. To create a summary slide, select all the slides you want to include in the summary.
Note
You need to either choose all slides or a series of consecutive slides when you create a summary slide in Outline View. Create a summary slide from Slide Sorter view if you want to choose multiple, non-consecutive slides.
![]() Usually it's easier to do this if you collapse all the headings by clicking the Collapse All button on the Outlining toolbar.
Usually it's easier to do this if you collapse all the headings by clicking the Collapse All button on the Outlining toolbar.
Tip
You can easily select all slides in the presentation by selecting the first slide and dragging the mouse down to the last slide or by pressing Ctrl+A.
![]() Next, click the Summary Slide button. PowerPoint automatically creates a summary slide that contains a bulleted list of all the selected slide titles in your presentation. The summary slide is inserted before the first selected slide, but you can move it to another location if you want.
Next, click the Summary Slide button. PowerPoint automatically creates a summary slide that contains a bulleted list of all the selected slide titles in your presentation. The summary slide is inserted before the first selected slide, but you can move it to another location if you want.
Figure 5.8 shows a sample summary slide.
Showing Slide Formatting
![]() By default, the outline pane displays each heading and subheading in the same font, bolding the headings for emphasis. If you want the outline to display using the actual fonts and formatting of the presentation itself, click the Show Formatting button on the Outlining toolbar.
By default, the outline pane displays each heading and subheading in the same font, bolding the headings for emphasis. If you want the outline to display using the actual fonts and formatting of the presentation itself, click the Show Formatting button on the Outlining toolbar.
Figure 5.9 displays a sample outline that shows formatting.
The specific font and attributes such as size, bolding, italics, underlining, and shadow now display in the outline pane. The font color, however, does not display.
Figure 5.8. Create a summary slide to introduce or close your presentation.

Figure 5.9. This outline displays text formatting.
