Understanding PowerPoint Presentations
Once you learn—or refresh your memory of—how to navigate PowerPoint, you can create a basic presentation. This chapter gets you up and running on presentation basics so you can quickly move forward to more advanced and sophisticated PowerPoint techniques.
In PowerPoint, you can create a presentation in several different ways, depending on the amount of content and design assistance you require. You can create
A presentation using the AutoContent Wizard The wizard selects a design template that matches your presentation type and creates a series of slides with content and slide layout suggestions. Using the AutoContent Wizard can help you save time and provide detailed design assistance if you aren't yet design-savvy.
A presentation using a design template This lets you add your own slides and content, but still have a consistent design scheme (layout, colors, fonts, and so on).
A blank presentation This type of presentation includes no preset design, colors, or content suggestions. Create a blank presentation only when you are very experienced with PowerPoint and know you want to create a custom design rather than use one of PowerPoint's existing designs.
Tip
Even if you want to create a custom presentation, it often saves you time to start with an existing design and then customizeit.
Understanding Design Templates
A design template (p.40-41) includespreformatted layouts, fonts, and colors that blend together to create a consistent look and feel for your presentation.Figures 2.1 and2.2 illustrate two sample design templates that you might use for totally different audiences and purposes.
→ To learn how to apply design templates, seeWorking with Design Templates.
The AutoContent Wizard automatically selects a design template that is suited to the type of presentation you want to make. If you don't use the AutoContent Wizard and instead select your own design template, be sure that the template you select matches your audience and fits the message you want to convey.
Understanding Slide Layouts
In addition to a design template, the other important design feature you need to consider is a slide layout. PowerPoint includes 24 different types of layouts, called AutoLayouts (p. 199):
Title Slide
Bulleted List
Two Column Text
Table
Text & Chart
Chart & Text
Organization Chart
Chart
Text & Clip Art
Figure 2.1. A conservative design template such as Soaring suits a corporate audience.

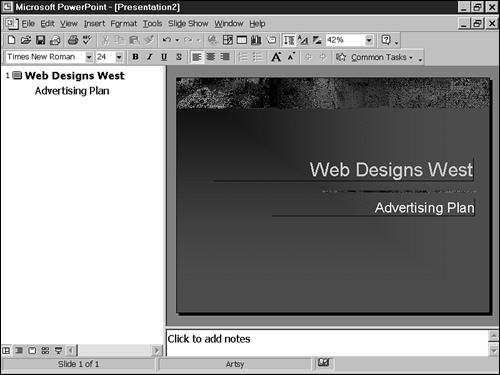
Figure 2.2. A more creative design template such as Artsy works better for an artsy audience.

Clip Art & Text
Title Only
Blank
Text & Object
Object & Text
Large Object
Object
Text & Media Clip
Media Clip & Text
Object over Text
Text over Object
Text & Two Objects
Two Objects & Text
Two Objects over Text
Even though PowerPoint provides a multitude of layout combinations from which to choose, these layouts only contain a total of eight different elements. These elements are
Titles Inserts a text box in which you can enter a title. Figure 2.3 illustrates a title slide.
Figure 2.3. Every presentation should have a title slide.

Lists Inserts abulleted list on a slide. Figure 2.4 illustrates such a list.
Figure 2.4. Bulleted lists make it easier to read a series of items.

Tables Inserts a table that you can format and customize.Figure 2.5illustrates a table.
→ To explore the ways you can work with tables even more, seeWorking with Tables.
Note
This procedure inserts a PowerPoint table. For more advanced formatting options, you may want to insert a Microsoft Word table in your presentation. To do so, select Insert, Picture, Microsoft Word Table.
→ If you want to learn more about inserting Word tables into PowerPoint presentations, seeInserting a Word Table.
Figure 2.5. Tables enable you to more easily present detailed information.

Text Inserts a text placeholder on a slide in which you can add the desired text (see Chapter 3, "Working with Text"). Figure 2.6 illustrates a text placeholder.
Charts Inserts a chart (bar, column, pie, and so on) that you create with Microsoft Graph. Figure 2.7 illustrates a chart.
→ For more information about using charts in PowerPoint, seeWorking with Charts.
Organization Charts Includes an organization chart that you create with Microsoft Organization Chart (see Chapter 10, "Working with Organization Charts"). Figure 2.8 illustrates such a chart.
Figure 2.6. The way you present text can affect how your presentation is perceived.

Figure 2.7. Charts can add visual punch to a presentation.

Clip Art Inserts a clip art image you choose from the Clip Gallery. Figure 2.9 illustrates a slide that contains clip art.
Tip
Before inserting your own art here, you can first import it into the Clip Gallery.
→ To learn how to import graphic images into the Clip Gallery, seeImporting Clips.
Figure 2.8. Use an organization chart to help you present your organization to new team members.

Figure 2.9. The Clip Gallery provides numerous illustration choices.

When you double-click an object placeholder, the Insert Object dialog box displays. From this dialog box, you can select or createa variety of objects (seeFigure 2.10). Some examples include
Adobe Control for ActiveX
Adobe Acrobat Object
Bitmap Image
Calendar Control 9.0
Comic Chat Room
Image Document
Lotus 1-2-3 97 Workbook
Lotus Word Pro 97 Document
Media Clip
Microsoft Clip Gallery
Microsoft Excel Chart
Microsoft Excel Worksheet
Microsoft Graph 2000 Chart
Microsoft PowerPoint Presentation
Microsoft PowerPoint Slide
Microsoft Word Document
Microsoft Word Picture
MIDI Sequence
Netscape Hypertext Document
Package
Paintbrush Picture
RegWizCtrl
Sax Webster Control V2.2
Video Clip
Wave Sound
WordPad Document
→ For more information about usingobjects in PowerPoint presentations, seeCreating and Formatting Objects.
Media Clips Inserts a media clip such as a sound or movie file. Figure 2.11 illustrates a slide that includes a media clip.
Figure 2.10. You can insert a variety of different objects into a PowerPoint presentation, such as this Excel chart.

Note
A media clip is a special kind of object that you use specifically to insert a sound or movie file. You can choose an AutoLayout that includes an Object to insert a media clip as well, but it's usually easier to select a layout that specifies Media Clip if this is what you want.
Figure 2.11. PowerPoint offers the ability to insert sound or movie files.

→ To learn more aboutinserting media clips, see"Adding Movies and Sound".
If none of these predefined layouts is what you want, you can modify a blank slide or customize one of the existing layouts by adding, moving, or deleting objects .
