
30. Outlining Presentations
In This Chapter
• Creating an Effective Presentation Outline
• Inserting an Outline from Another Application
A solid, well-organized outline helps you achieve the goals of your presentation. Fortunately, PowerPoint offers features that simplify the outlining process. You can use Outline view to display and organize your outline in PowerPoint or create an outline in Microsoft Word or another application and insert it into a presentation.
Creating an Effective Presentation Outline
Before you actually create a presentation, you need to determine its purpose, organize your ideas, and establish the flow of what you’re going to say. In other words, you need to create an outline, or storyboard.
You can outline your presentation in a few ways: on paper, in another application such as Microsoft Word, and directly in PowerPoint. Which one is best depends on the type of presentation you’re delivering, its length and complexity, and—most important—your personal preferences.
Using Outline View
No matter which method you use to create your outline, you might want to use PowerPoint’s Outline view to organize this information at some point.
 Tip
Tip
You can change the size of any pane in PowerPoint by dragging its border to a new location. To do this, move the mouse over the border and, when the cursor changes to a double-headed arrow, click and drag.
To open Outline view, click the Outline View button on the View tab. Your presentation’s outline displays in a pane on the left side of the window, replacing the Slides pane, and shares the interface with the slide itself and related notes. Figure 30.1 shows Outline view.

Each slide is numbered and followed by a slide icon and the title text. The body text is listed under each slide title. This body text includes bulleted and indented lists and other text information. The title text is also referred to as the outline heading, and each individual point in the body text is referred to as a subheading. Clip art, tables, charts, and other objects don’t display in the outline.
Adding new outline information is simple. Enter the content and then press the Enter key to move to the next point. To delete a point you no longer need, select it and press the Delete key.
Modifying Your Outline
When you right-click the content of any slide in Outline view, a contextual menu displays, as shown in Figure 30.2.

Although some of the options on this menu are generic—such as Cut, Copy, and Paste—most focus on editing and formatting slide content in Outline view. Table 30.1 lists the options found on this menu.

 Note
Note
Most of these menu options work best for slides that contain a lot of text, such as bulleted lists. If your slides emphasize other types of content, such as graphics and charts, you’ll find it to be more convenient to rearrange content directly on your slides.
Promoting and Demoting Outline Points
You can demote outline headings and promote and demote subheadings to reorganize and rearrange your presentation. Promoting a first-level subheading makes it a heading (slide title) in a new slide. Promoting a second-level subheading (such as indented text or lower-level bullet) moves it up to the next level. On the other hand, promoting indented text outdents it.
For example, if you right-click the text of a second-level bullet in the outline (see Figure 30.3) and select Promote from the menu, the bullet becomes a first-level bullet (see Figure 30.4).


If you promote a first-level bullet, it becomes a slide title, and PowerPoint inserts a new slide into the presentation. Demoting works in much the same way as promoting. Demoting a slide title makes it a first-level item and adds the slide’s contents to the end of the previous slide. Demoting other text indents the text to the next outline level.
When you demote a slide, the text content remains and carries over to the previous slide, but any graphics or notes are deleted. To keep the notes and graphics, copy them to their destination using the Clipboard and then demote the slide.
Moving Outline Points Up and Down
You can also move each outline item up or down in the outline. To move an item up, right-click it and select Move Up from the menu. If you want to move an item down the outline, as you might expect, select Move Down from the menu.
Collapsing and Expanding Outline Points
To make it easier to read a long outline, collapse and expand slides and their body text.
To collapse the body text of slides in Outline view, follow these steps:
1. Right-click in Outline view to display a menu of options.
2. From the menu, pause your mouse over the Collapse option to display a submenu.
3. Select Collapse All from the submenu. On the outline, the slide numbers and titles remain, but the related body text is hidden from view.
To display your outline’s detail again, right-click and select Expand and then Expand All from the menus.
Tip
To collapse the body text of an individual slide, right-click it and select Collapse from the menu. Right-click again and then select Expand to display the hidden text. If you want to collapse and expand more than one slide, but not all slides, press Shift, choose the consecutive slides, and then select Collapse or Expand. The slides you select must be consecutive.
Collapsing and expanding your outline makes it easier to print. You can print an entire outline in detail, only certain sections in detail, or only a collapsed summary outline. Learn more in Chapter 36, “Creating and Printing Presentation Materials.”
Showing Slide Formatting
By default, Outline view displays each heading and subheading in the same font, bolding the headings for emphasis. If you want the outline to display using the actual fonts and formatting of the presentation, right-click the slide content and select Show Formatting from the menu.
Each item’s specific font and attributes—such as size, bold, italic, underlining, and shadow—now display on the outline. The text’s color is always black, though, regardless of the color formatting you’ve applied.
Inserting an Outline from Another Application
If you create an outline in another application, you can insert this file directly into PowerPoint, which can work with outlines in many different formats, such as Word documents (.doc and .docx), Rich Text Format (.rtf),Text files (.txt), or HTML (.htm).
You can insert an outline into a blank presentation or into a presentation that already includes slide content. In the latter case, PowerPoint inserts the outline after the current slide.
To insert an outline from another application, follow these steps:
 Caution
Be sure the file you want to insert is closed. If it’s open in another application, PowerPoint gives you an error message.
1. On the Home tab, click the down arrow below the New Slide button.
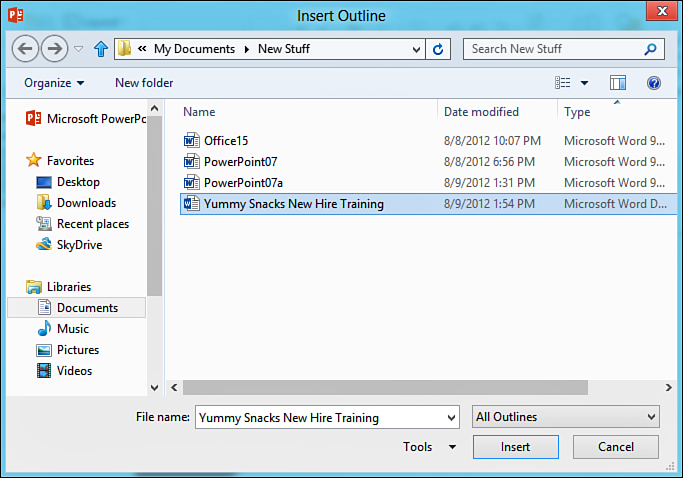
2. At the bottom of the gallery, click Slides from Outline. Figure 30.5 shows the Insert Outline dialog box that displays.
Tip
The Insert Outline dialog box offers many of the same advanced options found in the Open dialog box. Learn more in Chapter 26, “PowerPoint 2013 Basics.”
3. Navigate to the file you want to import and then click the Insert button. PowerPoint creates new slides and inserts the outline content onto these slides.
If your outline doesn’t insert as you anticipated, review your source document for any possible formatting problems. You can also use Outline view to revise your inserted content. Another option is to simply cut and paste your content onto your PowerPoint slides.