
7. Word 2013 Basics
Microsoft Word is the powerhouse of the Microsoft Office suite of applications, enabling you to present yourself or your business through polished, professional-looking documents. In this chapter, you discover the variety of document types you can create, explore new Word 2013 features, and learn how to start a new document and view your Word documents.
Exploring Word
If you have never worked with Microsoft Word before, you are in for a treat; and if you have worked with the application before, you’ll be happy to know that this new version is better than ever. Microsoft Word is an amazingly powerful application and there’s seemingly no end to the types of documents you can create with it. Yes, it’s easy to write a simple letter in Word, but you can also use this powerful application to create:
• All kinds of reports, from year-end budget reports to company prospects and beyond
• Research papers, term papers, essays, and the like
• Résumés, business cards, and all manner of promotional materials
• Brochures, flyers, and newsletters
• Organized lists, menus, to-do sheets, and so on
• Personalized calendars for home, office, and school
• Greeting cards, postcards, and notecards
• Photo albums for every occasion
• Faxes, labels, and coordinated mailing materials
• Web pages—yes, even web pages!
You can see from this small list of typical projects, you can use Word to create a variety of documents for a multitude of purposes, even those that rely more on visuals than on text.
Exploring Word 2013 New Features
Microsoft has made quite a few improvements to Word since its last rendition. For starters, it is retooled a bit to work with the new Windows 8 operating system. If your computer is one of the newer touchscreen models, you can utilize touchscreen techniques to interact with the application, such as selecting text using your finger to drag across the screen or tapping the screen to activate a command. If your computer doesn’t utilize touchscreen technologies, don’t worry about it; you can use the traditional mouse, keyboard, or mousepad (on a laptop) methods to work in Word.
Here’s a rundown of what else you can expect in the new Word 2013:
• A new, modern interface with a customizable watermark design in the upper-right corner.
• A new Start screen, also called a landing page, with quick access to recently used files, templates, and stored content.
• More templates than Word has ever had before. You can search for templates for every kind of document imaginable.
• New cloud connectivity—with an online connection and a Microsoft account, you can store documents online and access them from anywhere or any computer. Cloud connectivity includes Office 365 (a subscription-based software service) and SkyDrive (online file-hosting service).
• An improved Ribbon at the top of the window that organizes commands.
• Compatibility with apps for Word and other Microsoft Office applications, such as dictionaries.
• The new Reading mode, which works great on a tablet, lets you browse a document like you’re reading a book.
• Bookmarks that let you pick up reading right where you left off in a document.
• Capability to open PDF file formats and edit their content just like any other Word document.
• Improved markup tracking to help multiple users keep track of changes in a shared document.
• Improved graphics features to help you work with artwork and pictures you add to a document, including alignment guides to help you position graphics with your text.
• Capability to insert online videos into your documents, such as content from YouTube.
Exploring Word File Types
Before getting started with Word, it’s important to understand Word file types, also called file formats. By default, the files you create in Word are saved in Word’s “document” file type, which means the filenames end with a .docx file extension. If you save a file and name it Bob, its actual full name is Bob.docx with the file extension. Most of the time you don’t see file extensions in Windows unless you want to, but they determine what sort of application can read the file. Different applications read and create different file types. For example, you normally won’t create Word document files in an illustration application, and you can’t turn a Word document file into a graphic file—software applications are designed to make certain types of files, hence the distinguishing file extensions.
However, many apps can read and work with a wider variety of file types than just the ones they are designed to create. Microsoft Word enables you to open other text files, web pages, XML documents, OpenDocument files, PDF files, XPS files, and files created in older versions of Word. You can also save your documents as these other file types.
The default Word document type is mostly backward compatible, which means you can open your Word 2013 files in older versions of Word. The more you work with various types of files on your computer, the easier you can distinguish their types and which applications you can use to view the files.
 Note
Note
Ordinarily, you don’t see file extensions unless you choose to display them. If you want to see them in Windows Explorer or File Explorer (depending on your version of Windows), open the Explorer window (click the Explorer icon in the Windows desktop taskbar), click the Tools menu, and click Folder Options. In the Folder Options dialog box, click the View tab and deselect the Hide Extensions for Known File Types check box. Click OK and you can now view file extensions, even in Word’s Save As and Open dialog boxes.
Starting a New Document
Every time you open Word, you are presented with the option of starting a new document, opening a recent document, or opening another document stored on your computer, SkyDrive, or other location. The Word Start screen, as it is called, is a launching pad for deciding what you want to do in Word. To open a blank document, choose the Blank document option from among the list of templates, as shown in Figure 7.1. Yes, strangely enough, even a blank document is built on a template. You can learn more about using templates in Chapter 9, “Using Templates.”

Note
The term document in the non-digital world generally refers to a written or printed paper bearing original, official, or legal information. In the realm of computers, the term document refers to a file. Typically, computer documents contain text, but not always. Documents can also include files generated by desktop publishing applications, web pages, and more. Just for the record, the files you create in Word are officially called documents.
If you’re already using Word and want to create a new document, follow these steps:
1. Click the File tab on the Ribbon.
2. Click New.
3. Click Blank document, shown in Figure 7.2, or any other template you want to use to start a new file.

Word opens a new, blank document onscreen and you’re ready to go.
Note
To learn more about other basic Word operations—such as saving, opening, and closing documents—see Chapter 2, “Working with Office Applications,” which covers features common to multiple Office apps.
Viewing Multiple Documents
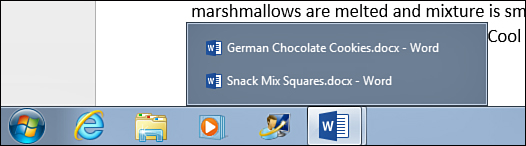
You can open more than one document at a time and switch between them as you work. This is particularly useful when you want to move text from one to the other. You can use the Windows taskbar to swap between open documents. Just move the mouse pointer to the taskbar and hover over the Word icon, as shown in Figure 7.3. A list of the open files appears and you can click the one you want to view.
You can also use Word’s View tab to switch between document windows, as well as control the display of two or more windows onscreen at the same time. Click the View tab, shown in Figure 7.4, to find all the viewing options.

Here are a few ways to view multiple documents:
• To switch document windows, click the Switch Windows button and click the document you want to view.
• To view all open documents onscreen at once, click the Arrange All tool (see Figure 7.5).

 Caution
If you have multiple open documents, viewing all of them onscreen can make your screen pretty crowded. This option works best with only a few open documents.
• To view two documents side by side, click the View Side by Side tool. Click it again to return to one full document window.
Don’t forget—you can use the Minimize, Restore, and Maximize tools in the upper-right corner of the document window to control individual windows. See Chapter 1, “Getting Started with Microsoft Office 2013,” to learn more.