
3. Working with Text
Adding and formatting text is a straightforward process in Microsoft Office. The Home tab in Word, Excel, OneNote, and PowerPoint (and the Message tab in Outlook) are “home” to a solid collection of text-formatting tools, giving you the option to select a font style and size, change text color, or apply bold, italic, and underlining to your text.
If the standard formatting isn’t enough, however, Office also offers sophisticated text formatting and customization. In addition, it automates many formatting tasks if you’re in a hurry or have limited design skills. In this chapter, you find out how to add and format text, text boxes, bullets, numbered lists, WordArt, symbols, and equations. You also discover how to spell check the text in your documents.
Be aware that although working with text is similar throughout Microsoft Office, there are variations between applications. This chapter identifies the most common differences, but you might find other small inconsistencies. If you can’t find a specific feature or button, it could have a different name or location on the Ribbon.
Formatting Text
Office themes include colors, fonts, and other design elements designed to work well and look good together. In this way, Office frees you to focus on your content. For maximum flexibility, however, Office offers numerous options for text formatting and customization.
You can format text in several ways:
• Use the options available on the Home tab. (These are on the Message tab in Outlook.)
• Use the Font and Paragraph dialog boxes to make a number of changes in one place and to set defaults. Open these dialog boxes by clicking the dialog box launcher (down arrow) in the lower-right corner of the Font and Paragraph groups.
• Apply text formatting individually by right-clicking the target text and using options on the mini toolbar.
• Use the text formatting options on the Format Shape pane. (Right-click text and select Format Shape from the menu.) See Chapter 5, “Working with Shapes and SmartArt,” for more information about this pane.
Enhancing Text
The following are some changes you might consider to enhance your documents:
• Enlarge or reduce font size—Before changing font size, be sure that the size is still appropriate for the document. Verify that all text is still readable and appropriate for the type of document.
• Replace one font with another—You might have a particular font you prefer to use in documents. Be careful, however, not to be too creative with unusual fonts. You want to be sure that everyone can read your document clearly.
• Add boldface, italic, or color—Use these to emphasize a point with a certain word or words.
• Add text effects—Apply text effects such as shadow, reflection, glow, bevel, and 3-D rotation.
Using the Formatting Tools on the Home Tab
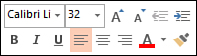
The Home tab includes an extensive collection of text formatting tools. (You find these on the Message tab in Outlook.) Figure 3.1 shows the Home tab in Microsoft Word.

Table 3.1 lists the formatting options in the Font group on the Home tab in Word. These options are similar in other Office applications.
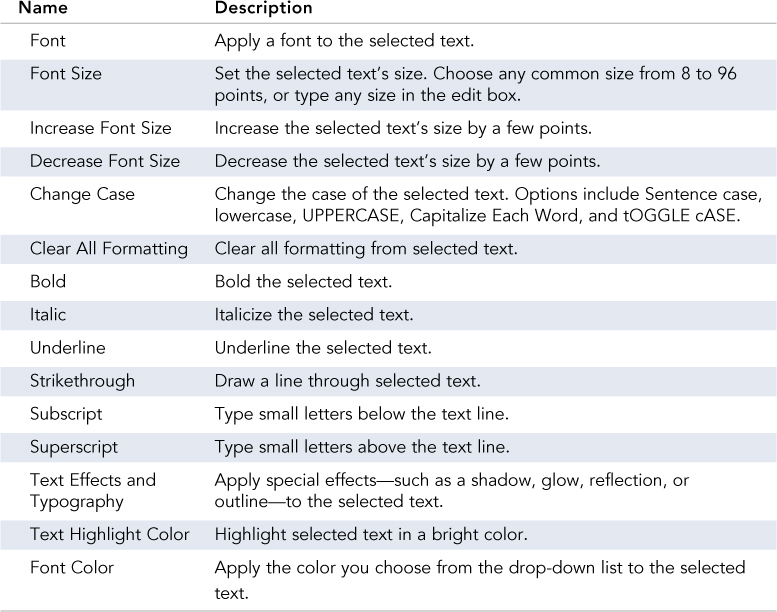
To apply one of these formatting elements, select the text you want to format and click the appropriate button. Clicking the Bold, Italic, Underline, or Strikethrough button a second time acts as a toggle and removes the formatting.
With the Font drop-down list, you can preview what each font actually looks like.
 Caution
Remember that an unusual use of case might be difficult to read, particularly uppercase and toggle case. With text, go for readability and clarity.
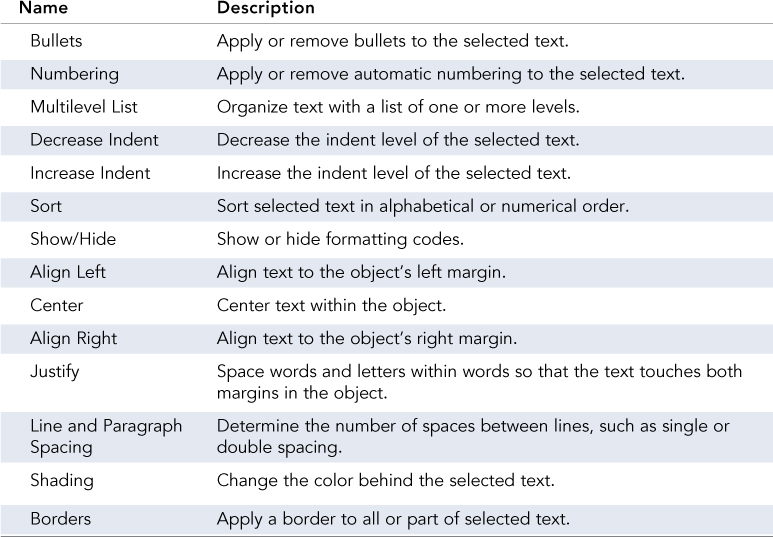
Table 3.2 lists the formatting options in the Paragraph group on the Home tab in Word. These options are similar in other Office applications.
Formatting Text with Options in the Font Dialog Box
The Font dialog box offers some advanced formatting options not available on the Home tab. This feature is available in Word, Excel, and PowerPoint.
To format selected text with the options in the Font dialog box, follow these steps:
1. On the Home tab, click the dialog box launcher (down arrow) in the lower-right corner of the Font group. The Font dialog box displays, as shown in Figure 3.2.
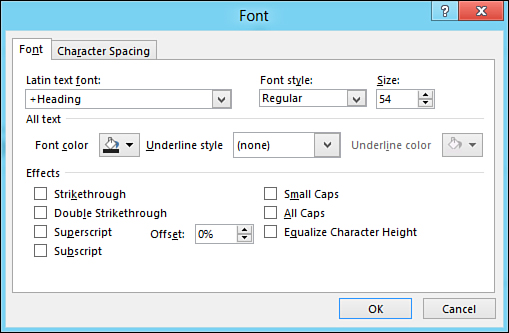
2. In the Font list, select the font you want to use. Scroll down the list to see the available fonts.
3. In the Font Style list, choose whether the font should be regular (neither bold nor italic), bold, italic, or bold and italic.
4. In the Size field, enter a specific font point size in the box or scroll through the available options.
5. Choose a font color from the palette that displays when you click the button next to the Font Color field. For additional color choices, click More Colors from the palette to open the Colors dialog box. See Chapter 4, “Working with Pictures,” for more information about the Colors dialog box.
6. If you want to underline text, select an Underline Style and Underline Color from the drop-down lists.
7. Apply other effects by selecting the check box next to any of the following:
• Strikethrough—Places a horizontal line through the selected text.
• Double Strikethrough—Places two horizontal lines through the selected text.
• Superscript—Raises the text above the baseline and reduces the font size. Sets the Offset to 30%, which you can adjust.
• Subscript—Lowers the text below the baseline and reduces the font size. Sets the Offset to –25%, which you can adjust.
Offset refers to the percentage the text displays above or below the baseline, which is the invisible line on which the characters sit. For example, because subscript text is below the baseline, its offset is a negative number.
• Small Caps—Formats the text in small caps.
• All Caps—Capitalizes the selected text.
8. Click the OK button to close the dialog box and apply the font formatting.
Formatting Text with Options in the Paragraph Dialog Box
The Paragraph dialog box offers some advanced formatting options not available directly on the Home tab. To open this dialog box, select the text you want to format and click the down arrow in the lower-right corner of the Paragraph group on the Home tab. The Paragraph dialog box appears, as shown in Figure 3.3.
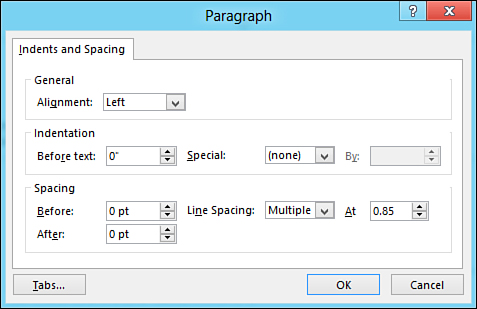
In this dialog box, you can do the following:
• Set alignment, including right-aligned, left-aligned, centered, justified, and distributed text.
• Specify indentation requirements such as hanging and first-line indentation.
• Set line spacing. When a document looks crowded or too sparse, the line spacing, or the amount of space between lines of text, might be at fault. Adjust line spacing until the text looks right.
• Establish tab stop parameters by clicking the Tabs button and setting the tab stop position.
Formatting Text with the Mini Toolbar
To access the mini toolbar, right-click the text you want to format. The mini toolbar appears (see Figure 3.4) either above or below a menu that includes options for Font, Paragraph, Bullets, and Numbering.
The mini toolbar contains selected text formatting buttons, most of which you should be familiar with from the Font and Paragraph groups on the Home tab. These include the following:
• Font
• Font Size
• Increase Font Size
• Decrease Font Size
• Format Painter
• Styles
• Bold
• Italic
• Underline
• Text Highlight Color
• Font Color
• Bullets
• Numbering
Using Bullets
To format text as a bulleted list, select the text and click the Bullets button on the Home tab. (In Outlook, this is on the Message tab.) Office uses the theme’s default bullet style, but you can change to another bullet style if you want.
 Tip
Tip
Consider using a list-style SmartArt graphic instead of a bullet list for greater visual impact. See Chapter 5 for more information about SmartArt options.
For more bullet options, click the down arrow to the right of the Bullets button.
In Word and Outlook, the Bullet Library opens and displays popular bullet options. Click the Define New Bullet link to open the Define New Bullet dialog box, where you can insert a symbol or picture as a bullet.
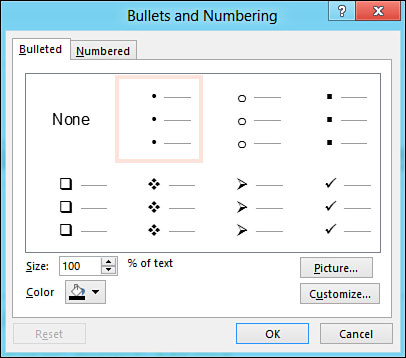
In PowerPoint, a list of bullet options displays. Click the Bullets and Numbering link to open the Bullets and Numbering dialog box where you can select from other bullet types or insert a picture or symbol as a bullet. (Click the Customize button to do the latter.) Figure 3.5 shows the Bullets and Numbering dialog box.
In OneNote, the Bullet Library displays. There are no additional options in OneNote.
 Note
Note
Excel doesn’t offer the Bullets button.
Using Numbered Lists
For a sequence of items, creating a numbered list is a good alternative to a bulleted list. For example, a series of procedural steps works well in a numbered list. You can create numbered lists with actual numbers, Roman numerals, or letters of the alphabet.
To format text as a numbered list, select the text and click the Numbering button on the Home tab. Office applies the default numbering to your text.
If the default numbered list formatting doesn’t suit your needs, click the down arrow to the right of the Numbering button.
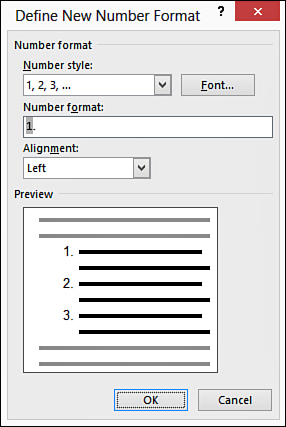
In Word and Outlook, the Numbering Library opens to display popular numbering options, including alphabetical lists. Click the Define New Number Format link to open the Define New Number Format dialog box (see Figure 3.6) with even more choices.
In PowerPoint, a list of numbering options displays. Click the Bullets and Numbering link to open the Bullets and Numbering dialog box to the Numbered tab where you customize your numbered list even further.
In OneNote, the Numbering Library displays. Click the Customize Numbers link to open the Customize Numbering pane where you can specify your exact sequence and format.
Note
Excel doesn’t offer the Numbering button.
Using WordArt
WordArt enables you to create special text effects such as shadowed, rotated, stretched, and multicolored text in Word, Excel, and PowerPoint. Office treats WordArt as both an object and text, so you can apply object formatting such as fills and 3-D as well as apply text formatting. You can also check the spelling in your WordArt text.
Be careful not to overuse WordArt in your document, or it can become cluttered and confusing. Use WordArt only for emphasis.
Inserting WordArt
Inserting WordArt is a simple, three-step process:
1. On the Insert tab, click the WordArt button. The WordArt gallery displays, as shown in Figure 3.7.
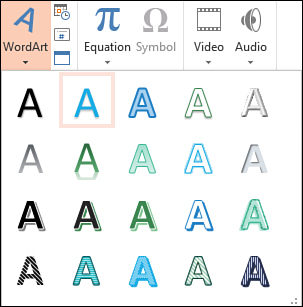
2. Click the WordArt style you prefer. A text box displays.
3. Replace the placeholder text with text you want to format using WordArt.
Tip
In Excel, click the Text button on the Insert tab and select WordArt to access this feature.
Formatting WordArt
If you want to change your initial WordArt selection, you can select a different style or customize it. Many WordArt formatting options are similar to those for shapes. See Chapter 5 for more information about these options.
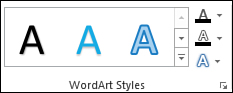
To format WordArt, select a WordArt object and click the Drawing Tools – Format tab. Figure 3.8 shows the WordArt Styles group, where you can do the following:
• Click the down arrow to the right of the Text Fill button to choose another theme color, remove the fill color, or apply gradients and textures.
• Click the down arrow to the right of the Text Outline button to choose an outline color, remove the outline, or specify a weight or dash type.
• Click the down arrow to the right of the Text Effects button to apply special effects such as shadows, reflections, glows, bevels, 3-D rotation, and transforms (unusual text formations).
• Click the dialog box launcher (down arrow) in the lower-right corner of the WordArt Styles group to open the Format Shape pane. See Chapter 5 for more information about the text formatting options available on this pane.
• In Excel and PowerPoint, click the down arrow to the right of the sample styles that display in the WordArt Styles group. The WordArt gallery opens, where you can apply a new WordArt style to selected text or all text in the shape. You can also click the Clear WordArt option to remove WordArt formatting.
• In Word and Outlook, click the Quick Styles button to apply a new style to your WordArt.
If you click the Text Fill, Text Outline, or Text Effects button directly, you apply the default formatting. You must select the down arrow to the right of these buttons to view all available options.
Tip
You can also apply the formatting options in the WordArt Styles group to other text, not just WordArt.
Using Text Boxes
Use a text box when you need to add text in a special location in Word, Excel, or PowerPoint. Text boxes are also useful for wrapping text around an object.
• In Word and Outlook, click the Text Box button on the Insert tab and select Draw Text box from the menu.
• In Excel, click the Text button on the Insert tab and select Text Box.
• In PowerPoint, click the Text Box button on the Insert tab.
From here, click where you want to place the text box and enter your text. Figure 3.9 shows a text box.

FIGURE 3.9 A text box calls attention to something you want to say and enables you to place the text exactly where you want it.
Moving and Resizing a Text Box
If your text box isn’t exactly right when you first create it, you can take the following actions:
• Position the mouse over one of the text box handles to resize it. The mouse pointer displays as an arrow when you resize.
• Position the mouse over the text box outline and drag it to a new location. The mouse pointer displays as a crosshair when you reposition.
• Position the mouse over the rotation handle (the small circle at the top of the text box) to rotate the box. The mouse pointer displays as an open circle when you rotate.
Tip
You can also move and resize placeholders, shapes, and WordArt objects using these techniques.
Formatting a Text Box
You can format text in a text box as you would any other text, including formatting the font, size, color, and style. See “Formatting Text” earlier in this chapter.
You can also format a text box using the Format Shape pane. To view the options available in this pane, follow these steps:
1. Right-click the text box you want to format.
2. Select Format Shape from the menu that displays to open the Format Shape pane.
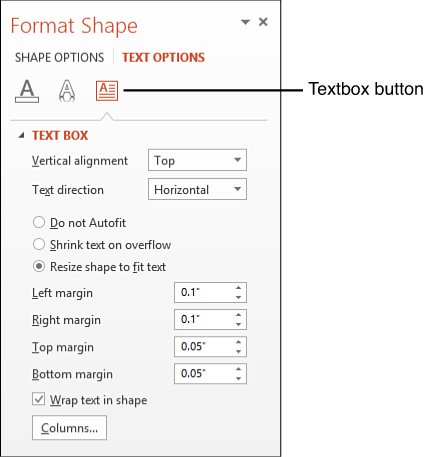
3. In the Format Shape pane, click the Text Options link and then the Textbox button.
4. Modify your text box using the options available on the pane (see Figure 3.10). For example, you can specify alignment, text direction, margins, and more. For more information about these options, see “Using the Format Shape Pane” in Chapter 5.
5. When you’re finished, click the Close (x) button in the upper-right corner of the pane to close it.
Inserting Symbols and Equations
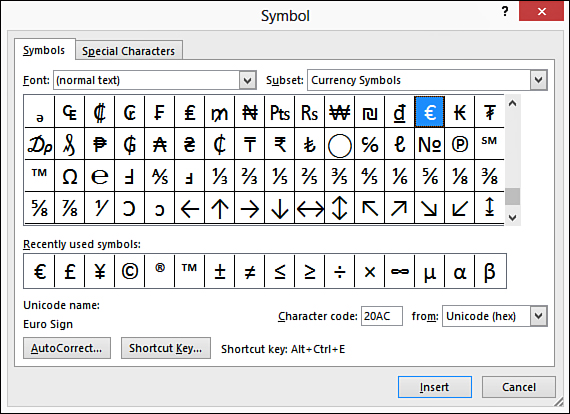
Although the typical computer keyboard is jam-packed with plenty of characters, numbers, and symbols, there are some special symbols you can’t find on a keyboard. These include symbols such as a copyright or registered trademark. You can use Office’s Symbol dialog box to find special characters and other symbols to insert into your documents, including mathematical symbols, special quote marks, and wingdings (tiny graphics). In addition, you can use Office’s equation functionality to enter complex equations in your documents.
To insert a symbol, click the Symbol button on the Insert tab. Word and OneNote display a list of common symbols; click the More Symbols link to open the Symbol dialog box (see Figure 3.11). Excel and PowerPoint open the Symbol dialog box directly. From here, you can select from a large collection of symbols and special characters.
To insert an equation, click the Equation button on the Insert tab. In Word and Excel, the Equation Tools – Design tab opens (see Figure 3.12), which enables you to create any equation you want to add to your document. To insert a ready-made equation—such as the Binomial theorem or the Pythagorean theorem—click the Equation button on the Equation Tools – Design tab and select an equation from the menu that displays.

In PowerPoint and One Note, a list of common equations displays initially. To view the Equation Tools – Design tab, select Insert New Equation from the bottom of the list.
Proofing Your Text
Creating a quality, error-free, and easy-to-read document is a natural objective. Fortunately, Office offers a spelling checker and a built-in thesaurus for finding just the right word. Keep in mind that, although an automated tool can help you catch errors, it isn’t foolproof and doesn’t take the place of thorough proofreading by a real person.
Setting Spelling Check Options
To set options for spelling, click the File tab, select Options, and go to the Proofing tab on the Options dialog box, as shown in Figure 3.13.
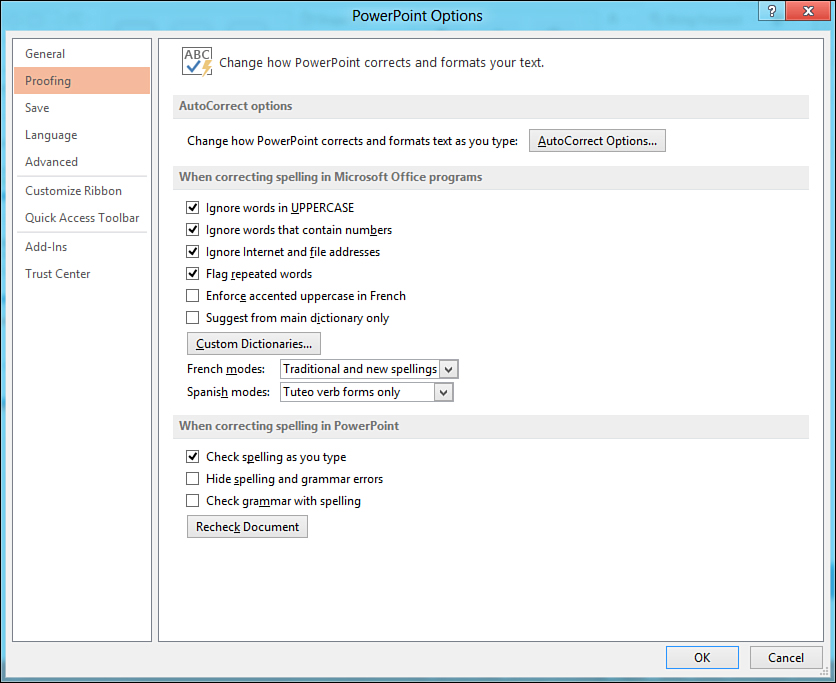
The options on the Proofing tab enable you to specify your preferences when you run the spelling checker, such as ignoring words in uppercase and that contain numbers, ignoring Internet and file addresses, flagging repeated words, checking spelling as you type, checking grammar, and more.
Checking Your Spelling
After you set the spelling options you want, you can spell check your document.
If you set the option to have Office check spelling as you type, you know immediately when you’ve possibly misspelled a word. Office places a red squiggly line under all suspected misspellings, as Figure 3.14 shows. You can either fix the error yourself or right-click to see some suggested alternatives from which to choose.
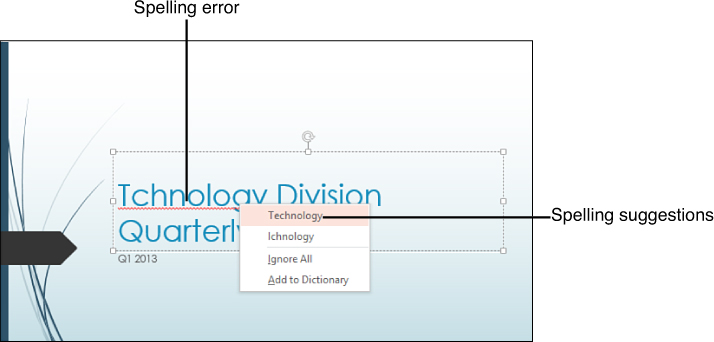
FIGURE 3.14 When you right-click a spelling error, Office suggests some possible alternative spellings.
You can also spell check your entire document at once. To check the spelling in your document, follow these steps:
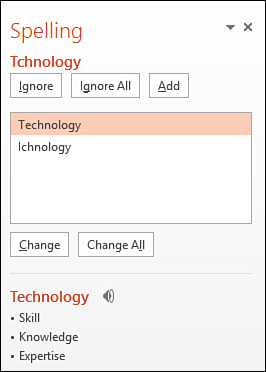
1. On the Review tab, click the Spelling button. (This is called the Spelling & Grammar button in Word and Outlook.) Alternatively, press F7. When Office encounters an error, it displays the Spelling pane, shown in Figure 3.15.
Note
In Excel and Outlook, the Spelling dialog box opens rather than the Spelling pane.
2. Review the word that the spelling checker suspects is misspelled.
3. If the word is correct, click the Ignore button (to ignore this instance of the word) or the Ignore All button (to ignore all instances of the word).
4. If the word is misspelled and the highlighted suggestion is correct, click the Change button (to change the individual misspelled word) or the Change All button (to change all instances of this misspelled word).
5. If you want to add the suspect word to the custom dictionary as a correctly spelled word, click the Add button.
6. If the word is misspelled and none of the suggestions is correct, enter the correct spelling and click the Resume button.
7. Continue steps 2 through 6 until you finish checking your document’s spelling. Office displays a dialog box that informs you the process is complete and closes the Spelling pane.
Looking Up a Synonym in the Thesaurus
If you ever have trouble coming up with just the right word, Office can help you with its thesaurus.
To find a synonym in the thesaurus, follow these steps:
1. Select the word you want to look up. If you can’t think of the exact word, type a word that’s close to it.
2. On the Review tab, click the Thesaurus button (or press Shift+F7). The Thesaurus pane opens.
3. Pause the mouse over the word you want to use. A down arrow displays to the right of this word.
4. Click the down arrow and select Insert from the shortcut menu that displays. Office places the new word in your document.
Tip
A quick way to find a synonym is to right-click the word in question and choose Synonyms from the menu. A list of possible synonyms displays.
Note
The Research pane also offers access to a thesaurus as well as a dictionary, translation tools, and several other research sources. Click the Research button on the Review tab to access this pane.