
3
A Lap around the CAD Track
- Setting up a simple drawing
- Drawing some objects
- Zooming and panning in your drawing
- Editing some objects
- Plotting your drawing
The previous two chapters introduce you to the AutoCAD world and the AutoCAD 2012 interface. The chapters that follow present the techniques that underlie good drafting practice. By now, you're probably eager to start moving the crosshairs around and draw something! This chapter takes you on a gentle tour of the most common CAD drafting functions:
- Setting up a new drawing
- Drawing some objects
- Editing those objects
- Zooming and panning so you can view those objects better
- Plotting (printing) the drawing
Much of the stuff in this chapter may be mysterious to you. Don't worry — I tell you where to look for more information on specific topics. In this chapter, you're simply taking AutoCAD out for a test drive to get a feel for what it can do. Go ahead and kick the tires — and don't worry about putting a dent in the fender!
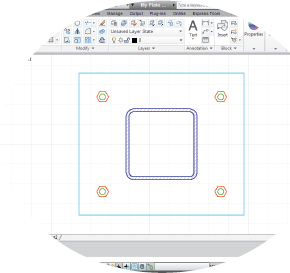
In this chapter, you create a drawing of an architectural detail — a base plate and column, as shown in Figure 3-1. Even if you don't work in architecture or building construction, this exercise gives you some simple shapes to work with and demonstrates commands you can use in most drafting disciplines.
Throughout this book, I show AutoCAD running in the Ribbon-based Drafting & Annotation workspace that was introduced in AutoCAD 2009 and present in both AutoCAD 2012 and AutoCAD LT 2012. Likewise, I tell you where to find commands and what to select using the Ribbon.
 If you're familiar with earlier versions of AutoCAD and the post-AutoCAD 2008 user interface looks just too weird, you can strap on some training wheels while you're getting used to it. Just click the down arrow at the right end of the Quick Access Toolbar (by default, it appears to the right of the Workspace drop-down list) and choose Show Menu Bar. If you're really and truly a Luddite where the Ribbon is concerned, you can revert to the “classic” way of doing things by either opening the Workspace drop-down on the Quick Access Toolbar, or by clicking the Workspace Switching button on the status bar and choosing AutoCAD Classic (AutoCAD LT Classic in that version). Presto change-o — suddenly, it's 2008!

Figure 3-1: How base is my plate.
Although the drafting example in this chapter is simple, the procedures that it demonstrates are real, honest-to-CAD-ness, proper drafting practice. I emphasize from the beginning the importance of proper drawing setup, putting objects on appropriate layers, and drawing and editing with due concern for precision. Some of the steps in this chapter may seem a bit complicated at first, but they reflect the way that experienced AutoCAD users work. My goal is to help you develop good CAD habits and do things the right way from the very start.
The step-by-step procedures in this chapter, unlike those in most chapters of this book, form a sequence. You must do the steps in order. Figuring out how to use AutoCAD is a little like figuring out how to drive, except that with AutoCAD, you're free to stop in the middle of the street and take a break.
 If you find that object selection or editing functions work differently from how I describe them in this chapter, you (or someone else) probably changed the configuration settings on the Option dialog box's Selection tab. Chapter 10 describes these settings and how to restore the AutoCAD defaults.