Defining a Background
While your model might now be looking a little more realistic with some user-defined lighting and custom materials assigned to it, its setting might look a little … empty. You can assign backgrounds to fill that empty space beyond the 3D model in your scene. A background is a property of named views, and you can set them up in the View Manager dialog box (I cover the VIEW command and View Manager dialog box in Chapter 12). You can define a background as a solid color, a gradient (two or three colors), a raster image, or a sky with a sun (available only when using photometric lighting).
 Follow these steps to create a new named view and assign a background to it:
- On the Views panel of the View tab, click Named Views.
The View Manager dialog box appears.
- Click New to display the New View/Shot Properties dialog box.
For a refresher on creating named views, refer to Chapter 12.
- In the Background area, click the Default drop-down, choose an option to override the default background, and then click OK.
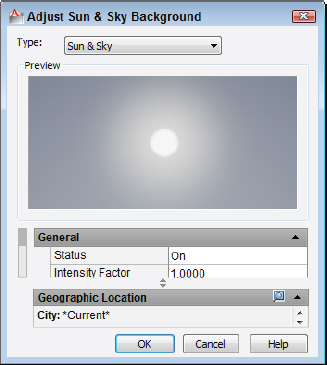
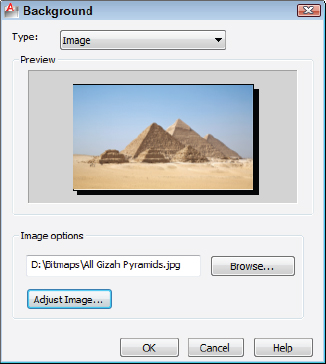
Choose Solid or Gradient if you want a studio-type scene, or choose Image if you have a suitable raster image to highlight your model. Any of these options displays the Background dialog box where you make your settings (see Figure 23-7). Choose Sun & Sky if you want to place your model in the great outdoors (and it's always fair weather in AutoCAD!). Choosing the last option displays the Adjust Sun & Sky Background dialog box, as shown in Figure 23-8.
- After the background is defined, select the view from the Views tree and click Set Current.
- When the View Manager closes, the new background should be displayed.
For more information on the View Manager, see Chapter 12.
 If you don't want to create a named view first, enter the BACKGROUND command at the command line to display the Background dialog box.