John Bavaro
21st Century Fayum Mummy Portraits
Chris Fayum Portrait
BY JOHN BAVARO
Artist, Professor
Pennsylvania, USA
Here we’ll see how an artist might approach a subject with a very specific intent, and a method to match. We’ll learn the steps to replicate art from another century.
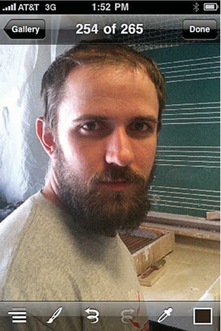
In Stage 1, I try to approximate the light and pose from antiquity, and that tries to takes into account that there was no artificial light in CE 100. The portrait sitters for the original Egyptian Fayum portraits most likely posed during a certain time of day, in a window of time when the light was appropriately even and not too raking.
My model Chris posed near an open window for two quick iPhone snapshots. The warm, diffuse light hit his left side, while the cool daylight illuminated his right side, and that seemed like the perfect conditions for the painting.
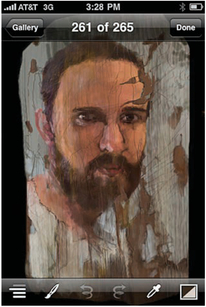
I imported the photo into “Brushes”, and painted with the brush spaced at about 30 percent, and at full opacity, then blocked in fields with the 25 brush by using the eyedropper to match local colors in the face. The result is a rough layer, with openings in it. I often save this layer as a separate painting to eventually merge its rough strokes back into the final piece.


Paint from general to specific, bringing the brush down in size, even to the #1 brush, as we put in details such as eyes, lips, and even mustache hairs. I find that at this point using the tool at 100 percent opacity is too heavy-handed, so we set the opacity at 40 percent or less so that we can layer semi-transparently.


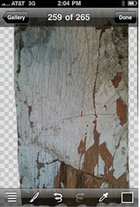


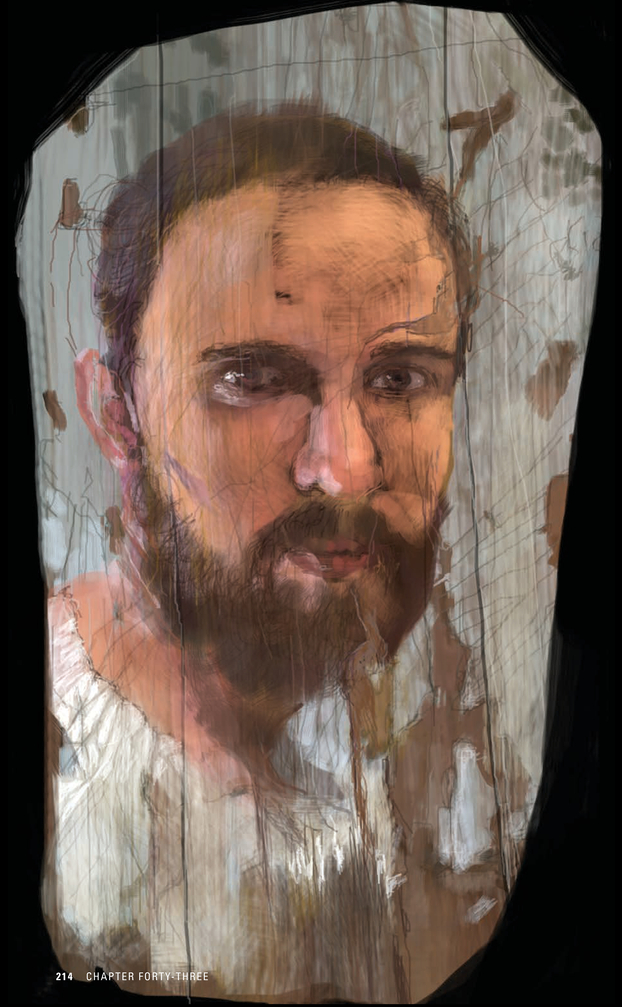
Next step, we import a photo of a dilapidated piece of painted wood into “Brushes” on its own layer. The cracks and fissures prove perfect for my process, so we create a empty layer, place it below the photo layer and make it active to paint on. By reducing the opacity of the top photo layer, we “onion-skin” a replica, crack by crack, texture by texture, into a copy and then discard the original photo layer. Using the eraser tool, we begin to soften up the edges of the board to indicate ancient wear and tear.
Finally it was time to merge the two paintings, but first I had to place the cracks on top of Chris’s face in a way that made him appear to recede. To do this, I erased “blindly” on his face layer, while it was submerged a layer down. I erased away little “rivulets” with the #1 brush to cause “spider cracks” on his face. I then brought this layer to the front, did some touch-up and clean-up, and then “weathered” the edges of the board more with the eraser tool. To capture a likeness is the first challenge of any portraitist and one that I’ve pursued my whole artistic life, but I find the second challenge

of making illusionistic, tromp l’oeil spaces to be the real envelope I try to push with my mobile art, especially for a piece like this, done on the small surface of my iPhone.