
Helene Goldberg
Abstract Calm
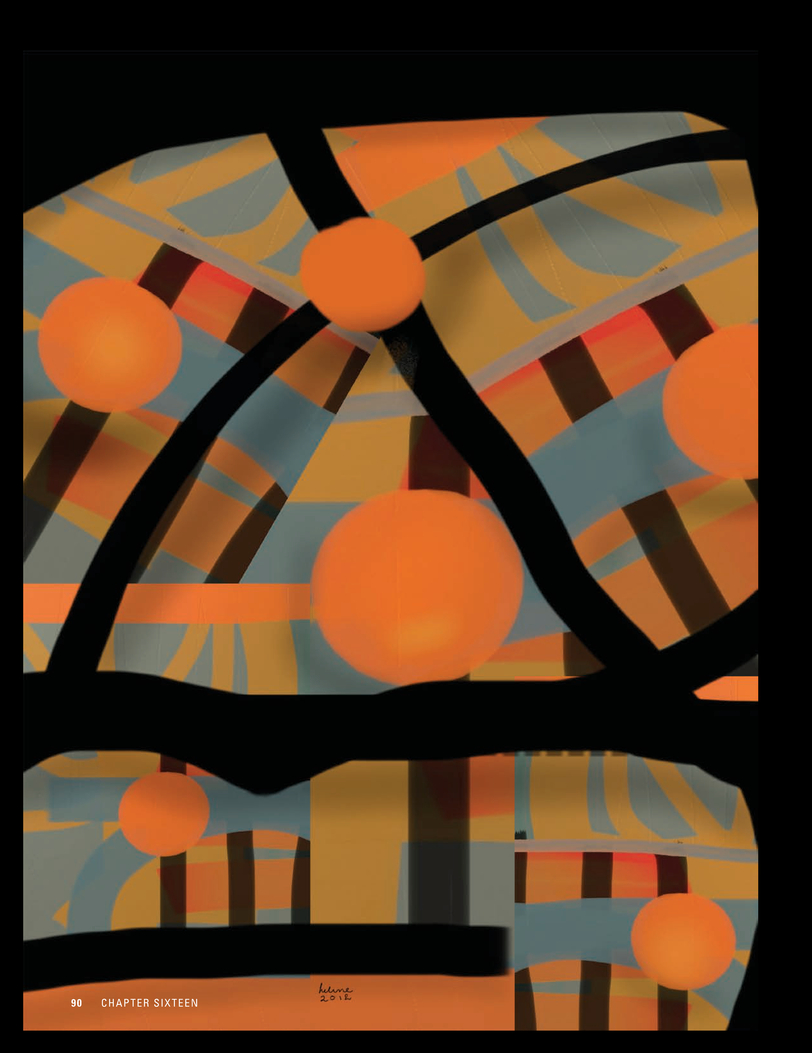
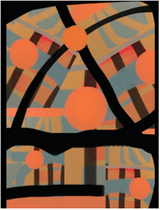
Love for 3 or more Oranges
HELENE GOLDBERG
Psychologist, Artist, Writer, Musician
California, USA
This artist finds personal satisfaction and international encouragement as the upside to mobile art. She shares her technique creating her pieces, Love for 3 or more Oranges and Afloat.

Step 1
I started out in “ArtRage” and began painting a gray undercoat layer in a slate gray/green using the widest roller brush.
Step 2
I continued with using a combination of the roller brush, oil brush, and even watercolor brush to create a pattern in gold, orange/red, and black on the second layer.


Step 3
In the third layer I added an orange circle using the roller brush.

Step 4
I added some more orange and blue/gray to unify the composition and saved it to my camera roll.


Step 5
In “Brushes” I used different layers to create new effects. To begin with, I duplicated the main image four times, pinched it down, and used the + icon, located in the Layers palette, to move it around. That way I could use my own painting to create a collage composition. I placed the second layer with the now four images over the original and then opened a new layer. In that layer, I painted the black lines that suggest a tent frame.

5a Two duplicates of the original moved around.

5b Duplicated again and arranged in reverse.
5c Image with black lines pulling the composition together.
Step 6
Final image with shading: I used the airbrush, painting with a soft, semitransparent brush to successfully imply shadows and dimension.

Screenshot of “Brushes” layers.
BY HELENE GOLDBERG
Psychologist, Artist, Writer, Musician
California, USA
Thousands of iPhone and iPad paintings later, Helene Goldberg displays an incredibly smooth and sophisticated path to abstract heaven.

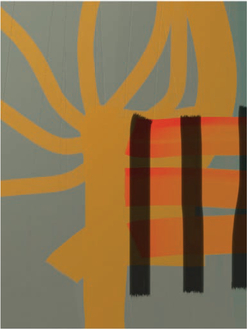
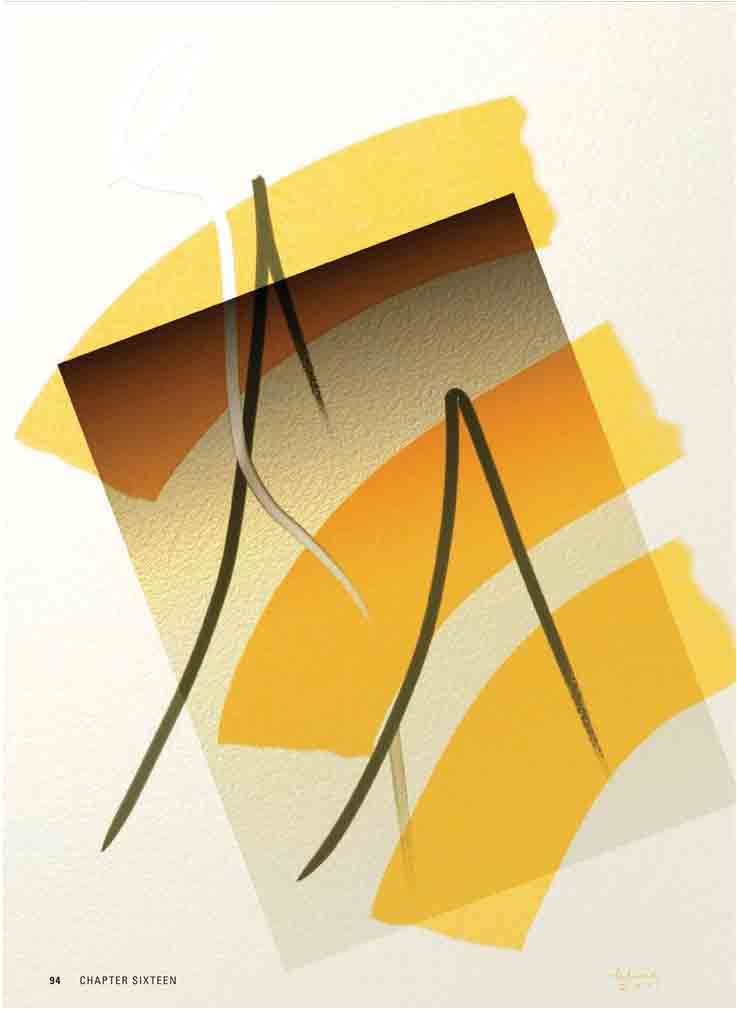
Step 1
I wanted to experiment with creating a simple painting in the app “ArtRage” and use other apps to unify it and give it a sense of drama. In “ArtRage”, I painted a pattern that consisted of three semi-curved brush strokes or swishes using the roller brush. Then I used the watercolor brush to make three swipes in gray/green and white to bind the yellow swashes together. I saved it to the camera roll.
Step 2
I created a blank blue/gray gradient layer in “SketchBook Pro” and saved it to my camera roll.

Step 3
In the third layer I added an orange circle using the roller brush.

Step 4
Still in “Brushes”, I opened the image I saved from Step 1, added the gold gradient, again as an overlay, merged them and saved the image to my camera roll.


Step 5
I opened the image in the app “Metal Me”, which creates metal textures. I played with some gold foil images but ended up with a more conservative silver etching.

Step 6
Now back in “Brushes”, I open the painting from Step 4 and add another layer of the original gradient, resized, repositioned and applied to the composition in the Multiply mode. That punched up the color and created sense of a shaded plane. It also dramatically added contrast and density to the original paper texture we created back in Step 1.


Step 7
I added another layer of gold in screen mode to give a warm glow to the entire painting and intensify the colors.
Step 8
As a final step, I added the “Metal Me” version as a new layer and set in the screen mode at 50 percent opacity. This allowed me to lighten the mid-tones while leaving the darks alone.
This is the final painting. It suggested sunwashed sails and I called it Afloat.