
Dan Hoffman
Marine Biology
Marine Biology
BY DAN HOFFMAN
Artist, Creative Strategist
New Jersey, USA
Dan Hoffman is a freelance creative strategist working in interactive media. He lives in South Orange, NJ, USA. More of his mobile art can be found on Flickr and in the iCreated iPhone app and gallery.

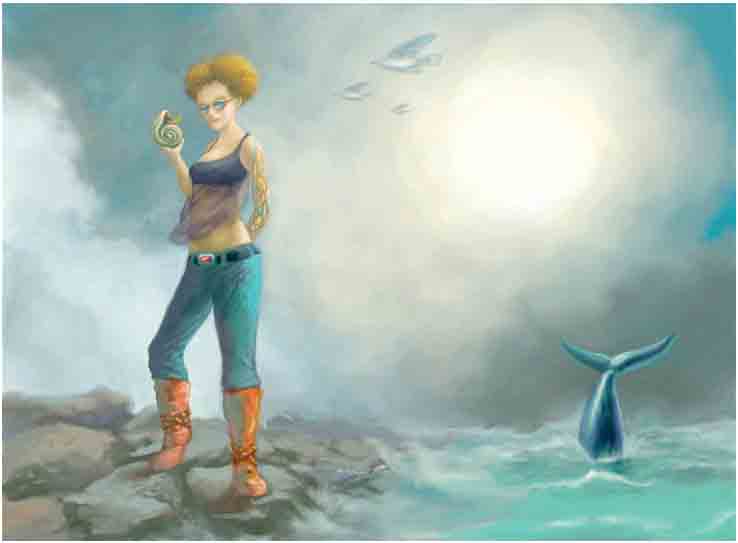
Marine Biology started with a pretty loose, almost abstract concept. I envisioned a rather foggy, mysterious seaside landscape, and a female figure standing on a rocky jetty extending away into the distance. (The painting’s title came at the end of the process, after improvisation added some elements that weren’t even remotely part of the original concept.) Since I was much clearer on the atmospherics than on the specifics of the figure, I decided to start by blocking in the sea, sky, and jetty. Knowing I might want to change direction with any of these elements later, I painted each one on a separate layer.
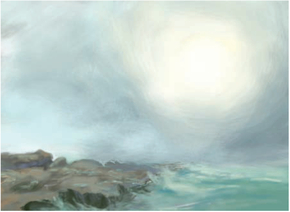
The Block-In of the Background Landscape
The ocean, jetty, clouds, and sunlight are each on a separate layer. The first major “improv” was to the sky. I started to feel I wanted to see the sun peeking out of the gloom. I started a new layer, and I liked that bright splash of sunlight so much that I started to paint some blue sky around it. Eventually, the atmospherics changed from fog and gloom to a dramatic sky with the sun breaking out through receding storm clouds.
Having redone the sky, I needed to rework the sea. Starting on a new layer, I painted over the grayer, murkier original with more bright yellow-greens, as the sunlight shone through the peaks of breakers and the shallows alongside the jetty.

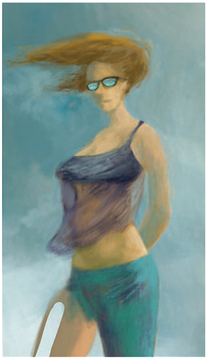
At this point, I was pretty happy with the landscape (and skyscape), so it was time to start in on the central figure standing on the jetty. I started by blocking in a woman in a full-length skirt and hooded top, a mysterious figure covered from head to toe by clothing. But I realized pretty quickly that this figure didn’t quite mesh, thematically, with the brighter, more dynamic direction I had taken with the landscape. She looked like someone bracing for a storm that had already passed.
As I began rethinking the figure, I started wondering what she was doing out there on the jetty in the first place. The concept began to shift from a mysterious but passive wanderer to someone more actively engaged in exploring the seaside environment. I hid the layer with the hooded figure and started blocking in my new character, shedding the hood and long skirt for rugged jeans and boots and a funky top. Details of the character continued to evolve through improvisation on multiple layers.
Evolution of a Character
Layers were turned on and off, added and deleted repeatedly as I worked through different ideas.


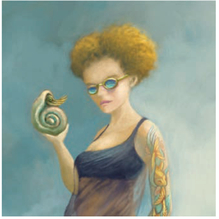
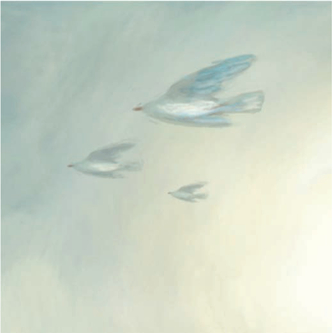
The birds, whale, and nautilus were added near the end of the painting process. Having created my seaside explorer, it seemed her explorations should be rewarded by adding some aquatic creatures to the environment. The nautilus held by the character, the seabirds flying overhead and the whale sounding in the background were all layered additions put in near the end of the work.

by Dan hoffman
Artist, Creative Strategist
New Jersey, USA
This tutorial makes the light source the first priority, and then takes a wild turn through this artist’s imagination using the app “Procreate”.

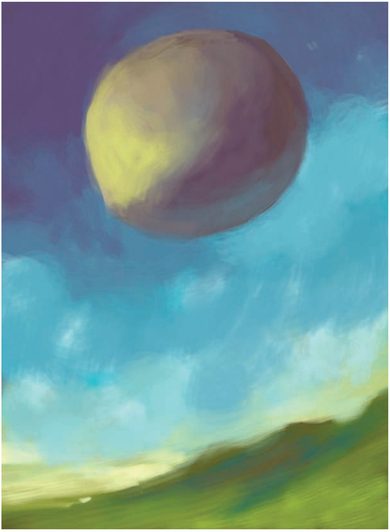
Figure 1 shows this initial block-in of the balloon and the hillside using large brush strokes
Deciding on the Light Source
Although the painting won’t actually have a sunset in it, I decide that sunset is the time of day I want to depict. The sun will be low in the sky coming from the lower left, so the painting should have a fairly dramatic mix of light and shadow, depending on where an object is in relation to the low sunlight.
Starting the Balloon on a Separate Layer
Having established the basic idea of where the light is coming from, I start painting in the balloon. I keep in mind that, since it’s sunset, the balloon will actually be above the light source. So the tone of the balloon on the left side of the painting gets lighter further down the curve. The darkest area of the balloon will be in the upper right corner, the point farthest from the light. Since I’m figuring out the painting’s various elements on the fly, I’ve used the Layers feature of “Procreate” to put the balloon on a separate layer from the hillside so I can make major changes to either element easily.
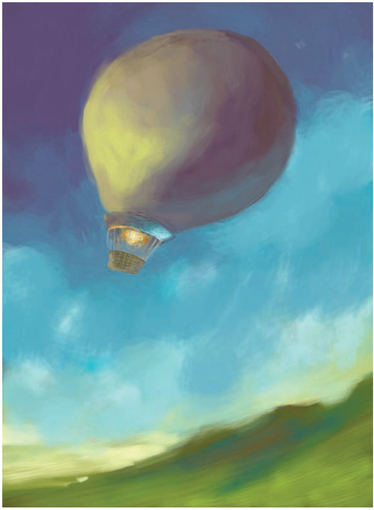
Figure 2 shows the painting with those new details starting to take shape.
Starting to Fill in the Details
Having blocked in the major elements of the painting, I now start to work in some key details: I add the basket below, the gas burner that keeps the balloon afloat, and the mouth of the balloon. I also start to add some variety in color and light to the sky, giving it more of a sunset-type look.
To go along with the altered sky, I soften the details of the hillside, suggesting more light coming over the top, and subtler shadows on the far side. I also refine and smooth out the light on the balloon itself.
The Eye in the Sky
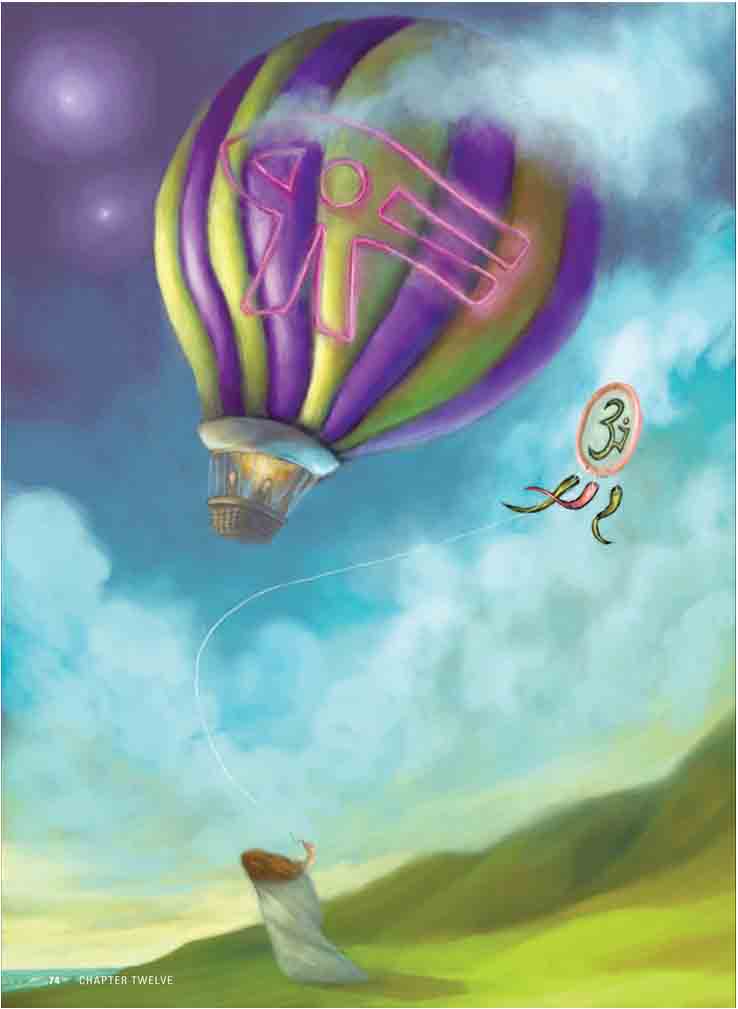
In Figure 3 I’ve added two new major elements—the eye graphic on the balloon and the kite being floated up to “greet” the balloon. I struggle a bit with the eye, and then put it aside for the moment to work on the kite (adding a new layer to work the kite without disturbing the balloon and eye). After playing around with various diamond-shaped kite designs, I get a bit more ambitious and go for the more dynamic, colorful kite design in Figure 3. The symbol on the face of the kite is Ajna, a tantric symbol associated with the “third eye” and meditation. Although I’m still not that happy with the eye, I decide it’s time to start a new layer for whoever is flying that kite.

Adding the Kite Flyer
I don’t really start out with a clear idea of the person flying the kite, but at moments like these ideas from my favorite artists often take over. (You can call that “inspiration” or “stealing”, whichever you prefer.) I’m a big fan of the pre-Raphaelite artists, like Edward Burne-Jones, J.W. Waterhouse, and Dante Gabriel Rossetti. Among other things, their work is full of mysterious, red-haired women traipsing around strange landscapes in long flowing gowns (not the most practical thing for hiking the windswept moors, but it looks great). So, not surprisingly, my kite flyer ends up being a somewhat pre-Raphaelite figure. Aside from adding the figure herself, I also add her shadow, to better integrate the figure and the hillside, and to be consistent with my light source.

Figure 4 shows the completed kite flyer painted in.
Swapping Eyes
After finishing my kite flyer, and taking a look at the overall picture, I decide that the big, gaping eye on the balloon is just not cutting it. The overall tone of the image is soft and romantic, but the eye looks like something out of a horror movie. So, having already used a vision-related symbol on the kite, I decide to do the same on the balloon. After a bit of research, I discover the ancient Egyptian Wedjat hieroglyph— the “Eye of Horus”. So I paint over the original eye, add a layer, and paint a nice pink neon Wedjat in its place. As I paint in the new eye, I also make sure to add some variation in lighting and color, to integrate the symbol with the lighting I’ve already established on the surface of the balloon. The completed painting is a serendipitous mash-up of Tantric, pre-Raphaelite, and ancient Egyptian influences.