
Patricio Villarroel
Masterworks: Ridiculous Room + autobiography (23)

Ridiculous Room
BY PATRICIO VILLARROEL
Artist, Musician, Teacher
Paris, France
iPhone / iPad art master Patricio Villarroel works with multiple apps and finds a new way to construct or deconstruct another batch of abstract images every day. The next few pages detail how he sparks a visual idea, moves images through different apps, and winds up in some wonderful, magical place.
Step 1
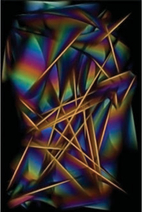
I begin this tutorial by playing in the app “Artisan”. This abstract art generator has controls for speed, size, shape, color, and transparency that allow you to create an infinite number of variations. Do a screenshot on the iPhone to save your favorite to the camera roll. I chose this one to work with as the background for the piece.
Step 2
I import the background to the app “NPtR”, and combining the techniques “two finger quick” and “one finger slow” use the square tool to reveal sections of our background. Save this to the camera roll.

Step 3
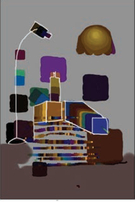
Open the background in the app “Brushes”, and create two other layers to place on top as shown. I make our top layer active (highlighted in blue), and paint the floor with an opaque brown shade.

Step 4
While leaving the layers in this order, I select the middle layer to make it active, and paint selected areas like the lamp and candle and start some outlining using a small white brush. Take the opacity level of this whole layer down to 50 percent to create subtle variations in overlapping areas of the piece.

this room would have to be my room
there seems to be a video camera in it,
I don’t know what to do
the light is peaceful the classical picture in
the wall is one
I made 3 centuries before
How will I rest?

Step 5
I finish outlining the piece on the top layer now, and do a final adjustment of the transparency level of the middle layer. Finally, I sign the piece, save it to my camera roll and post it to Flickr.
BY PATRICIO VILLARROEL
Artist, Musician, Teacher
Paris, France
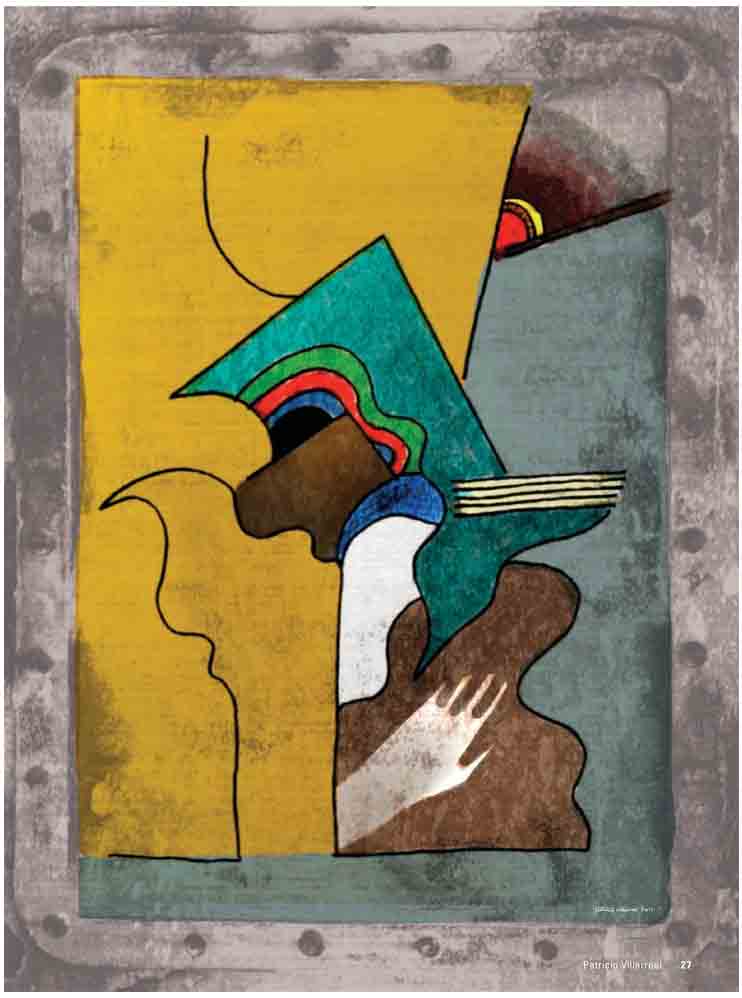
Patricio Villarroel takes us step by step through this graphic composition, from its rough pencil-drawing beginning to a most elegant ending.

Step 1
Graphite 9B is my way of saying, “pencil drawing on paper”. Using my iPhone and the app “Genius Scan”, I photographed the drawing, adjusted the perspective and saved it to my camera roll. I opened it in the app “Photogene” to adjust the contrast.

Step 2
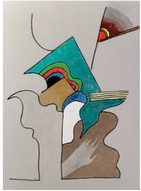
I opened the drawing in the app “ArtRage” to place the image on a textured background, established the colors of the piece and then saved it.
Step 3
Next, I opened the drawing in the app “GrungetasticHD” and after experimenting with the various settings and borders, fell in love with this one and saved it to the camera roll.


Step 4
Finally, I settled into the app “Brushes” to create my composite and finish painting. The first layer is the saved image from Step 2, resized down to about 80 percent.
Step 5
Still in “Brushes”, I placed the image from Step 3 over the drawing as a new layer at 50 percent opacity, letting the grunge show through and creating a great border.
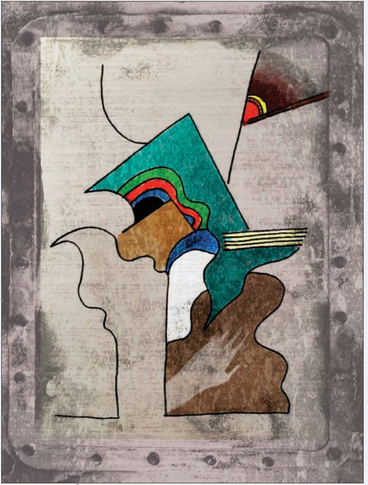
Step 6
On a separate layer, but still placed below the grunge layer, I finished the piece by painting areas in gold and a dull teal color. I signed the piece, saved it, and posted it to my Flickr photostream.

