
Deborah McMillion Nering
Solar Flare Highlights
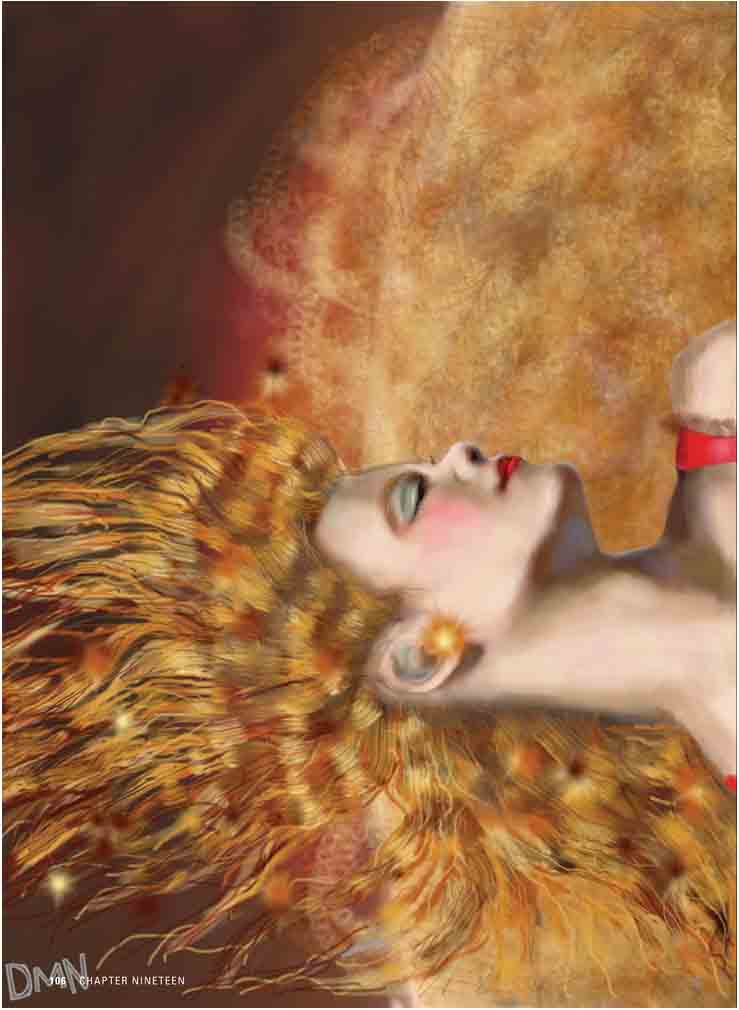
Solar Flare Highlights
BY DEBORAH MCMILLION NERING
Artist
Arizona, USA
This talented artist creates this piece in the app “SketchBook Pro for iPad”, and shows us how using layers for compositing helps add dimension to our fiery portrait.

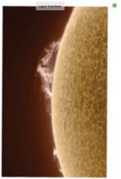
Step 1
Begin by importing a photograph of the sun.
Step 2
Rotate and resize it to fill the canvas. I’ll use this as a guide to paint the solar flare for the background.

Step 3
Duplicate this layer so we have two suns. Erase the background black of the upper layer and duplicate it again. Now there are three layers.

Step 4
I fill the layer with textures and use the eraser to “draw” holes in the top layer. Creating holes lets the detail in lower layers peek through, creating a sense of depth and complexity.


Step 5
I use various textured brushes to paint contrasting patterns on the middle layer.

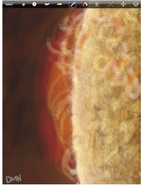
Step 6
After creating a third texture on the lowest layer, I make the upper layers semi-transparent. The resulting blend of transparent areas and semitransparent brush strokes combine to create the finished effect.


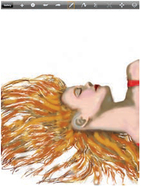

Step 7
I start the figure in a new layer by blocking in with an opaque brush. Base contours and shadows are added using a slightly transparent, neutral color with a slightly feathered brush.

Step 8
Using progressively finer, more transparent brushes, I slowly build up the detail, highlights, and shading. Repeatedly going over the same area with progressively more transparent and softer brush strokes gives the sense of blending and glazing that you would achieve in oils.

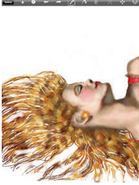
Step 9
With the figure’s face nearly complete, I now want to develop her hair. I do this using multiple layers to create complexity and a sense of depth, much the way it was done for the background.

Step 10
I begin by duplicating the layer. Starting in the lower layer, I add dark, soft tones using a thick feathered brush.

Step 11
Working in the upper layer, I start using streaky brushes to create hair-like texture. I then alternately use the eraser to create holes in between strands, while adding successively finer detail and streaks. Towards the end, I add highlights and accents.
Step 12
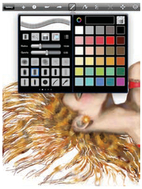
A very powerful feature of “Sketch-Book Pro” is the Preserve Transparency feature, not available on the iPhone version. It allows you to draw in a layer without “painting over” the transparent portion of that layer.

This feature allows you to touch up, tone, blend, and highlight the edges of figures and fine detail (like hair) without obscuring the layers underneath.
Step 13
With all layers visible, add initials on a separate layer to finalize the piece, and save it to the camera roll.
BY DEBORAH MCMILLION
Artist
Arizona, USA
Deborah McMillion was born in Portsmouth, Virginia. The daughter of a naval officer, she earned a fine arts degree from Arizona State University before moving to central Arizona to run the Rural Arts Project, a fine arts serigraph printshop for non-profit organizations in Pinal County.
After returning to Phoenix, she joined MARS Artspace, exhibiting as an artist. Her fifteen-year tenure at MARS included five years as the organization’s resident and curator.
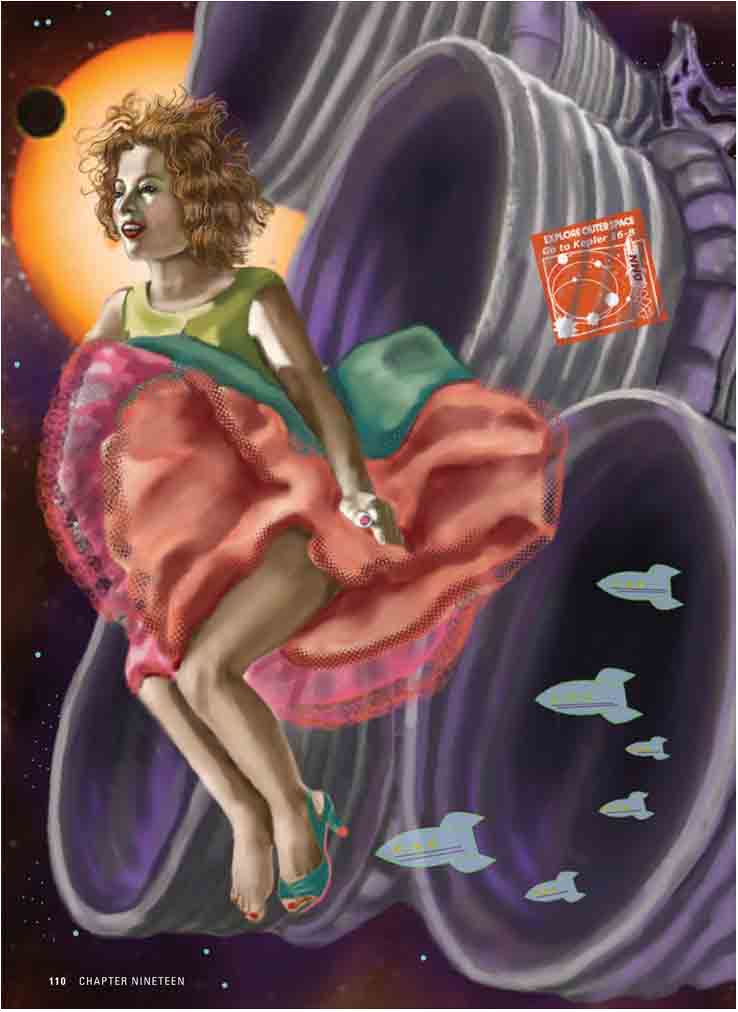
Deborah McMillion has mastered all of the painting apps to create a distinctive body of work. Here, using “SketchBook Pro”, she shows us her methodology to create the piece Conservation of Momentum.

Step 1
I imported and smoothed an image of a gradient sun and planet.

Step 2
I used the circle tool to create additional “bodies”.

Step 3
Finally, to finish the background, I used a single-pixel white brush to add stars.

Step 4
I import an image of the figure to use as a cartoon and place it on a separate layer.

Step 5
Drawing in a new layer above the image, I make a line drawing from the reference figure.
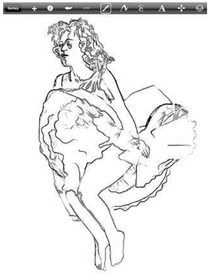
Step 6
I can now discard the reference image layer from Step 4 and can begin to paint the figure.

Step 7
I begin by blocking in the colors and then build up textures and highlights.

Step 8
I use a multiple line brush to texture hair, first by painting it and then by turning that brush into an eraser and scratching those lines out.

Step 9
Multiple layers of that technique and with the “lace brush” creates a natural-looking chaos. Once that is done you can then add lines or erase with fine lines till you get the detail you want. I also do layers of hair, lock transparency, and paint each layer in different colors. By using the Multiply mode these blend in and out of each other for a more natural look. For skin, the last layers are done with an airbrush at the thinnest transparency.
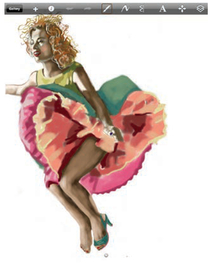
Step 10
Afterwards, details like eyelashes, specular highlights, lip definition are finished out. For the dress I also set the eraser for the thinnest setting to erase areas of the skirt to show background where the background light comes through. In iPad art you don’t have to paint it to look as though it’s sheer; instead, you make it sheer.


Step 11
I import a photograph of a rocket engine and use that as a guide to draw the nozzles.

Step 12
The little rocket ships were drawn freehand, vertically, sometimes using the mirror tool to create symmetric shapes, and placed on their own layer. They were then rotated, duplicated, and scaled to create a variety of sizes, creating a sense of depth.

Step 13
The stamp was inspired by the NASA patch shown (top). I used the line, oval, and shape tools to create a similar motif (middle). I then added text and used the eraser tool to create a worn look (bottom).
Step 14
The final step is to simply layer and position the elements to create the final composition.