So far, we have seen how to set up notification rules and create custom events. The last part of the puzzle is the e-mail templates used by JIRA while sending out notifications.
In this recipe, we will create our own e-mail templates that can be used by custom events.
All mail templates are stored in the <JIRA_INSTALL>/atlassian-jira/WEB-INF/classes/templates/email directory, and generally, for each event in JIRA, there are three template files:
- The Subject template: This is the template file for the e-mail's subject line, which is stored in the
subjectsubdirectory - The Text template: This is the template file for e-mails sent in the text format, which is stored in the
textsubdirectory - The HTML template: This is the template file for e-mails sent in the HTML format, which is stored in the
htmlsubdirectory
To start creating our own e-mail templates, we first need to create the three files mentioned in the previous list of template files and place them in their respective directories. Take special note that all three files need to have the same filename with a .vm extension.
We will start with the subject template as follows:
- Create a new file with the following code snippet:.
#disable_html_escaping()
$eventTypeName - ($issue.key) $issue.summary
- We now need to create the body of the e-mail, keeping in mind that we have to create two versions: one for text and one for HTML. The following snippet shows the HTML version; for the text version, simply remove the HTML markups:
#disable_html_escaping()
Hello $issue.reporterUser.displayName,
<p>
Your request <a href="">$issue.key</a> has been approved, with the comment below:
</p>
<blockquote>
<p>
$comment.body
</p>
</blockquote>
<br/>
Internal IT team
- After we have created all three template files, we need to register them in JIRA so that they can be selected while creating custom events. To register new e-mail templates, open the
email-template-id-mappings.xmlfile in a text editor; you can find the file inside the<JIRA_INSTALL>/atlassian-jira/WEB-INF/classesdirectory. - The
email-template-id-mappings.xmlfile lists all e-mail templates in JIRA, so we need to add a new entry at the end as follows:<templatemapping id="10002"> <name>Issue Rejected</name> <template>issuerejected.vm</template> <templatetype>issueevent</templatetype> </templatemapping>
There are a few points to note here:
- The template ID value needs to be unique.
- You can give any value to the
<name>element, but it is good practice to keep it consistent with your event in JIRA. - The
<template>element should have the name of the custom template files we have created. Since we can have only one<template>element, all three files need to have the same filename. - The
<templatetype>element needs to have the value ofissueevent.
Once you have added the entry and saved the file, you will need to restart JIRA for the changes to be applied.
JIRA's e-mail templates use the Apache Velocity (http://velocity.apache.org) template language to display dynamic data. Each template is a mix of static text (with or without HTML markups) and some Velocity code. If you do not need to have dynamic contents, then you can have only static text in your templates.
In our previous examples, every time you see the dollar sign ($), such as $issue.key, it is a piece of Velocity code. The $ sign indicates getting a variable from the Velocity context, and the variable name is the word that comes directly after the $ sign; so, in this case, it is issue. The period (.) means getting the value specified from the variable. So, $issue.key can be read as "get the value of key from the variable issue", or in other words, "get me the issue's key".
JIRA exposes a number of variables in its Velocity context for e-mail templates; you can find the full list at https://confluence.atlassian.com/display/JIRA041/Velocity+Context+for+Email+Templates.
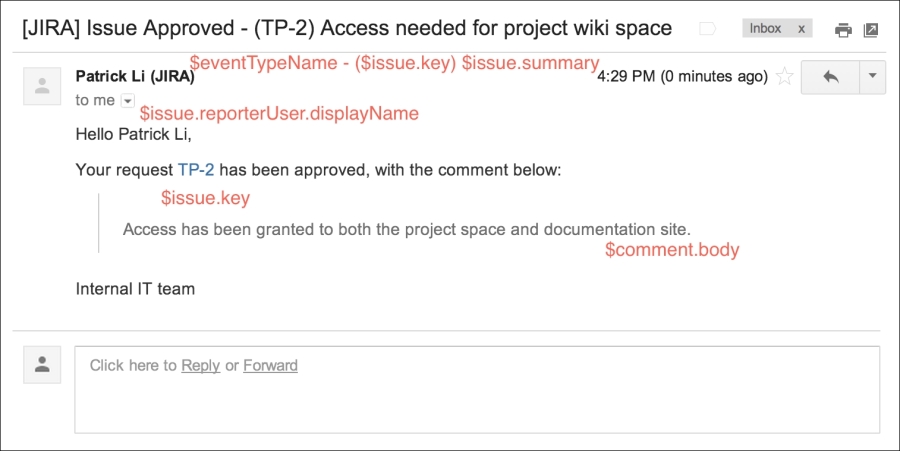
So, if we take a look at our templates, for the subject template, the ($issue.key) $issue.summary Velocity code will be turned into something like (TP-12) Request for JIRA administrator access, where TP-12 replaces $issue.key and Request for JIRA administrator access replaces $issue.summary.
The following screenshot shows a sample e-mail from the custom template we have created:
There is an add-on called Outgoing Email Template Editor for JIRA which lets you edit existing templates directly within JIRA's web interface, without having to download and upload the files to the server. You will still have to restart JIRA however. You can get the add-on from the following link:
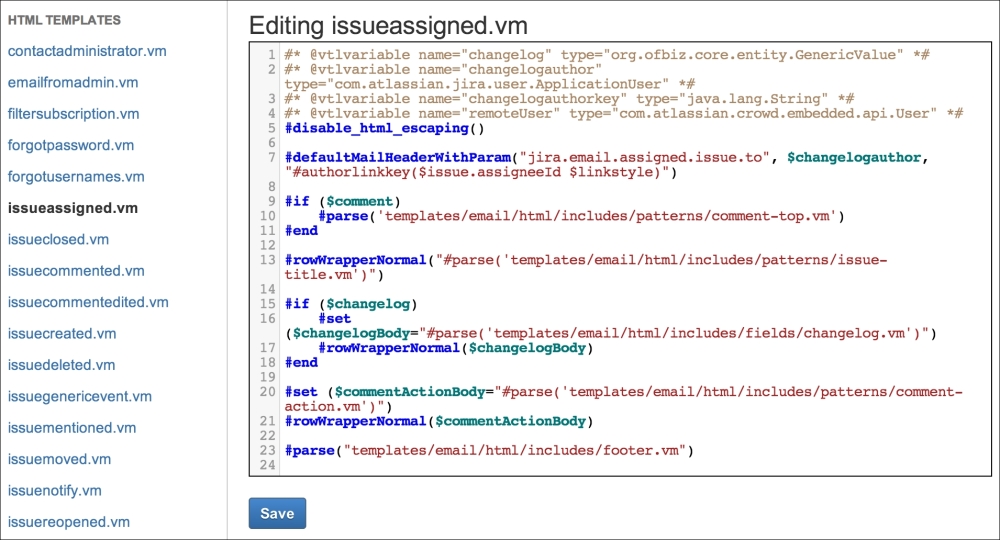
Once you have installed the add-on, proceed with the following steps to edit templates in JIRA:
- Navigate to Administration | System | Email Editor.
- Select the template you want to edit from the left panel, and you will see its content displayed in a syntax-highlighted editor.
- Update the template and click on the Save button, as shown in the following screenshot.
- Restart JIRA to apply the change.