
If you have a controlled IT environment where changes need to go through development, testing/staging, and then production processes, then without a doubt, you would know how painful it is to promote JIRA configuration changes across different environments. Since JIRA does not provide a way to export configurations out of the box, all changes will need to be manually applied to each environment, which is both time consuming and error prone.
In this recipe, we will look at two options that can help to make this process easier.
For this recipe, we need to have the Project Configurator add-on and the Configuration Manager for JIRA add-on installed. You can download them from the following links and install them with the Universal Plugin Manager:
We will start with the Project Configurator add-on. We first need to create an export file of our project configurations:
- Navigate to the project from which configurations are to be exported.
- Click on the Administration tab.
- Click on the Advanced export link. You can also click on the Export configuration link to quickly export everything.
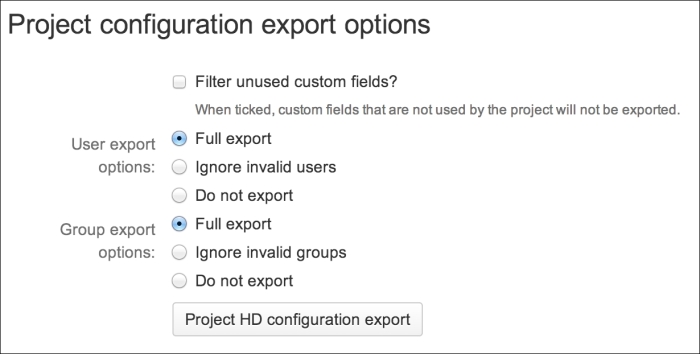
- Check the Filter unused custom fields? option as we do not want to copy over irrelevant configurations.
- Set both User export options and Group export options to Ignore invalid users and Ignore invalid groups, respectively, as shown in the following screenshot.
- Click on the Export button to generate the export XML file. Have a look at the following screenshot:
Now that we have our XML output file, we can import it into another JIRA instance as follows:
- Navigate to Administration | Add-ons | Load project configuration.
- Select the XML output file.
- Check the Apply changes? option.
- Click on the Project configuration file upload button to start the import, as shown in the following screenshot:

The second option is to use the Configuration Manager for JIRA add-on. This add-on requires you to first create a snapshot. A snapshot contains all the configuration settings. You can create two types of snapshots:
Proceed with the following steps to create a configuration snapshot:
- Navigate to Administration | Configuration Management | Snapshots.
- Click on the Add Snapshot button.
- Select to create either a System Configuration or Project Configuration snapshot.
- Enter a name for the snapshot.
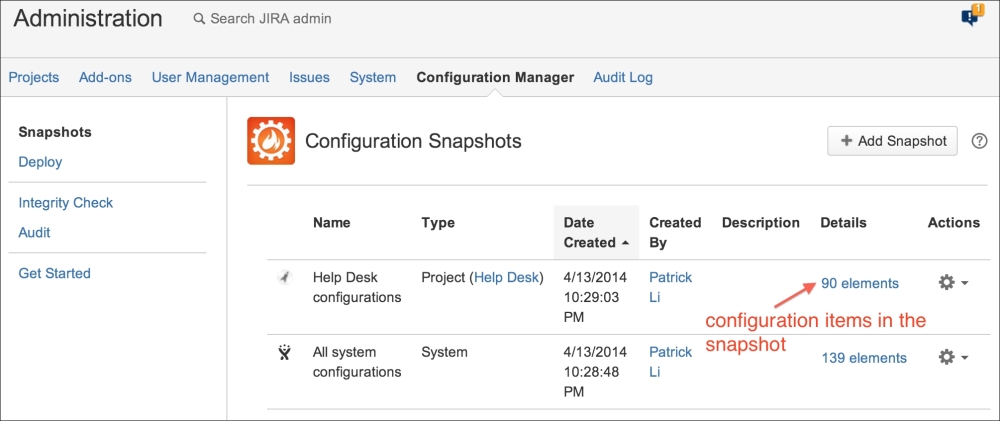
- Click on the Create button. The following screenshot shows the details of the snapshot we created:
Having created the snapshot, there are several ways in which we can promote and deploy the changes to another JIRA instance. We can either download the snapshot XML file and upload it, or link the two JIRA instances together with Application Link and load the snapshot remotely. We will use the snapshot file option in this recipe.
Proceed with the following steps to deploy a snapshot:
- Navigate to Administration | Configuration Management | Deploy.
- Select the From Snapshot File option.
- Choose the snapshot XML file.
- Click on the Deploy link to start deployment.
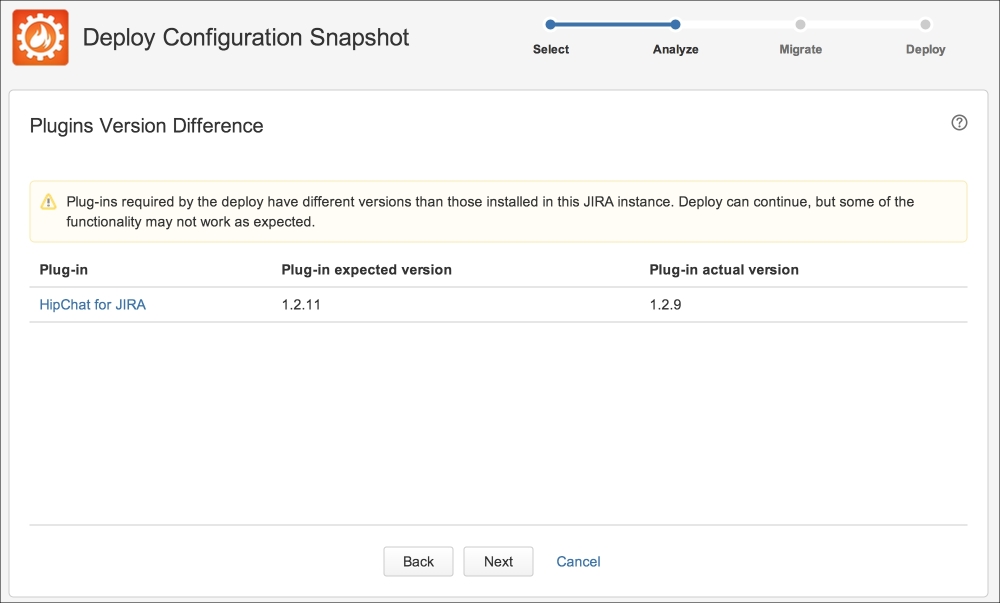
The add-on will walk you through a deployment wizard, where it will analyze the contents from the snapshot and determine if your current JIRA system meets all the necessary requirements. For example, in the following screenshot, it has informed us that there is an add-on version mismatch:
After the add-on has determined that all the requirements are met, it will provide a quick summary of all the changes that will be applied (seen in the following screenshot). This is a good time to review the list of items to make sure we are not introducing unwanted changes accidentally. If everything looks good, we can go through and complete the deployment. Have a look at the following screenshot:
