
The other major use of outgoing mails is for JIRA to automatically send out notifications about changes to issues; for example, if an issue has been updated, you would want the issue's reporter and assignee to be notified of the change.
In this recipe, we will look at how to set up notification rules so that interested parties are notified of any changes to their issues.
You must first configure an outgoing mail server for JIRA. Refer to the Setting up an outgoing mail server recipe for details.
JIRA uses notification schemes to control who should receive notifications for a given event. JIRA comes with a Default Notification Scheme; you can choose to update this scheme directly by clicking on the Notifications link. In this recipe, however, we will be creating a new notification scheme and applying that to projects:
- Proceed with the following steps to create a new notification scheme:
- Navigate to Administration | Issues | Notification Scheme.
- Click on the Add Notification Scheme button.
- Enter a name for the new scheme and click on Add to create it.
After you have created a new notification scheme, you will be taken to the Notifications settings page for the scheme. By default, there will be no notifications set for any events, as shown in the following screenshot:
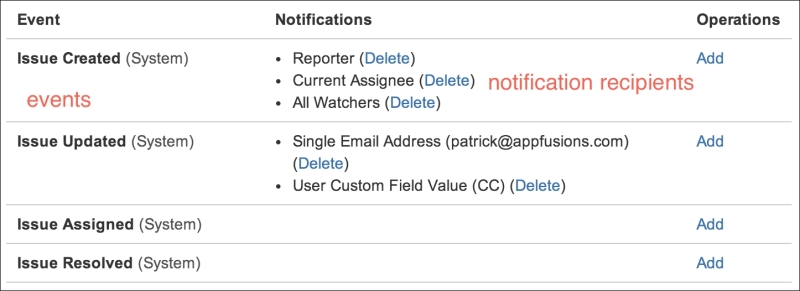
- To add a notification recipient to an event, proceed with the following steps:
- Click on the Add link for the event.
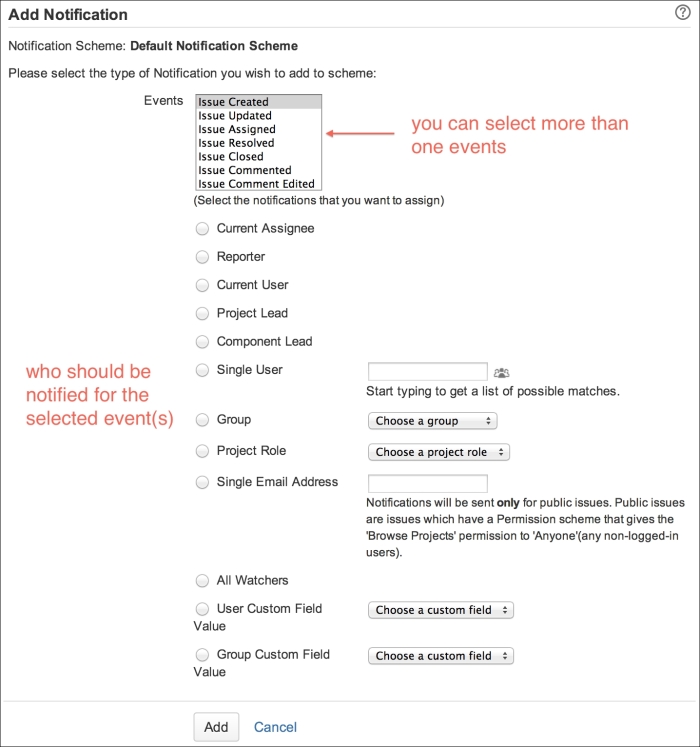
- Select the notification recipient type and click on Add.
You can add as many notification recipients as you need for an event, and JIRA will make sure not to send duplicated e-mails to the same user. For example, if you have set both the reporter and assignee to receive notifications for a single event, and they happen to be the same user, JIRA will only send out one e-mail instead of two.
Also note that JIRA will take permissions into consideration while sending out notifications. If a user does not have access to the issue, JIRA will not send notifications to that user. The following screenshot of the Add Notification page denotes this:
- The last step is to apply our new notification scheme to a project:
- Browse to the project you want to apply the notification scheme to.
- Click on the Administration tab.
- Select the Notifications option from the left panel.
- Select Use a different scheme from the Actions menu.
- Select New Notification Scheme and click on Associate.
JIRA uses an event system where every issue operation such as creating a new issue or workflow transitions will all trigger a corresponding event to be fired. As we have seen, notification schemes map events to notification recipients. This way, we are able to set up flexible notification rules to notify different people for different events.
JIRA provides many different notification recipient types. Some are very simple, such as Current Assignee and Reporter, which will simply take the current value of those fields. Other options such as User Custom Field Value can be very powerful. For example, you can create a multiuser picker custom field, and for each issue, you can have a different list of users as recipients, without having to modify the actual scheme itself.
Events are also mapped to e-mail templates so JIRA knows what to use for the subject and body. You cannot change the mapping for system events, but as we will see in the next recipe, we can create custom events and select what templates to use.