
As mentioned before, one of the key features of JIRA is its ability to let you customize the fields in which you have to collect information from the user. JIRA comes with over 20 different types of custom fields, such as simple text and select lists.
In this recipe, we will be creating a new custom field—a single select list custom field—from the default selection.
Proceed with the following steps to create a new custom field of the type single select list:
- Log in to JIRA as a JIRA administrator.
- Navigate to Administration | Issues | Custom Fields.
- Click on the Add Custom Field button.
- Scroll down and select the Select List (single choice) field type, and click on Next as shown in the following screenshot:

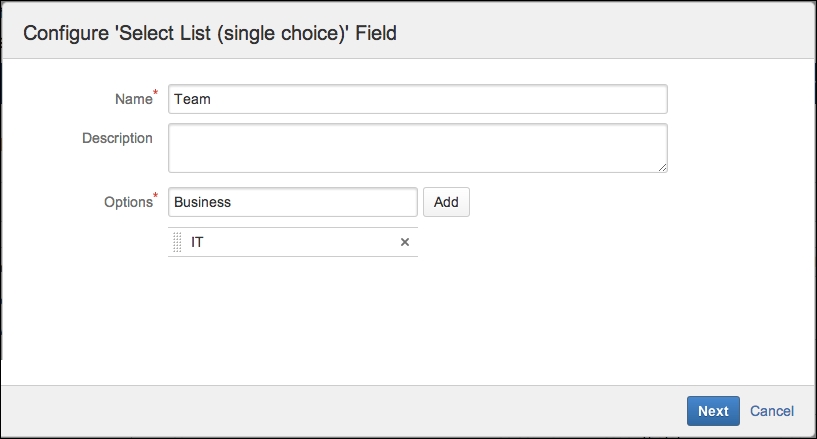
- Name the custom field
Team. - Add select options by typing the option value in the Options text field and click on Add. Continue until all options are added and then click on Next, as shown in the following screenshot:
- Select the screens to place the new
Teamcustom field onto, and click on Update to finish, as shown in the following screenshot. Note that you can always add the field to other screens later.
..................Content has been hidden....................
You can't read the all page of ebook, please click here login for view all page.