
When you have a mixed group of users such as internal employees and outside consultants working on the same JIRA project, there will be issues with sensitive information that should only be viewed by internal employees. In these cases, you would want to mark those issues as internal only so other people cannot see them.
In this recipe, we will look at how to set up permissions to control access at issue level with issue security schemes.
The steps for setting up issue-level permissions are as follows:
- Since JIRA does not come with any default issue security schemes, the first step is to create a new one from scratch:
- Navigate to Administration | Issues | Issue Security Schemes.
- Click on the Add Issue Security Scheme button.
- Enter the new scheme's name and click on Add.
- The second step is to set up the security levels you can choose from, such as Internal Users Only:
- Click on the Security Levels link for our new issue security scheme.
- Enter the name for each security level and click on the Add Security Levels button.
The following screenshot shows three existing security levels. You add a new security level from the form at the bottom:

- After we have set up the security levels, the third step is to grant users access to each of the security levels you have defined:
- Click on the Add link for the security level you want to set up the user access for.
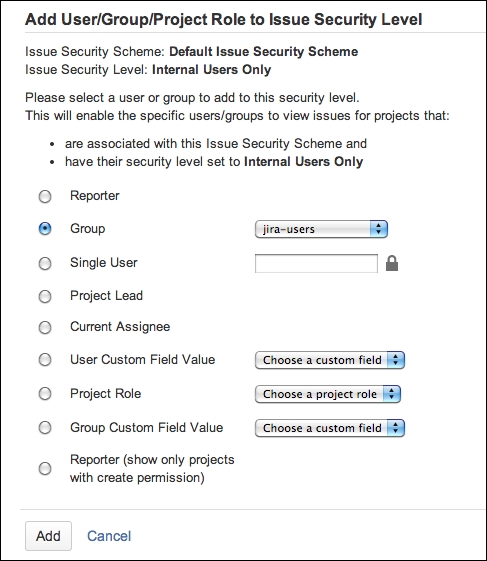
- Select the permission option and click on the Add button.
The following screenshot displays the different options you have while granting security levels:
- Now that we have all the security levels set up, the last step is to apply the issue security scheme to our project:
- Go to the project you want to apply the issue security scheme to and click on the Administration tab.
- Select the Issue Security option on the left-hand side, and click on the Select a scheme option from the Actions menu.
- Select the new issue security scheme and click on Next.
- If the project is not empty, JIRA will ask you to select a default security level for all the issues. You can select the None option so that all issues will remain as is, or you can select a security level that will be applied to all issues.
- Click on the Associate button and the issue security scheme will now be applied to the project:

The issue security scheme allows you to control who can access individual issues based on the security levels set. Issues with a security level can only be viewed by those who meet the criteria. Note that subtasks will inherit security levels from their parent issues.
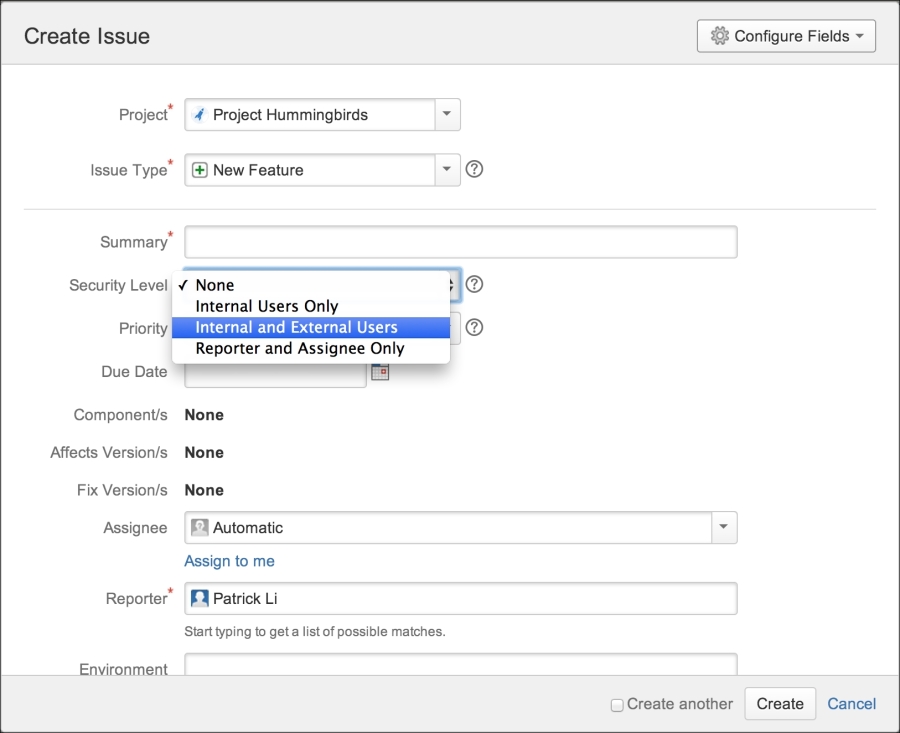
Once we have applied the issue security scheme to a project, users with the Set Issue Security permission will be able to select a security level while creating and editing issues, as shown in the following screenshot.
It is also worth mentioning that you can only select security levels that you belong to. For example, if there are two security levels, A and B, security level A is granted to the jira-administrators group and security level B is granted to the jira-users group. Now, as a member of the jira-users group, you will only be able to select security level B.
For a user who meets the criteria for the selected security level, he or she will be able to view the issue normally. However, if a user who does not meet the criteria tries to view the issue, he or she will get a permission violation error, as shown in the following screenshot:
