In the previous chapters, we have looked at how to use groups to manage multiple users in JIRA. One limitation of using groups is that groups are global in JIRA. This means if a user is in a group, then that user is included for all projects in that group.
In real life, this is often not the case; for example, a user is a manager in a project. He/she may not be a manager in a different project. This becomes a serious problem when it comes to configuring permissions and notifications.
So, to address this limitation, JIRA provides us with project roles. Project roles are similar to groups; the only difference being that the membership of a project role is defined at the project level.
JIRA comes with three project roles out of the box: Administrators, Developers, and Users. So, we will first look at how to create a new project role.
Proceed with the following steps to create a new project role:
- Navigate to Administration | User Management | Roles.
- Enter the new project role's name and description.
- Click on the Add Project Role button.

Once the project role has been created, we can start adding users and groups to the concerned role for each project. To add a new user and/or group to a project role, proceed with the following steps:
- Navigate to the target project.
- Click on the Administration tab and select Roles.
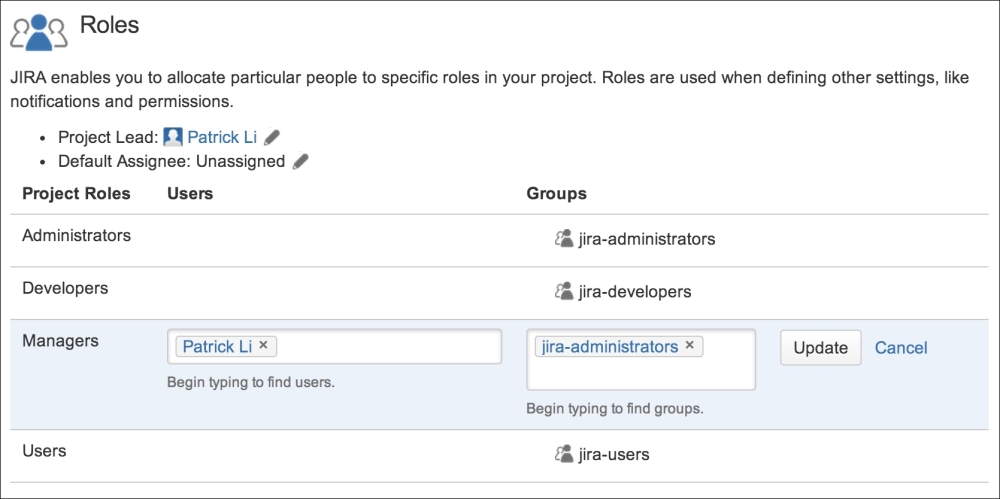
- Hover over the new project role and select either Add User or Add Group.
- Select the user and/or group and click on Update as shown in the following screenshot: