
First, we need to fetch the Redmine appliance from the following URL: http://www.turnkeylinux.org/redmine. For this book I will be using the ISO image as it's, perhaps, the most common option and can be installed on a new server. You can also download the virtual machine image or images ready for deployment to VPS.
After inserting CD into CD-ROM and rebooting or turning on the computer we get:
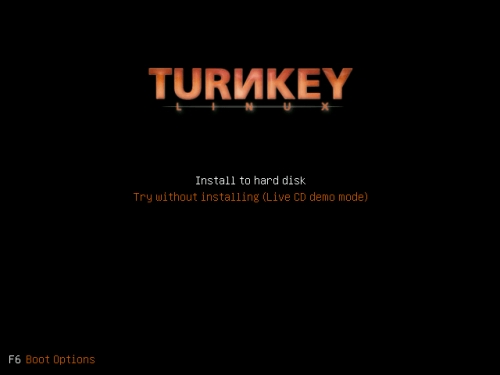
As you see this splash screen allows us to choose either to immediately install the appliance (by the way, it does this by default in 30 seconds) or to launch the live demo of the appliance. We will use the second option for now.
Shortly after pressing the down-arrow key and Enter, TurnKey asks for the root password.

This will be the main system password so be sure to make it as strong as possible. After specifying this password and pressing Enter you will also need to specify the confirmation. After doing this you will be asked to enter another password:

This will be the password for MySQL superuser. Like the system root password this one should be strong enough. Specify the password and press Enter, then specify the confirmation and press Enter again.
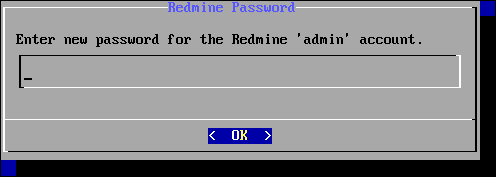
This password is for the Redmine administrator. This is replacement of the default one, which is "admin". This way the TurnKey ensures you won't be using Redmine with the default well-known password. The username of the administrator account, however, remains the same that is admin.
Specify the password and confirmation. After that you will get:
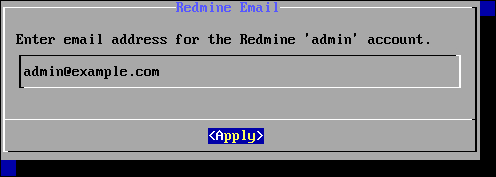
This time the TurnKey Linux asks for the email of the administrator account this way ensuring you won't forget to update it. Specify your email and press Enter.
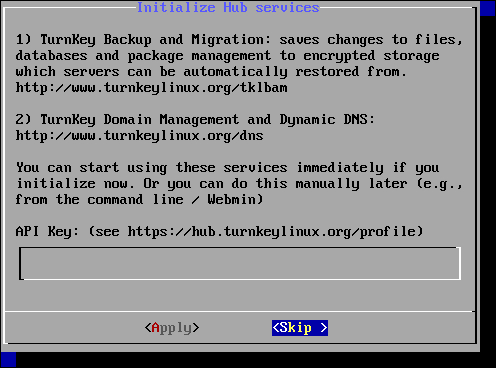
In addition to making the Redmine installation easier the TurnKey Linux offers Amazon based backup and cloud hosting services. This screen is the promotion of these services. If you registered for these services you can specify your API key here. If not press Tab twice to make the Skip button active and then press Enter.
That was all. The next screen contains details of the running system:
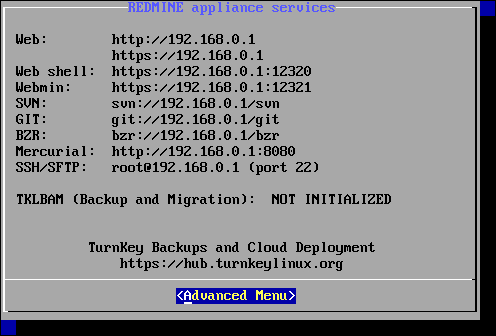
That's actually the screen of the running TurnKey Linux system. The same screen you get when you install the system on disk (this is the screen you get each time you boot the server).
As shown on the screen TurnKey Redmine comes with Subversion, Git, Bazaar, and Mercurial servers, which are already configured and integrated with Redmine. Besides the system is also running SSH server, Webmin, and web shell, so you could connect to the system remotely.
Now you can play with Redmine by opening the browser and pointing it to http://192.168.0.1 (use the URL which is shown on your screen):
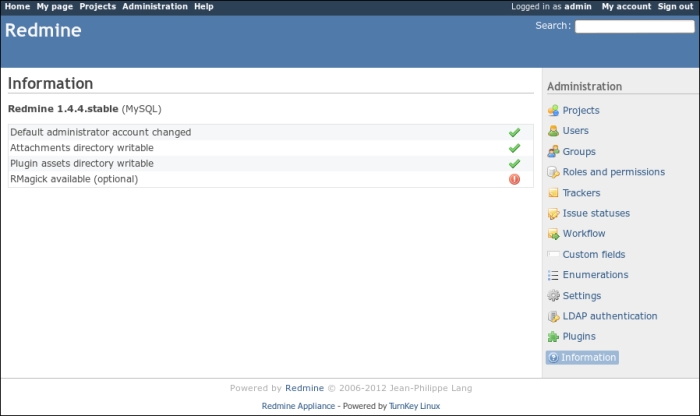
As seen from the screenshot, TurnKey Redmine is missing RMagick but you can install it using the following command in the shell:
$ sudo apt-get install ruby-rmagick
If you like the system you can press Enter on the Advanced Menu button in the TurnKey system screen and then select the Install menu item:
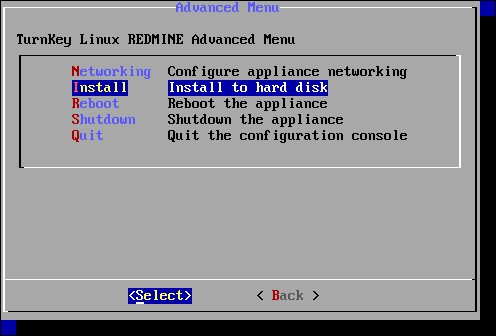
The further installation procedure won't be reviewed here as it is actually the Ubuntu/Debian installation procedure and is quite simple. After rebooting you will be asked the same questions you were asked to run the live demo (root password, MySQL password and so on). In the end you will get the same TurnKey Linux screen with the Advanced Menu button but which, this time, won't have the Install menu item.