
Now it's time to check how to update issues. To open the update form you need to click on the Update link, which is located in the top-right corner of the issue page (in the contextual menu). The Update form gets opened below the last history entry and looks like this:
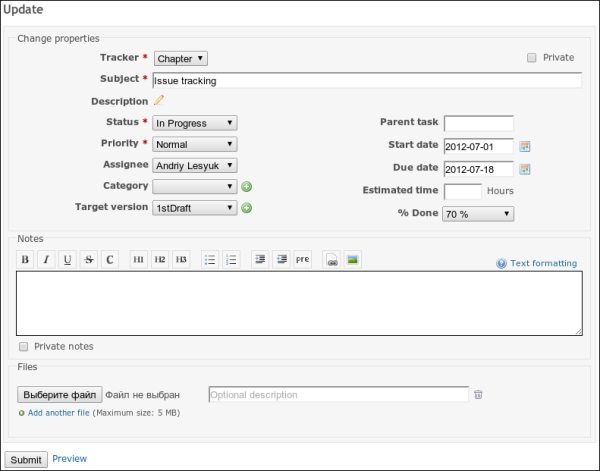
Almost all fields of the update form are already known to you. The missing Description field is actually hidden by default to save space and can be revealed by clicking on the pen icon.
The only new fields are Notes (which, like the Description field, supports Wiki formatting), and Private notes, (which, if set, make the notes visible only to project members having the View private notes permission). These fields can be used to add comments to the issue. After adding notes they appear in the history as shown in the following screenshot:

In the preceding screenshot, you can see that the private comments have a red strip to their left.
Note the two icons in the bottom-right corner. The pen icon allows you to edit the comment (if you have the Edit own notes permission, of course) and another one lets you quote the comment. By the way, quoting the issue description is also easy, you just need to click on the Quote link for this (to do so, go to the top of the issue page).
You might think that we are done with issue editing. But it's not so, Redmine also supports "bulk editing".
Let's go back to the issue list. Right-click on any issue and you will see the contextual drop-down menu, as shown in the following screenshot:
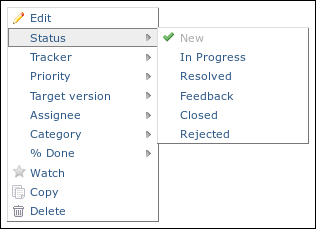
This menu provides you with a quick way of setting one value at a time for several issues.
If you plan to make several changes at a time to many issues, you will find the Edit contextual menu item more suitable. This menu item activates the bulk edit form:
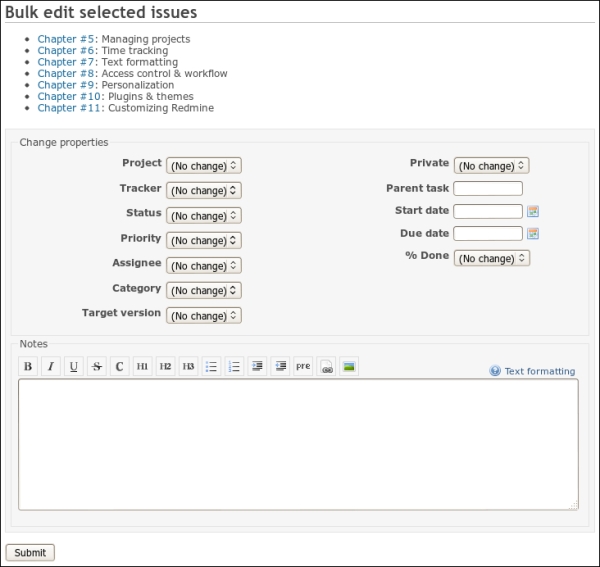
This form is similar to the issue edit form but changes made here apply to several issues.