Inserting Tables
Tables offer an excellent way to organize data, and you can easily add tables to your mail messages. Figure 16.4 shows a mail message with a table inserted.
Figure 16.4. A mail message with a table inserted.

To insert a table in your mail message, follow these steps:
Create a new memo.
Position your cursor in the body field where you want the table to appear.
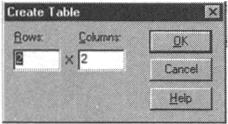
Choose Create, Table or click the Create Table SmartIcon. The Create Table dialog box appears (see Figure 16.5).
Enter the number of Rows and Columns you want in your table.
You can edit, insert columns and rows, and add borders and shading to tables. If you right-click an element of the table, the properties box appears from which you can select properties for tables, rows, columns, or text. To learn more about editing and formatting tables, search the Help database for "table."

