
iAd: Banner Ads and Interstitial Ads
Frankly, in these freemium days, it’s not easy to get a lot of people to pay for an app. So an alternative is to incorporate ads. iAd is not the only mobile ad product available, but it is the official ad service for iOS, paying developers 70% of revenue, the same as the revenue share for paid app sales. And, conveniently, Unity has scripting support for iAd. In this chapter we’ll incorporate the two ad types offered by iAd—banner ads and interstitial (full-screen) ads—into our bowling game.
The project project for this chapter on http://learnunity4.com/ includes the iAd scripts developed in this chapter and is sufficient to demonstrate iAd functionality. However, even if you start with the that project to avoid adding the scripts by hand, you’ll still need to enable iAd in iTunes Connect.
As with Game Center, you need to enable iAd for our app on iTunes Connect in addition to calling Unity’s iAd functions from scripts. Besides the Manage Apps page, iTunes Connect has two other pages relevant to iAd: the Contract, Banking and Taxes page and the iAd Network page (Figure 15-1).

Figure 15-1. The iAd-related pages on iTunes Connect
The first page you need to visit is the Contracts, Banking and Taxes page, so you can agree to Apple’s iAd contract, in the same way you had to agree to the paid sales contract to start charging for apps.
Once the iAd contract has been processed, as shown in Figure 15-2, you’re ready to enable iAd for individual apps.

Figure 15-2. A completed iAd Network contract listed on iTunes Connect
Just as you did with Game Center, enable iAd for Fugu Bowl by going to the Manage Apps page in iTunes Connect, selecting Fugu Bowl, and visiting its App Information page. On the top right, in the same section as the Game Center button, is the Manage iAd Network button (Figure 15-3).

Figure 15-3. The top portion of the App Information page in iTunes Connect
Click the Manage iAd Network button to start the process of enabling iAd. It’s much simpler than enabling the Game Center. No leaderboards or achievements to set up, just click the Enable iAd Network button (Figure 15-4).

Figure 15-4. Enabling iAd on iTunes Connect
Like Game Center, iAd can only be enabled or disabled for an app after a New Version of the app has been added to iTunes Connect and before that version has been approved and released. The iAd change will affect that upcoming version, and there’s no way to change the iAd status of an app already on the App Store.
Tip I’ve had apps rejected for having screenshots that showed test ads, so you may want to take screenshots of your app before enabling iAd.
iAd is now enabled for our app on the server side, and you just need to add the code for iAd to the app itself.
Let’s start by adding a banner ad to our bowling game. Unlike, interstitial ads, which only run on iPads, banner ads run on all devices. And frankly, banner ads are easier to incorporate in a game. You just need to allocate some space at the top or bottom of the screen.
Tip Think about where to incorporate ads when designing the app, not as an afterthought.
Similar to how we created a script in the previous chapter to initialize the Game Center, let’s write a script to instantiate and place a banner ad. Create a new JavaScript in the Project View, place it in the Scripts folder, and name it FuguAdBanner (Figure 15-5).
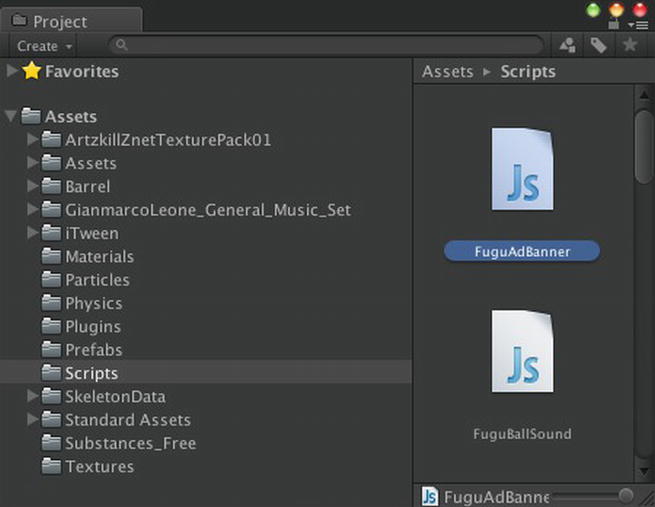
Figure 15-5. Creating the FuguAdBanner script
Then edit the script and add the contents of Listing 15-1 to it.
Listing 15-1. The Complete Listing of FuguAdBanner.js
#pragma strict

public var showOnTop:boolean = true; // banner on top or bottom of screen
public var dontDestroy:boolean = false; // keep this GameObject around for next scene

#if UNITY_IPHONE

// don't make this a local variable, or else it'll get garbage collected
private var banner:ADBannerView;

function Start () {
        if (dontDestroy) {
                GameObject.DontDestroyOnLoad(gameObject); // keep ad alive across scenes
        }
        Debug.Log("Creating iAd banner");
        banner = new ADBannerView();
        banner.autoSize = true;
        banner.autoPosition = showOnTop ? ADPosition.Top : ADPosition.Bottom;
        while (!banner.loaded && banner.error == null) {
                yield;
        }
        if (banner.error == null) {
                Debug.Log("iAd banner shown");
                banner.Show();
        }  else {
                Debug.Log("iAd banner error: "+banner.error.description);
                banner = null;
        }
}
#endif
The code in FuguAdBanner is similar to the Scripting Reference example for AdBannerView. The Start callback creates an AdBannerView instance and waits in a while loop for either the banner to load, indicated by the loaded variable of the AdBannerView, or for an error to happen, indicated by the error variable in AdBannerView. The while loop calls yield to avoid blocking the rest of the game from running.
If there is an error, the error message is logged with Debug.Log. If the banner has loaded successfully, the ad will immediately display by with a call to the Show function of AdBannerView. You can call Show and Hide on the ad at any time, but with banner ads, the easy thing to do is just leave it up.
To provide some flexibility and reuse of the script, let’s add a couple of public boolean variables, which will show up as check boxes in the Inspector View. The ShowOnTop variable to determines whether the banner is displayed at the top or the bottom of the screen (the only two options), by passing in the enum values AdPosition.Top or AdPosition.Bottom accordingly. The iAd banners are automatically sized correctly to stretch across the screen.
If the other variable, DontDestroy, is true, then we call the static function GameObject.DontDestroyOnLoad, passing in the GameObject the script is attached to. This keeps the GameObject alive if another level is loaded, so if you have multiple scenes, you don’t have to add an AdBanner GameObject to each one.
Caution Calling GameObject.DontDestroyOnLoad in a scene that will be loaded again later can result in duplicate GameObjects.
For example, if you place your AdBanner GameObject in the splash scene instead of the bowling scene, setting dontDestroy to true will allow the banner ad to persist through the load of the bowling scene without getting destroyed.
Speaking of destroyed objects, notice that we declare the banner variable outside the Start function, although it looks like it could have been declared inside. Normally, it’s better to declare variables within the narrowest scope possible, but in this case, you want the ADBannerView to exist as long as this GameObject exists. If you declare banner as a variable inside the Start function, then there is no reference to the ADBannerView object after the Start function returns, and the object can be destroyed at any time to free up the memory it’s taking up, and the ads will disappear as soon as that happens.
This reclamation process is called garbage collection (GC), as objects that are lying around with no way for code to access them are effectively garbage. GC is not an issue for objects in the scene (basically anything whose class is a subclass of UnityEngine.Object), because as long as they are in the scene there is an implicit reference to them. Generally, those objects have to be explicitly cleaned up with a call to the static Destroy function of the UnityEngine.Object class.
To add the FuguAdBanner script to the bowling scene, make sure that scene is open, create a new GameObject in the Hierarchy View, name it AdBanner, and drag the FuguAdBanner script onto it (Figure 15-6).
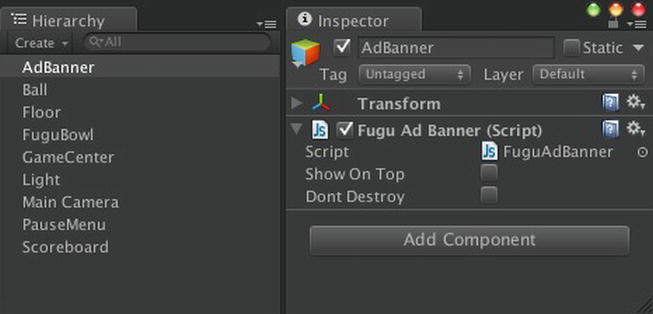
Figure 15-6. The FuguAdBanner script added to the scene
Because we have our scoreboard at the top of the screen, lthe banner ad is best left at the bottom, so leave Show On Top unchecked. And because the AdBanner GameObject is placed in the bowling scene, which doesn’t load any other scene, it doesn’t really matter whether you call DontDestroyOnLoad or not, but let’s leave DontDestroy unchecked, too.
An iAd won’t show up when running the game in the Editor, but you can test it by running the game in the iOS Simulator or on a device. Until the app is approved, it will show only test ads, as shown in Figure 15-7.

Figure 15-7. A test iAd banner
If an ad doesn’t appear, check the Xcode debug area for the Debug.Log error messages emitted by the FuguAdBanner script. But if there are no error messages, don’t worry. Sometimes ads take a while to show up, and sometimes the iAd server fails to provide an ad, in which case a No inventory message will appear in the debug area. Even after an app is approved, there is typically a delay until iAd is really activated. During that time, users will see test ads, but again, don’t panic!
Now we’re ready to try an interstitial ad. Since interstitial ads are full-screen ads, we have to treat them differently from banner ads. When an interstitial ad appears, it has to be dismissed before the game can proceed, much like dismissing a modal dialog. For that reason, interstitial ads are usually placed strategically at transition points in the game (interstitial means in between). No one would like a full-page ad popping up in the middle of a game! For this reason, let’s place our interstitial ad in the splash scene, so it appears, if it appears, before the bowling scene is loaded.
Again, let’s start by creating a new JavaScript, named FuguAdInterstitial (Figure 15-8). Add the contents of Listing 15-2.

Figure 15-8. Creating the FuguAdInterstitial script
Listing 15-2. The Complete Listing for FuguAdInterstitial.js
#pragma strict

var waitTime:float = 2.0;

#if UNITY_IPHONE
private var ad:ADInterstitialAd = null;

function Start() {
        if (iPhone.generation == iPhoneGeneration.iPad1Gen ||
                iPhone.generation == iPhoneGeneration.iPad2Gen ||
                iPhone.generation == iPhoneGeneration.iPad3Gen ||
                iPhone.generation == iPhoneGeneration.iPad4Gen ||
                iPhone.generation == iPhoneGeneration.iPadMini1Gen ||
                iPhone.generation == iPhoneGeneration.iPadUnknown) {
                ad = new ADInterstitialAd();
                var startTime = Time.time;
                while (!ad.loaded && ad.error == null && Time.time-startTime<waitTime) {
                        yield;
                }
                if (ad.loaded && ad.error == null) {
                        Debug.Log("iAd page shown");
                        ad.Present();
                }  else {
                        if (ad.error != null) {
                                Debug.Log("iAd page error: "+ad.error.description);
                        }  else {
                                Debug.Log("iAd page timed out");
                        }
                        ad = null;
                }
        }
}
#endif
Because interstitial ads are only available on iPads, the first thing to do in our Start function is check if its running on an iPad. Unfortunately, there’s no succinct way to test for that, but you can check the static variable of iPhone.generation and see if its value matches one of the iPad models, each with a value defined in the iPhoneGeneration enumeration.
The way you testiPhone.generation illustrates the iPad values of the iPhoneGeneration enumeration, but it does have the disadvantage of requiring an update when future versions of Unity add values to accommodate new iPad models. Another way to do it, either more robust or a kludgy, depending on your viewpoint, would be to convert the enum value to a string and check if it starts with “iPad,” like this:if(iPhone.generation.ToString().StartsWith("iPad")).
After the iPad check, the code resembles the FuguAdBanner script. Instead of the ADBannerView class, we have Unity’s ADInterstitialAd class. As FuguAdBanner did with ADBannerView, the code instantiates an ADInterstitialAd and, within a while-yield loop, waits for the ADInterstitialAd to load or fail with an error. But we don’t want to wait for an indeterminate duration, especially if it’s going to delay the start of the game, so we also set it to stop waiting after a certain amount of time, waitTime, has expired.
waitTime is in seconds and declared a public variable so it can be adjusted in the Inspector View. Before the loop begins, the current game time, available in the static variable Time.time (also in seconds), is saved in a local variable startTime. The loop, along with checking if the ad has loaded or resulted in an error, checks if Time.time minus startTime is still less than waitTime.
When the while loop terminates, the ad is displayed if it has loaded successfully, using the ADInterstitialAd Present function (essentially the same as the Show function used for ADBannerView). If it hasn’t loaded successfully, an “iAd page has timed out” message is logged with Debug.Log.
With our FuguAdInterstitial script in hand, we’re ready to add it to a scene. As mentioned earlier, we’re going to add it to our splash scene, so let’s switch to that scene (double-click the splash scene file in the Project View). Then create an empty GameObject and name it AdPage (you could name it AdInterstitial, but why not name it something easier to type). Drag the FuguAdInterstitial script onto the AdPage GameObject (Figure 15-9).

Figure 15-9. Adding the FuguAdInterstitial script to the splash scene
Now we’re ready to roll. As with banner ads, you won’t see any ads when running in the Editor, but when testing on the iOS Simulator or on a device, you should see a full-page ad while the splash screen is up (Figure 15-10). As with banner ads again, there’s no guarantee that the iAd servers will send the ad, but if it does, it will be a test ad until the app is released on the App Store.

Figure 15-10. Test interstitial iAd on the iOS Simulator
Like app sales revenue, iAd revenue is reported on iTunes Connect, under the iAd Network page link, shown in Figure 15-1. The top of the iAd Network page displays a graph of iAd revenue for all your apps (Figure 15-11).

Figure 15-11. iAd revenue
Below the revenue graph is a list of your iAd-enabled apps, both those that have gone live and those that are still test ads (Figure 15-12).

Figure 15-12. An app listing on the iAd revenue page
Clicking an app in the list brings up a similar page displaying revenue just for that app. That page also displays ad revenue broken down by country and provides options for editing the app description (what advertisers see) and specifying competing companies and apps that you don’t want displayed in your ads.
Explore Further
This chapter has been the shortest by far, and that’s a good thing. It means our game is functionally complete and adding ads is really simple. Even the setup on iTunes Connect wasn’t bad! In practice, though, you may need to put some thought into where and when to place ads, especially interstitial ads, and the earlier in the design process that takes place, the better.
We managed to do a lot with just a little code in this chapter. Only two classes were required to make use of iAds: “ADBannerView” and “ADInterstitialAd,” and in a typical app you would only use one of those classes (having both banner ads and interstitial ads is a bit much!). The pages for both of those classes have script examples.
The “iPhone” class contains anything that is specific to iOS (much of what used to be iOS-specific is now also applicable to Android and is now in the “Handheld” class). For example, we check the static variable “iPhone.generation” to find out if we’re running on an iPad. It’s worth checking the page on the “iPhoneGeneration” enum to see the set of iOS hardware recognized by Unity.
The Unity ADBannerView and ADInterstitialAd classes correspond to same-named classes in Objective-C. The iAd Programming Guide in the iOS Developer Library describes those classes and provides a lot of details on how to effectively deploy banner and interstitial ads.
General information about iAd for both developers and advertisers is available on http://developer.apple.com/iad.
iAd isn’t your only in-app advertising option. Once you start releasing apps, you will probably start receiving e-mails from numerous account managers at various mobile ad vendors. In fact, iAd originated as a product of Quattro Wireless before Apple acquired that company to gain its advertising product. Third-party ad vendors typically have their own iOS SDK and thus require a Unity plugin to access that SDK. Some of these SDKs are available on the Asset Store under the Services category, including PlayHaven and Inneractive.
Outside the Asset Store
As with their Game Center plugin, Prime31 Studios offered an iAd plugin before Unity introduced their iAd scripting support. Prime31 offers plugins for many other advertising services, including AdMob, AdWhirl, MobClix, and many more, available at http://prime31.com/.
Kiip (http://kiip.com/) provides an interesting twist on ads. A Kiip-enabled app features coupons that resemble banner ads but are presented like achievements. Their Unity plugin is available on GitHub at http://github.com/kiip.