
The Game GUI
Over the past several chapters, we’ve put together a fairly complete bowling game with 3D graphics, physics, sound, player controls, and automatic camera movement. The game has almost every category of feature expected in a 3D game except for one: a graphical user interface (GUI). In particular, the bowling game should have a scoreboard, and games usually have a menu that shows up at the beginning of the game and when the game is paused.
Tip I have had an iOS game rejected by Apple for not having a pause menu, so I do recommend including one, if only for that reason.
In this chapter, we’ll implement both a scoreboard and start/pause menu with Unity’s built-in GUI system, known as UnityGUI (you can tell how long a Unity feature has been around by the coolness of its name—more recent features have names like Shuriken, Mecanim, and Beast).
The scoreboard and pause menu scripts are available in the project for this chapter on http://learnunity4.com/, but, to iterate a point ad nauseam, entering the code line by line and function by function provides the best learning experience!
The Scoreboard
Let’s start off with the scoreboard because it’s a simpler case than the menu. The scoreboard only needs to display, with no interaction required. As described in the previous chapter, a typical bowling scoreboard will show the results for each frame (i.e., the first and second ball, and possibly third, in the tenth frame), and also the total score up to that frame. We won’t do anything fancy here, just display the scores with text by drawing the scoreboard as a sequence of labels, with each label displaying the score for that frame as text.
Create the Script
Let’s get started by creating a GameObject with a scoreboard script attached (this should be a familiar process by now). In the Project View, create a new JavaScript in the Scripts folder and name it FuguBowlScoreboard (Figure 9-1).
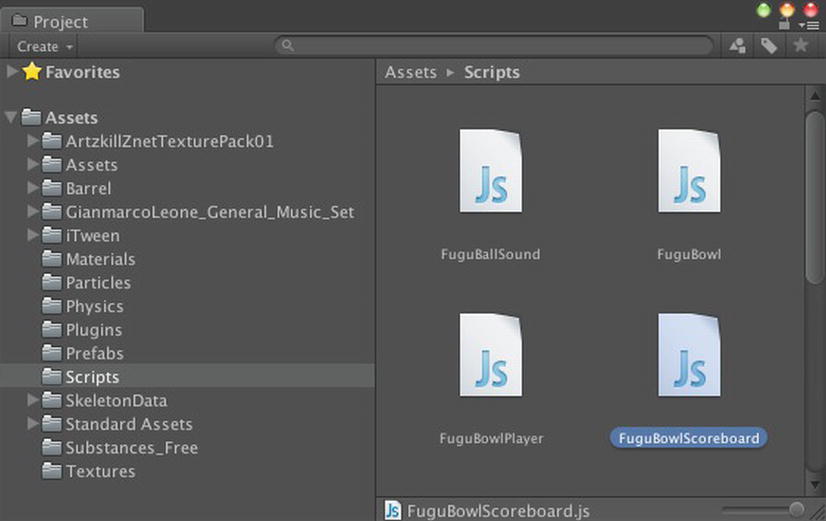
Figure 9-1. Creating the FuguBowlScoreboard script
Next, create a new GameObject in the Hierarchy View, name it Scoreboard, and attach the FuguBowlScoreboard script to it.
Now you’re ready to add UnityGUI code to the FuguBowlScoreboard script. If you’ve developed user interfaces with other GUI systems, you’ll probably find UnityGUI a bit unusual. Instead of creating and placing GUI objects that have callbacks responding to events like button clicks, UnityGUI Controls are created inside OnGUI callback functions, which are called every frame (actually a few times a frame). To demonstrate quickly how UnityGUI works, place the contents of Listing 9-1 in the FuguBowlScoreboard script.
Listing 9-1. Testing a Simple UnityGUI Label in FuguBowlScoreboard.js
#pragma strict

function OnGUI() {
       GUI.Label(Rect(5,100,200,20),"This is a label");
}
All UnityGUI Controls are created with calls to static functions in the GUI class (and also GUILayout, but I’ll get to that in the next section). The OnGUI callback of Listing 9-1 calls GUI.Label to draw a label, passing in a Rect (rectangle) that specifies the label is to be drawn at x,y coordinates 5,100 (the coordinate system for UnityGUI has 0,0 at the top left of the screen) and with a width and height of 200 and 20 pixels, respectively. The second argument is the text to display in the label. Click Play and you should see “This is a label” appear on the screen.
Placing user interface code in a single script callback can be cumbersome if the user interface is complex. But for this simple user interface, the OnGUI callback is convenient, and we can expand on it to form a no-frills text-based bowling scoreboard. Let’s replace the single-label example in FuguBowlScoreboard with the contents of Listing 9-2.
Listing 9-2. A Bowling Scoreboard
#pragma strict

var style:GUIStyle; // customize the appearance

function OnGUI() {
       for (var f:int=0; f<10; f++) {
               var score:String="";
               var roll1:int = FuguBowl.player.scores[f].ball1;
               var roll2:int = FuguBowl.player.scores[f].ball2;
               var roll3:int = FuguBowl.player.scores[f].ball3;
               switch (roll1) {
                      case -1: score += " "; break;
                      case 10: score +="X"; break;
                      default: score += roll1;
               }
               score+="/";
               if (FuguBowl.player.IsSpare(f)) {
                      score +="I";
               } else {
                      switch (roll2) {
                              case -1: score += " "; break;
                              case 10: score +="X"; break;
                              default: score += roll2;
                      }
               }
               if (f==9) {
                      score+="/";
                      if (10==roll2+roll3) {
                              score +="I";
                      } else {
                              switch (roll3) {
                                     case -1: score += " "; break;
                                     case 10: score +="X"; break;
                                     default: score += roll3;
                              }
                      }
               }
               GUI.Label(Rect(f*30+5,5,50,20),score,style);
               var total:int=FuguBowl.player.GetScore(f);
               if (total != -1) {
                      GUI.Label(Rect(f*30+5,20,50,20)," "+total,style);
               }
       }
}
The new OnGUI callback loops through all ten frames, querying the FuguBowlPlayer for the FuguBowlScore representing each frame. At the bottom of the loop, one or two calls to GUI.Label are issued. The first GUI.Label displays the score for each ball of the frame, and the second GUI.Label is drawn below the first, displaying the game total score for that frame if it is available.
Most of the code in the loop is devoted to figuring out what to display for each ball of the frame. For ball1, if it has not been rolled, yet, then the String to display is just a space. If a strike has been rolled, then the letter ‘X’ is displayed. Otherwise, display the numeric score (1–9).
ball2 is similar to ball1, except it also displays the letter ‘I’ for a spare. Normally, I would use the slash character ‘/’ for a spare, but that is used here to separate the scores for ball1, ball2, and ball3.
The String for ball3 is constructed only if the frame is the tenth frame (index 9). ball3 is the same as ball2, except it checks for a spare combining ball2 and ball3 instead of ball1 and ball2.
The frame total score is retrieved just by calling the FuguBowlPlayer function GetScore and is displayed as long as long as the score is available, i.e., not −1. The Rect for each GUI.Label is offset from the top left of the screen by an increment based on the frame the GUI.Label is displaying (Figure 9-2).

Figure 9-2. A bowling scoreboard displayed by FuguBowlScoreboard.js
Figure 9-2 shows a game on the second ball of the fourth frame. Three pins have been knocked down on the first ball. Strikes have been rolled on the first two frames and a spare on the third (five pins on the first roll and five on the second).The game total for the first frame is 10 for the strike plus the pins knocked down by the next two balls, which is 10 for the second strike and then 5 for the first ball in the third frame, for a total of 25.
The second frame also has a strike, so it’s 10 plus 5 for the first ball of the third frame and 5 for the second ball of that frame, for a total of 20. Add that to the 25 from the first frame, for a game total of 45.
The third frame has a spare, so it’s 10 again, but with just the next ball added, which is 3, for a total of 13, and add it to the game total from the previous frame, that’s 58. So our scoring code and scoreboard code works!
Style the GUI
The appearance of a GUI Control can be customized with a GUIStyle, which is a collection of properties that affect the display of the Control. Conceptually, it’s similar to how Cascading Style Sheets (CSS) are used in formatting web content.
Each GUI function that creates a GUI Control is an overloaded function that comes in two flavors: one that uses the default GUIStyle and one that takes a GUIStyle argument. The initial single-label example just used the default GUIStyle, but the scoreboard uses the version of GUI.Label that takes a GUIStyle argument, which provides a way to customize the scoreboard’s appearance.
The GUIStyle passed to the GUI.Label is bound to a public variable named style , which allows customization of the GUIStyle in the Inspector View. For example, since the scoreboard is all text, you can click the Text Color field in the Normal subsection of the style (equivalent to accessing style.onNormal.textColor in the script) to bring up a color chooser and change the color of the scoreboard (Figure 9-3).

Figure 9-3. GUIStyle options
Among the many other GUIStyle properties, several affect the GUI font, which defaults to Unity’s built-in font, Arial. You can change the font by dragging a Font asset from the Project View into the Font field of the GUIStyle (in the script, that would be the variable style.font). Any font in TrueType, OpenType, or dfont format can be imported into Unity.
Other GUIStyle properties control the font size and style (for Font assets imported as dynamic fonts), text alignment, and word wrap.
Rich text format is particularly interesting, as it provides for HTML-like markup in the label text. So really, although the script is simple, your style customization options are plentiful!
Compared with the scoreboard, a start/pause menu will take considerably more scripting, so, first, a design is in order. Let’s create a main menu and two submenus: one for game options and one to display the game credits. The options menu will have distinct panels for audio, graphics, system, and stats. The logic is not as complicated as for the bowling game controller, but it’s another example where you should first sketch out the design as a state diagram (Figure 9-4).

Figure 9-4. A state diagram for a pause menu
The diagram shows that the player can go from the game playing state (or equivalently, the menu-invisible state) to the main pause menu, and from there to a credits screen, an options menu, or quit the game. The options menu in turn can display an audio, graphics, system, or statistics panel, each of which could be listed as states, but for now, let’s keep it simple by just thinking of each top-level menu screen as a state.
All states except for Quit (which you can think of as the exit state) can transition back to the state that transitioned to them in the first place, which is why each transition arrow is drawn bidirectionally. This means the player can go from the main menu to the options menu and back to the main menu, and from there can go back to the normal game play mode. But there won’t be any shortcuts going from the options menu straight back to gameplay, for example.
Create the Script
Let’s start the pause menu implementation by creating a new JavaScript in the Scripts folder of the Project View and name it FuguPause (Figure 9-5).
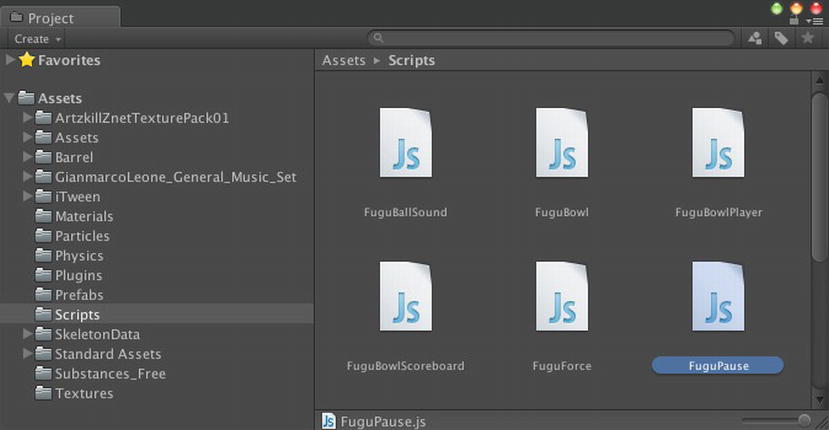
Figure 9-5. Creating the FuguPause.js script
Now, to add the script to the scene, create a new GameObject in the Hierarchy View, name it PauseMenu, and attach the FuguPause script to the PauseMenu GameObject.
The technique used in the FuguBowl script of implementing a state machine with coroutines won’t work with UnityGUI, as all of the UnityGUI functions must be called within an OnGUI callback. But the state diagram is still useful as the basis for an implementation. For starters, we can focus on the states that represent distinct menu screens. Let’s call them “pages” to distinguish them from the more general term “screen.” These menu states could be distinguished by strings or integers, but an enumeration fits the bill when you have several related but distinct values. So let’s define an enum called Page for the menu page states and a variable named currentPage to track which page is currently being displayed (Listing 9-3).
Listing 9-3. Enumerations for Menu Pages
enum Page {
       None,Main,Options,Credits
}

private var currentPage:Page;
Following the state diagram, the enum lists a state for no menu (the game is playing), the main menu page, the options page, and the credits page. Because the variable currentPage is of type Page, only the values Page.None,Page.Main,Page.Options, or Page.Credits can be assigned to that variable.
Pause the Game
Making a pause menu involves solving two problems: making a menu and making the game pause. We’ll start with making the game pause. The static variable Time.timeScale specifies how fast the simulated game time progresses and defaults to 1. Setting Time.timeScale to 0 effectively pauses the game, suspending physics, animation and anything else dependent on the advance of Time.time. So let’s make a PauseGame function that sets Time.timeScale to 0 (Listing 9-4).
Listing 9-4. A Function to Pause the Game in FuguPause.js
private var savedTimeScale:float;       // Time.timeScale before we pause

function PauseGame() {
       savedTimeScale = Time.timeScale; // save normal time scale
       Time.timeScale = 0;              // suspend time
       AudioListener.pause = true;      // suspend music
       currentPage = Page.Main;         // start with the main menu page
}
PauseGame first saves the current Time.timeScale in a variable savedTimeScale so we can restore Time.timeScale when the game is unpaused (we shouldn’t assume Time.timeScale is 1 when the game is paused).
PauseGame also sets AudioListener.pause to true, which suspends any playing sounds (you don’t want to do this if you’re going to play sounds in the menu).
Finally, the currentPage variable to the is set to Page.Main, indicating the main pause screen should be displayed.
The game is unpaused by reversing all of that (Listing 9-5).
Listing 9-5. Function that Unpauses the game in FuguPause.js
function UnPauseGame() {
       Time.timeScale = savedTimeScale;
       AudioListener.pause = false;
       currentPage = Page.None;
}
UnPauseGame restores Time.timeScale to the value you saved in the variables savedTimeScale by PauseGame, and sets AudioListener.pause to false to reenable audio.
To see if the game is paused, you can just check if Time.timeScale is 0. Listing 9-6 shows a little convenience function for that. Notice that it’s a static function, so any script can call it as FuguPause.IsGamePaused().
Listing 9-6. Checking if the Game is Paused in FuguPause.js
static function IsGamePaused() {
       return Time.timeScale==0;
}
If the game is to start paused, the Start callback should have a call to PauseGame (Listing 9-7). Adding a public boolean variable startPaused and checking it before calling PauseGame makes the initial pause optional.
Listing 9-7. Pausing the Game in the Start Callback of FuguPause.js
var startPaused:boolean = true; // bring up the menu at game start

function Start() {
       if (startPaused) {
               PauseGame();
       }
}
Since the default value for startPaused is true, if you click Play, the game will immediately pause, showing the ball suspended in the air. And then you’re stuck, since there’s no menu. There’s also no way to unpause then pause again, so let’s have the Escape key (the key labeled ESC on the top left of most keyboards), toggle the pause state. Input handling is usually performed in the Update callback, and this is no exception (Listing 9-8).
Listing 9-8. Handling the Escape Key in the Update Callback of FuguPause.js
function Update() {
       if (Input.GetKeyDown("escape"))	{
               switch (currentPage) {
                      case Page.None: PauseGame(); break;   // if not paused, then pause
                      case Page.Main: UnPauseGame(); break; // if paused, then unpause
                      default: currentPage = Page.Main;     // any subpage goes back to main page
               }
       }
}
The first line checks if the ESC key has been pressed. If so, then it calls PauseGame, unless the pause menu is already up. The function also treats ESC as a back key, switching from a subpage to the main page or from the main page to an unpaused state.
Setting Time.timeScale to 0 halts the advance of Time.time, so Time.deltaTime is always 0. This works great for Update functions that multiple values by Time.deltaTime, but dividing by Time.deltaTime when time is frozen results in a division-by-zero error. There is such a case in the Update callback of the FuguForce script, so before proceeding with the pause menu, that has to be taken care of (Listing 9-9).
Listing 9-9. Avoiding Divide-by-Zero in FuguForce.js
function Update() {
       forcex = 0;
       forcey = 0;
       if (Time.deltaTime > 0) {
               CalcForce();
       }
}

function CalcForce() {
       var deltaTime:float = Time.deltaTime;
       forcex = mousepowerx*Input.GetAxis("Mouse X")/deltaTime;
       forcey = mousepowery*Input.GetAxis("Mouse Y")/deltaTime;
}
Instead of immediately dividing the rolling force values by Time.deltaTime, now the Update callback checks that Time.deltaTime is not 0 before proceeding with the force calculation, now moved into a CalcForce function. Update always initializes the force values to 0 to ensure that no lingering force is applied to the bowling ball while the game is paused.
The actual display of the pause menu, as with the scoreboard in the previous section, must take place in an OnGUI callback function. Specifically, OnGUI needs to check if the game is paused, and if so, then display the current menu page (Listing 9-10).
Listing 9-10. The OnGUI Callback in FuguPause.js
function OnGUI () {
       if (IsGamePaused()) {
               switch (currentPage) {
                      case Page.Main: ShowPauseMenu(); break;
                      case Page.Options: ShowOptions(); break;
                      case Page.Credits: ShowCredits(); break;
               }
       }
}

function ShowPauseMenu() { Debug.Log("Main Pause"); }
function ShowOptions() { Debug.Log("Options"); }
function ShowCredits() { Debug.Log("Credits"); }
For now, there are placeholders for each of the page display functions, keeping the script in a runnable state (i.e., without compilation errors) as you fill out each of the display functions one at a time. It’s a good idea to place Debug.Log statements inside these stub functions to verify they’re called when expected. For example, if you click Play, you should see “Main Pause” appear in the Console View every time you pause the game.
For the menu buttons that are stacked vertically and centered in the screen, you can take advantage of the GUILayout functions to avoid figuring out each Rect that would otherwise have to be passed for each GUI.Button. Between calls to GUILayout.BeginArea and GUILayout.EndArea you can make calls to create GUI Controls without passing a Rect to each one, using the GUILayout versions of the GUI functions. The Controls will be automatically placed and sized within the Rect that was passed to GUILayout.BeginArea. Since all of the pause menu pages will be displayed the same way, let’s make some convenience functions that wrap around the GUILayout functions (Listing 9-11).
Listing 9-11. GUILayout Functions for Positioning Pages in FuguPause.js
var menutop:int=25; // y-coordinate for top of the menu

function BeginPage(width:int,height:int) {
        GUILayout.BeginArea(Rect((Screen.width-width)/2,menutop,width,height));
}

function EndPage() {
       if (currentPage != Page.Main && GUILayout.Button("Back")) {
               currentPage = Page.Main;
       }
       GUILayout.EndArea();
}
The BeginPage function calls GUILayout.BeginArea, and the area is specified by the width and height passed as arguments, horizontally centered on the screen and with its top edge distance from the top of the screen specified by the public variable menutop.
The EndPage function calls GUILayout.EndArea, but before that, if the current page is not the main page, displays a Back button. If that button is clicked, then the current page is set to the main page.
Now we have all of the pieces to get a menu on the screen. Listing 9-12 shows a fleshed-out ShowPauseMenu function.
Listing 9-12. Function that Displays the Pause Menu in FuguPause.js
function ShowPauseMenu() {
       BeginPage(150,300);
       if (GUILayout.Button ("Play")) {
               UnPauseGame();
       }
       if (GUILayout.Button ("Options")) {
               currentPage = Page.Options;
       }
       if (GUILayout.Button ("Credits")) {
               currentPage = Page.Credits;
       }
#if !UNITY_WEBPLAYER && !UNITY_EDITOR
       if (GUILayout.Button ("Quit")) {
               Application.Quit();
       }
#endif
       EndPage();
}
All of the GUI code between BeginPage and EndPage effectively takes place between GUILayout.BeginArea and GUILayout.EndArea, so you can use the GUILayout versions of the GUI calls to create elements without passing Rects. For example, instead of calling GUI.Button you could call GUILayout.Button. Aside from the missing Rect parameter, the functions look otherwise identical.
GUILayout.Button is different from GUILayout.Label in that it returns true or false depending on whether the button has been pressed. So each call to GUILayout.Button takes place inside an if test and executes the appropriate statement if the button has indeed been pressed.
When you click Play, you’ll now see the main menu, and the Play button in the menu should unpause the screen (Figure 9-6). Application.Quit has no functionality in a Unity web player or in the Editor, so that piece of code is surrounded by a test of the corresponding preprocessor definitions UNITY_WEBPLAYER and UNITY_EDITOR to see if the build target is a web player or if you’re running in the Editor. These definitions are evaluated just before compilation takes place (hence the term “preprocessor”), so if UNITY_WEBPLAYER is false and UNITY_EDITOR is false, the enclosed code is compiled. Otherwise, it’s as if the code were never there.
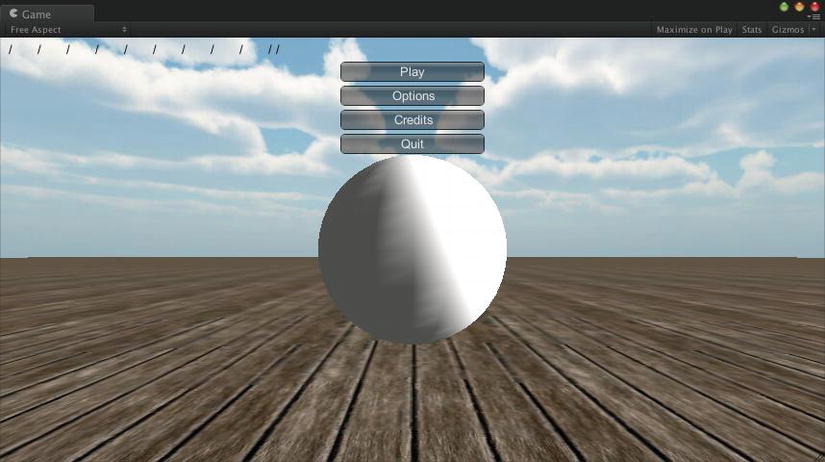
Figure 9-6. The main menu
The Credits and Options buttons won’t do anything yet, because the ShowCredits and ShowOptions functions are still empty shells. The Credits page is simpler, so let’s start with that one.
Multiple credit entries can be stored in a String array. A variable credits is defined for that, along with a ShowCredits function to display the credits, in Listing 9-13.
Listing 9-13. Function to Display the Credits Page in FuguPause.js
var credits:String[]=[
       "A Fugu Games Production",
       "Copyright (c) 2012 Technicat, LLC. All Rights Reserved.",
       "More information athttp://fugugames.com/"] ;

function ShowCredits() {
       BeginPage(300,300);
       for (var credit in credits) {
               GUILayout.Label(credit);
       }
       EndPage();
}
Because the variable credits is public, you can edit each of the credit entries and add to the array or remove from it in the Inspector View.
The ShowCredits function loops through the array of credits and displays each one in a UnityGUI label (Figure 9-7). Notice that there is a simple way to loop through the array using in instead of the usual habit of iterating through a sequence of array indices. In this particular case, you don’t need an index for anything else, so let’s go with the simpler method.

Figure 9-7. The Credits page
Like the main menu, you start with a call to BeginPage and end with EndPage so you’re operating inside a GUILayout area (this time 300 × 300) and can use GUILayout.Label instead of GUI.Label. EndPage ensures that there automatically is a Back button. And remember, the Update callback also treats the ESC key as equivalent to clicking the Back button.
The Options page is quite a bit more involved than the Credits page, as it features a toolbar implemented with four tabs: Audio, Graphics, Stats, and System. Listing 9-14 shows the fleshed-out ShowToolbar function, with some supporting variables and functions.
Listing 9-14. The Options Page in FuguPause.js
private var toolbarIndex:int=0; // current toolbar selection
private var toolbarStrings: String[]= ["Audio","Graphics","System"]; // tabs

function ShowOptions() {
       BeginPage(300,300);
       toolbarIndex = GUILayout.Toolbar (toolbarIndex, toolbarStrings);
       switch (toolbarInt) {
               case 0: ShowAudio(); break;
               case 1: ShowGraphics(); break;
               case 2: ShowSystem(); break;
       }
       EndPage();
}

function ShowAudio() { Debug.Log("ShowAudio"); }
function ShowGraphics() { Debug.Log("ShowGraphics"); }
function ShowSystem() { Debug.Log("ShowSystem"); }
Again, everything in the ShowOptions function is enclosed between calls to the BeginPage and EndPage functions. The first line calls GUILayout.Toolbar to create a toolbar—a row of buttons that acts as a tab or radio button—from a String array, where each String is the label of the button. The function also takes an integer that corresponds to a position in that array of strings. That is the button to make currently active on the toolbar. But if you just had
GUILayout.Toolbar (toolbarIndex, toolbarStrings);
then toolbarIndex would never change from its initial value (0), and even if you click another button, the next time this is called (in the next invocation of OnGUI), the active button would be set back to that value.
But GUILayoutToolbar returns an integer that represents the currently active button, so you feed that value back into the variable that you passed in, toolbarIndex.
toolbarIndex = GUILayout.Toolbar (toolbarIndex, toolbarStrings);
Thus, toolbarIndex is 0 initially, but if you click Graphics, it’ll change to 1, and if you click Controls it’ll change to 2, and so on. Then there is a switch statement that checks toolbarIndex and calls the display function that matches the selected button. As with the main menu, we start with stub functions and implement them on by one. Go ahead and click around, and you should see the corresponding function names show up in the Console View, because that’s all you’ve told it to do!
When the Audio tab is selected, it will display a slider for volume control (Figure 9-8).

Figure 9-8. The Audio panel in the pause menu
Adding that slider the ShowAudio function is actually pretty easy, just one line. Well, two lines, since a slider with no label is a bit too mysterious (Listing 9-15).
Listing 9-15. The Audio Panel in FuguPause.js
function ShowAudio() {
       GUILayout.Label("Volume");
       AudioListener.volume = GUILayout.HorizontalSlider(AudioListener.volume,0.0,1.0);
}
The first line calls GUILayout.Label, which should be familiar by now. The second line calls GUILayout.HorizontalSlider, which takes as arguments the minimum value represented by the slider, the maximum value, and a value that represents the current setting.
The slider reflects the value of AudioListener.volume, which is the master volume of all sounds in Unity. So AudioListener.volume is passed as the current value of the slider, and because AudioListener.volume ranges from 0 to 1, pass those values are passed as the minimum and maximum, respectively. And, in order to register the slider value, the return value of GUILayout.Slider is assigned to back AudioListener.volume. Otherwise, the value of AudioListener.volume will never change and the slider won’t budge.
The Graphics panel will display the some of the same graphics quality information shown by the Quality Settings of the Unity Editor (Figure 9-9).

Figure 9-9. Graphics options in the pause menu
The two buttons at the bottom of the panel increase and decrease the Quality Settings level. This panel doesn’t require any new UnityGUI controls to implement this panel, but it does access the QualitySettings class (Listing 9-16).
Listing 9-16. Function that Displays the Quality Settings
function ShowGraphics() {
       GUILayout.Label(QualitySettings.names[QualitySettings.GetQualityLevel()]);
       GUILayout.Label("Pixel Light Count: "+QualitySettings.pixelLightCount);
       GUILayout.Label("Shadow Cascades: "+QualitySettings.shadowCascades);
       GUILayout.Label("Shadow Distance: "+QualitySettings.shadowDistance);
       GUILayout.Label("Soft Vegetation: "+QualitySettings.softVegetation);
       GUILayout.BeginHorizontal();
       if (GUILayout.Button("Decrease")) {
               QualitySettings.DecreaseLevel();
       }
       if (GUILayout.Button("Increase")) {
               QualitySettings.IncreaseLevel();
       }
       GUILayout.EndHorizontal();
}
The ShowGraphics function is fairly straightforward. It retrieves the current Quality Settings level, represented as an integer, by calling QualitySettings.GetQualityLevel, and then uses that integer as an index to the QualitySettings.names array to retrieve the name of that Quality Setting. That name and several Quality Settings properties are displayed in labels, and two buttons are placed at the bottom: one calling QualitySettings.DecreaseLevel and the other calling QualitySettings.IncreaseLevel.
The two buttons allow you to increase and decrease the Quality Settings level, within the range of existing levels, and not only will you see the displayed Quality Settings information change, you might see the graphical quality of the scene change before your eyes, too, since it’s still being rendered every frame, even with the game time paused.
The System panel displays information about the hardware platform (Figure 9-10).

Figure 9-10. The System panel in the pause menu
As in the Graphics page, the information is displayed with labels, but whereas the Graphics page accesses the QualitySettings class, the System panel accesses the SystemInfo class (Listing 9-17).
Listing 9-17. The System Panel in FuguPause.js
function ShowSystem() {
       GUILayout.Label("Graphics: "+SystemInfo.graphicsDeviceName+" "+
       SystemInfo.graphicsMemorySize+"MB
"+
       SystemInfo.graphicsDeviceVersion+"
"+
       SystemInfo.graphicsDeviceVendor);
       GUILayout.Label("Shadows: "+ Available(SystemInfo.supportsShadows));
       GUILayout.Label("Image Effects: "+Available(SystemInfo.supportsImageEffects));
       GUILayout.Label("Render Textures: "+Available(SystemInfo.supportsRenderTextures));
}
The SystemInfo class provides information about the graphics hardware and its capabilities, including some identifying information such as the device name and the name of the vendor, its graphics memory size, and whether the hardware supports some of the more advanced features, such as dynamic shadows, rendering to a texture, or image effects (which requires rendering to a texture).
You may have noticed the white text in the pause menu is often difficult to read. One solution is to change the static variable GUI.color, which tints the entire GUI with a color value (Listing 9-18).
Listing 9-18. GUI Color Customization in FuguPause.js
var hudColor:Color = Color.white;

function OnGUI () {
       if (IsGamePaused()) {
               GUI.color = hudColor;
               switch (currentPage) {
                      case Page.Main: ShowPauseMenu(); break;
                      case Page.Options: ShowOptions(); break;
                      case Page.Credits: ShowCredits(); break;
               }
       }
}
We add a public variable hudColor to the FuguPause script so a color can be chosen in the Inspector view. All UnityGUI operations, including setting variables like GUI.Color, must take place within an OnGUI callback, so the assignment to GUI.color is placed inside the OnGUI callback before any of the GUI Controls are created (but after IsGamePaused is called, since there’s no reason to set GUI.Color if there’s no GUI rendering). Note that you can set GUI.color multiple times within OnGUI to change the color before rendering various parts of the GUI.
Now you can select a color in the Inspector View (Figure 9-11) and see the resulting GUI tint (Figure 9-12).

Figure 9-11. Color selection for the pause menu

Figure 9-12. The pause menu with a custom color
The default UnityGUI skin is pretty neutral, and it’s hard to read the text, as you can see with the pause menu from the previous section. With the scoreboard, you could change the text color by adjusting the style passed to GUI.Label, but if you have a lot of GUI elements, that can be a hassle.
That’s where UnityGUI skins come in. A Skins is a collections of styles assigned to the various GUI elements. Applying a skin is easy—just declare a public variable of type GUISkin and assign that skin to the variable GUI.skin, within the OnGUI callback, similar to assigning a GUI.Color (Listing 9-19).
Listing 9-19. Adding a GUISkin to the Pause Menu
var skin:GUISkin;

function OnGUI () {
       if (IsGamePaused()) {
               if (skin != null) {
                      GUI.skin = skin;
               } else {
                      GUI.color = hudColor;
               }
               switch (currentPage) {
                      case Page.Main: ShowPauseMenu(); break;
                      case Page.Options: ShowOptions(); break;
                      case Page.Credits: ShowCredits(); break;
               }
       }
}
You can test this skin support with a really cool-looking free UnityGUI skin from the Asset Store called the Necromancer GUI (Figure 9-13).

Figure 9-13. The Necromancer GUI on the Asset Store
Download and import the Necromancer GUI, then drag its skin file (named Necromancer GUI) into the Skin property that’s now in the Inspector View (Figure 9-14).

Figure 9-14. The Necromancer GUI
Then click Play, and you have a much more ornate pause menu. Figure 9-15 shows how the pause menu Graphics panel looks with the Necromancer GUI. Look at all the pretty buttons!
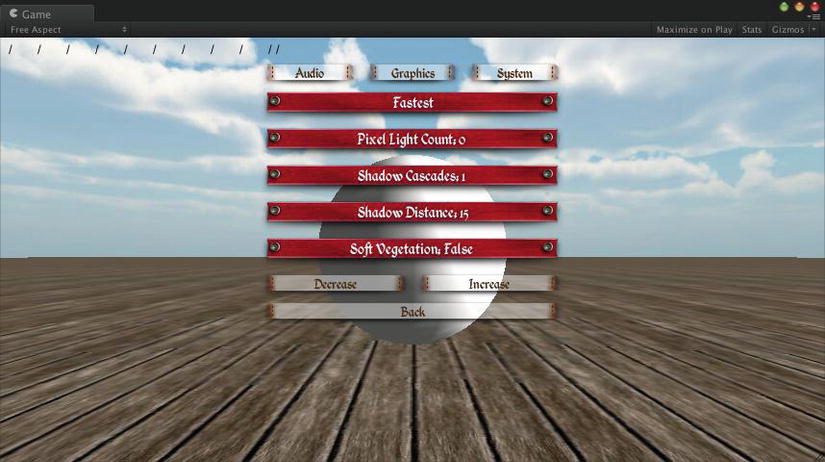
Figure 9-15. The Necromancer GUI skin in action
The finalized start/pause menu script is significantly longer than the scoreboard script, so the complete listing is omitted here. All the code has been shown in this chapter, and the entire script FuguPause.js is available in the project for this chapter at http://learnunity4.com/.
Explore Further
Finally, the scoreboard display makes our bowling game a fully functional bowling game, and the addition of a start/pause menu provides some of the polish that players expect!
The addition of the game GUI not only completes the bowling game (in a commercial game project, this might be considered a “first playable” milestone) but it also marks the end of our introduction to Unity’s basic features typically used in a 3D game.
Tip Although I left the GUI development to the end of this phase, which is unfortunately common in game development, it’s best to include GUI design early in the project. Even just sketching out the menus will help clarify the anticipated game modes and options.
For the most part, although you’ve been modifying and testing the game solely in the Editor, these are cross-platform features. Right now, you could build this game as a web player or a Mac or Windows executable, and the game would run the same on all platforms, performance differences aside. But the ultimate goal of this book is to get you into iOS development, so, starting with the next chapter, the remainder of this book will be all about Unity iOS.
The Game Interface Elements link in the “Creating Gameplay” section of the Unity Manual leads to the “GUI Scripting Guide,” which is a tutorial-style sequence of pages that goes through the UnityGUI system, from creating a single button to adding various other UnityGUI Controls such as sliders and radio buttons, use of automatic layout vs. fixed layout, creating reusable compound Controls, and customizing the GUI appearance with styles and skins.
The “GUI Scripting Guide” also explains how you can customize the Unity Editor using UnityGUI. It turns out the Editor interface is actually implemented with UnityGUI (which explains why on occasion you may see an OnGUI error message in the Console View that is not related to any of your code)!
I briefly mentioned how additional fonts besides the built-in Unity font can be imported into a Unity project and then assigned to UnityGUI styles and skins. The Reference Manual has a page in its Asset Components section describing the Font asset and its import options in more detail.
Naturally, the Runtime Classes list in the Scripting Reference includes pages describing the UnityGUI functions you’ve used, starting with the “OnGUI” callback defined in the “MonoBehaviour” class.
Most of the UnityGUI functions used in both the scoreboard and pause menu are the static “GUI” and “GUILayout” functions used to create the various UnityGUI Controls, such as “GUI.Button” and “GUI.Label.” It’s worth going through the Scripting Reference pages for each of them so you know what GUI Controls are available, along with customization variables like “GUI.color” and “GUI.skin” (and there are others, e.g., to customize the background color). GUIStyle and GUISkin are classes too, and you can change their properties any time in a script.
Besides the UnityGUI classes, a few others are used in the pause menu. The static variable “Time.timeScale” was set to pause and unpause the game, “Application.Quit” called to exit the game, and the “AudioListener,” “QualitySettings,” and “SystemInfo” classes accessed in the Options page.
The Necromancer GUI looked great in the pause menu, demonstrating how nice UnityGUI can look with a well-crafted GUISkin, but there are many others on the Asset Store. They’re all listed, along with the Necromancer GUI, in the “GUI Skins” category under “Textures and Materials.” That category is well populated with skins for UnityGUI and also skins for third-party GUI systems, such as the popular EZGUI from Above and Beyond Software (http://anbsoft.com/) and NGUI from Tasharen Entertainment (http://tasharen.com).
Those third-party GUI systems are available under the “Scripting” category, in the well-populated “GUI” subcategory, which is filled with pre-scripted GUIs such as minimaps and menus. In fact, a version of the pause menu implemented in this chapter is on the Asset Store in the “Complete Projects” section (under the name FuguPause).
The Asset Store also has a decent assortment of fonts listed under the “Fonts” category of “Textures and Materials.” But since Unity can import TrueType and OpenType fonts, a plethora of free font sites on the web is available to you, along with moderately priced font libraries (I use the MacXWare Font Library).