
Getting Started
Unity is a cross-platform 3D game development system developed by a company called Unity Technologies (originally named Over the Edge). What does it mean to call Unity cross-platform, exactly? Well, it’s cross-platform in the sense that the Unity Editor, the game creation and editing tool that is the centerpiece of Unity, runs on OS X and Windows. More impressively, Unity is cross-platform in the sense that from the Unity Editor we can build games for OS X, Windows, web browsers (using either Flash, Google Native client, or Unity’s browser plug-in), iOS, Android, and game consoles. And the list keeps growing (shortly before this book’s publication, Unity Technologies announced support for the BlackBerry 10)!
As for 3D, Unity is a 3D game development system in the sense that Unity’s built-in graphics, sound, and physics engines all operate in 3D space, which is perfect for creating 3D games, but many successful 2D games have also been developed in Unity.
This book describes the latest version of Unity as of this writing, which is Unity 4.1.2, but Unity is a fast-moving target, with new features and user interface changes appearing even in minor releases (which are appearing more frequently, since Unity Technologies has introduced a faster incremental update schedule starting with Unity 4). This caveat applies to everything else, of course, including products, licenses, and prices from Unity, Apple, and third-party vendors.
Prerequisites
Before the fun part, learning how to use the Unity Editor and build games, you need to download Unity, install it, and activate a license. Although you’ll spend the first several chapters working with step-by-step examples in the Unity Editor and not get into iOS development until later (by the way, iOS originally stood for iPhone Operating System, but now includes the iPod Touch and iPad), it’s not a bad idea to get started on the iOS development prerequisites, too.
For iOS development, you’ll need a Mac running the Lion or Mountain Lion version of OS X (that is, version 10.7 and up). Unity 4 can still run on older versions of OS X, like Snow Leopard, but Lion and Mountain Lion are currently required to run the latest version of Xcode, the software tool required by Apple for iOS development. Typically, the latest or fairly recent version of Xcode is required to target the latest version of iOS.
Register as an iOS Developer
It’s worth visiting the Apple developer site to register as an iOS developer as soon as possible, since the approval process can take a while, particularly if you’re registering a company. First, you’ll need to register on the site as an Apple developer (free) and then log in and register as an iOS developer ($99 per year membership). This is required to deploy your apps on test devices and to submit those apps to the App Store.
Download Xcode
Although you won’t need Xcode until we reach the iOS portion of this book, you can download Xcode now from the Mac App Store (just search for “xcode”) or from the Apple developer site at http://developer.apple.com/. When you start building Unity iOS apps, I’ll go over the Xcode installation in more detail.
Download Unity
To obtain Unity, visit the Unity web site at http://unity3d.com/ and go to the Download page. There you will find a download link for the latest version of Unity (at the moment, Unity 4.1.2) and also a link to the release notes (which are included with the installation). There is also a link to a list of older versions in case you need to roll back to a previous version of Unity for some reason.
Tip While you’re on the Unity web site, take a look around. Check out the demos, the FAQ, the feature comparisons among the various licenses, and the support links to the documentation, user forum, and other community support sites. You’ll certainly have to come back later, so you might as well figure out where everything is now!
There is only one Unity application, with additional features and platform support activated by licenses. For example, the product name Unity iOS Pro specifies Unity with an added Unity Pro license and also a Unity iOS Pro license. I’ll elaborate on the various licenses a little bit later in this chapter when I introduce the License Management window in Unity.
Unity version numbers are in the form major.minor.patch. So Unity 4.1.2 is Unity 4.0 with an incremental upgrade to Unity 4.1, with a couple of bug fix updates. Major upgrades, such as Unity 3 to Unity 4, require a license upgrade purchase and may require changes to the project.
Tip In general, once a Unity project has been upgraded, it may become incompatible with older versions of Unity. So it’s a good idea to make a copy of your project before upgrading it, just in case you need to revert back to the previous version of Unity.
To start the Unity installation process, click the download link (as of this writing, it’s a button labeled Download Unity 4.1.2). The file is around 1GB in size, so the download will take a while, but we’re on our way!
The Unity download file is a disk image (DMG file), which at this time is a file named unity-4.1.2.dmg. Once the file is downloaded, double-click it to see the disk image contents (Figure 1-1).

Figure 1-1. The Unity installer files
The installer disk image only contains two files: the release notes and the standard OSX installer package for Unity in the form of a file named Unity.pkg.
Double-click the Unity.pkg file to start to begin the Unity installation (Figure 1-2).

Figure 1-2. The Unity installer
The installer will proceed through a typical installation sequence (the steps are listed on the left side of the installer window), and at the end, a Unity folder will be placed in your Applications folder.
Tip If you happen to be upgrading from an older version of Unity, this process will just replace that old version. If you want to keep the previous copy around, rename the old folder first. For example, if you’re upgrading from Unity 3.5 to Unity 4, first rename your Unity folder to “Unity35” before performing the new installation. Then you can run both versions of Unity.
The Unity installation folder contains the Unity application and several associated files and folders (Figure 1-3).

Figure 1-3. Contents of the Unity installed folder
The most important file in the Unity installation folder, and the only one you really need, is the Unity app, which provides the environment used to construct your games. This app is sometimes more specifically termed the Unity Editor, as distinct from the Unity runtime engine, or Unity Player, that is incorporated into final builds. But usually when I just say “Unity,” the context is clear (I also refer to Unity Technologies as Unity).
The Documentation folder contains the same User Manual, Component Reference, and Script Reference viewable on the Unity web site (under the Learn tab). Each of these files can be brought up within a web browser from the Unity Help menu, and you can always double-click Documentation.html directly to see the front page of the documentation.
The Standard Packages folder contains several files with the .unityPackage extension. These Unity package files each hold collections of Unity assets and can be imported into Unity (and from Unity, you can export assets into a package file). For example, the Standard Package file named Scripts.unityPackage contains several generally useful scripts.
The MonoDevelop app is the default script editor for Unity and is a custom version of the open source MonoDevelop editor used for the Mono Project, known as Mono for short. Mono is an open source version of Microsoft’s .NET framework and forms the basis of the Unity scripting system.
The Unitron app is an earlier and simpler script editor that is also derived from another program, a text editor called Smultron developed by Peter Borg. Although customized for Unity and still included in the Unity installation, Unitron is no longer officially supported.
Finally, there’s the Unity Bug Reporter app, which is normally run from the Report a Bug item in the Unity help menu. However, you can always launch the Unity Bug Reporter directly from the Unity installation folder. That’s pretty helpful if you run into a bug where Unity doesn’t even start up!
Activate a License
Go ahead and double-click the Unity app to run it. If this is the first time Unity has been installed on your machine, you’ll be presented with a license activation window. Of the three options presented, two are applicable to Unity iOS development: entering the serial number for a Unity license purchased in the Store section of the Unity web site (Figure 1-4) and registering for a free one-month trial of Unity Pro with Unity iOS Pro and Unity Android Pro (Figure 1-5).
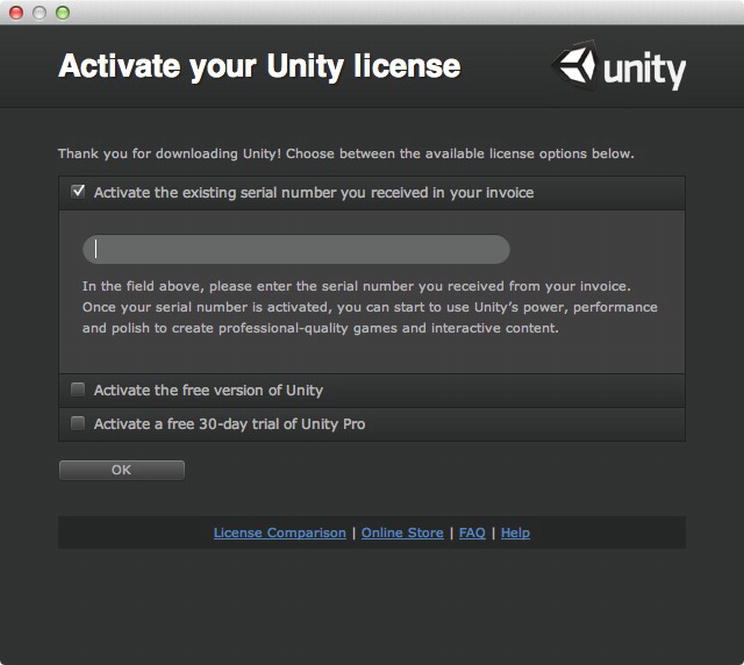
Figure 1-4. Activating a paid Unity license

Figure 1-5. Activating a free Unity trial
The free version of Unity, which is Unity without the Pro features and is officially called just Unity (although sometimes it’s referred to as Unity Basic, and I still call it Unity Indie, since it’s only supposed to be used by entities making less than $100,000 a year), doesn’t include Unity iOS. You can still start with free Unity for the portion of this book leading up to the iOS chapters and then add Unity iOS for $400, but keep in mind the Unity Pro and Unity iOS Pro features won’t be available.
To clarify, your license determines which core version of Unity is enabled and which add-ons, if any, are enabled. The core product and the add-ons are available in non-Pro and Pro versions, and Unity Pro must be licensed for any Pro version of the add-ons to be licensed. So, developing with the non-Pro version of Unity iOS will cost you $400 in Unity licenses, but developing with Unity iOS Pro will cost $1,500 for Unity Pro and another $1,500 for Unity iOS Pro, for a grand total of $3,000. Unity Technologies sometimes offers discounts, especially when they’re introducing a new major version of Unity, and prices can change, of course (after all, Unity Indie used to cost $400 and now it’s free). In any case, the availability of the free trial Pro license means you don’t have to worry about that immediately.
Welcome to Unity!
After you get the licensing taken care of, the Unity Editor window will appear with a friendly “Welcome To Unity” window appearing on top (Figure 1-6). The welcome window suggests some resources you should look at to get started. You can click each item to bring up that resource.
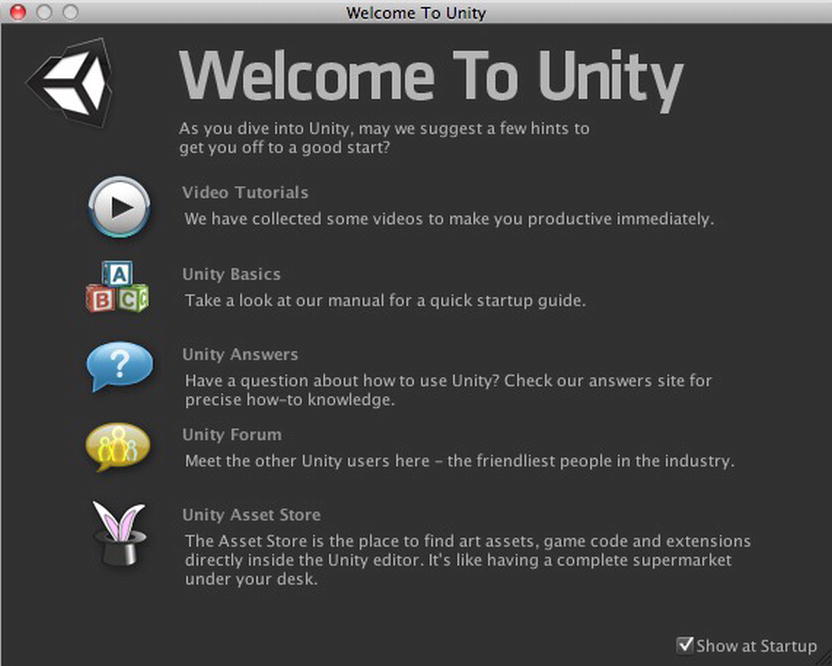
Figure 1-6. The Unity Welcome screen
The Welcome window will appear every time you start up Unity until you uncheck the “Show at Startup” check box in the lower right corner of the window. It’s a good idea to look at the suggested resources before doing that, although you can always bring up the Welcome window again using the Unity Help menu (Figure 1-7).
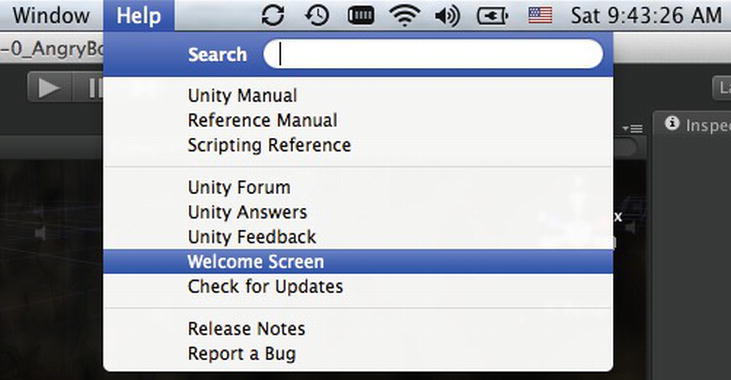
Figure 1-7. Bringing up the Welcome screen from the Unity Help menu
Before getting into actual game development with Unity, this is a good time to look at some of the administrative features in the Unity Editor.
Change Skins (Pro)
The Unity Editor appears in one of two skins, Dark or Light. If you’re using Unity Pro, you’ll initially see the Dark skin (Figure 1-8), and if you’re using the non-Pro version of Unity, you’ll only see the Light skin (Figure 1-9).
Figure 1-8. The Unity Editor with the Pro (Dark) skin

Figure 1-9. The Unity Editor using the Indie (Light) skin
For the rest of this book, I use the Dark skin for screenshots, but aside from the hue, there is no difference in the user interface. If you’re using Unity Pro and prefer the Light skin, you can change skins in the Unity Preferences window. First select Preferences in the Unity menu (Figure 1-10).

Figure 1-10. The Preferences menu item in the Unity Editor
Now with the Preferences window up, you can change the skin from Dark to Light or Light to Dark (Figure 1-11). This is a Unity Pro-only feature. If you’re using Unity Indie, you’re stuck with the Light skin.

Figure 1-11. General Preferences in the Unity Editor
While you’re in the Preferences window, I recommend making sure “Always Show Project Wizard” is checked. That will ensure Unity brings up the project selection dialog when it starts up, instead of automatically opening the most recently opened project, which can be time-consuming and is not always what you want. In particular, you don’t want to accidentally upgrade a project to a new version of Unity before you’re ready.
Eventually, you may need to update your license, either because you’re using the free trial and it has expired, to upgrade your license to Pro versions, to add another build platform, or because you need to switch your license to a different machine. At that point, you can bring up the Unity menu on the menu bar and select Manage License (Figure 1-12).

Figure 1-12. Bringing up the License Management window from the Unity menu
The resulting License Management window gives you the option of entering a new serial number or returning the license for this machine so you can use it for another (Figure 1-13).
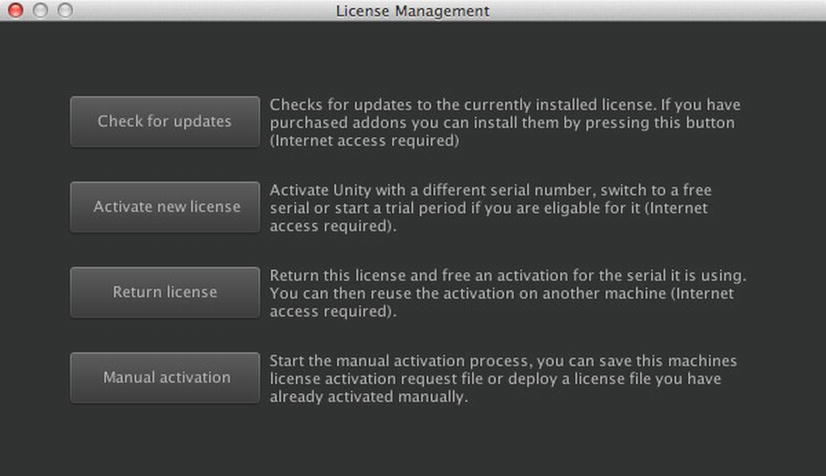
Figure 1-13. The License Management window
A single Unity license can be used on two machines. In its early years, when the Unity Editor only ran on OS X, a Unity license was only good for one machine, but the number was increased to two after Windows support for the Unity Editor was added.
If you use Unity for a significant period of time, you’ll certainly encounter bugs, real or imagined. That’s not a knock on Unity. The 3D game engines are very complicated, at least internally, and the pace of their development is remarkable (I started with Unity 1.6 when it only ran on OS X and only deployed builds for Windows and OS X). Bugs don’t fix themselves, especially when they’re not reported. That’s where the Unity Bug Reporter comes in. As I mentioned when going over the Unity installation files, the Bug Reporter is available in the Unity folder but normally is launched from the Help menu in the Unity Editor (Figure 1-14).
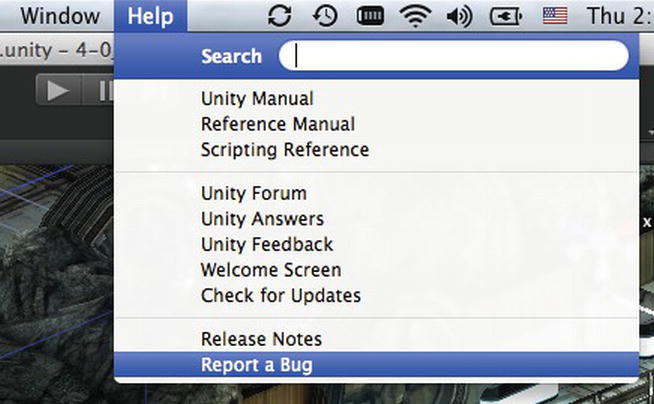
Figure 1-14. The Report a Bug option in the Help menu
Tip The Bug Reporter, as you can see in the list of files in the Unity installation, is a separate application from the Unity Editor. So if you encounter a bug that prevents the Unity Editor from starting up properly, you can always launch the Bug Reporter directly by double-clicking that file in the Finder.
The resulting Bug Reporter window (Figure 1-15), prompts you to select where the bug occurs (in the Unity Editor or in the Unity Player, i.e., a deployed build), the frequency of the bug’s occurrence, and an e-mail address to which Unity Technologies will send responses about this bug.

Figure 1-15. The Unity Bug Reporter window
Below that, in the middle of the window, is the list of attachments. Unity automatically starts off this list with the current project, and you might include supplemental files like screenshots or log files. You can remove the current project from this list, but normally you should include the project so that Unity support can reproduce the problem.
By the same token, you should fill in the problem description with a detailed enough explanation that Unity support would know how to replicate the undesired behavior and understand why it’s undesired. Basically, you want to avoid responses in the mode of “We can’t reproduce the problem” and “This is not a bug. It’s by design.”
Shortly after submitting a bug report, you should receive an e-mail confirmation from Unity Technologies with a case number and a link to a copy of the report in the Unity bug database, which you can check to see the status of the bug.
If you’re lucky, your bug report will result in a fix. And if you’re really lucky, that fix will show up in the next Unity update. You can always check if there’s a new update by selecting the Check for Updates command from the Window menu on the menu bar. The resulting window will display whether or not an update is available (Figure 1-16).

Figure 1-16. The Unity Editor Update Check
Notice the version number displayed in Figure 1-16 is Unity 4.1.2f1. The suffix represents the most granular releases, including emergency hot fixes. Out of some caution, Unity Technologies usually doesn’t make newly released updates immediately available to the Editor Update Check, so if you’re waiting anxiously for a bug-fix update, you can always check the Unity web site, too.
Explore Further
My favorite technical books, like Peter Van Der Linden’s Just Java (a very detailed but easygoing introduction to Java for nonprogrammers), provide a nice break at the end of each chapter by reciting an interesting anecdote, a bit of trivia, or some relevant history. Alas, I won’t be doing that in this book. However, I do find simple chapter summaries and recaps dull (I always skip them as a reader), and I feel one of the major challenges facing new Unity developers is that they need to get in the habit of finding Unity information on their own, and they need to know where to find that information, which isn’t always easy!
Therefore, at the end of each chapter, and including this one, I’ll direct you to documentation and other resources related to the topics you just learned, so you’ll know where to find the definitive and comprehensive information sources and can take things further when you’ve finished this book. I’ll focus on the official Unity manuals and the Unity web site but also mention some third-party resources. So now that you have Unity installed, before putting it to use in this book, take a break and browse the web sites and reference documentation that you will surely be utilizing heavily from now on. It’s always a good idea to figure out where to find what you need, before you need it!
At the beginning of this chapter, I mentioned it’s a good idea to get the ball rolling on downloading Xcode and registering for Apple’s iOS Developer Program.
Requirements for iOS development, including required hardware and details about the iOS Developer Program, are listed on Apple’s developer support page (http://developer.apple.com/support).
Information about Xcode requirements and downloading Xcode can be found at http://developer.apple.com/xcode.
Along with the growth of Unity features and platforms, the Unity web site (http://unity3d.com/) has grown, too. It’s all worth browsing, but in particular, for general information about Unity, check out the FAQ section on the Unity web site (http://unity3d.com/unity/faq).
The license activation process and License Management window are documented on http://unity3d.com/unity/activation. This chapter mentioned the distinct Pro and non-Pro versions of Unity and Unity iOS, but the license comparison table at http://unity3d.com/unity/licenses provides a more comprehensive table of features and their availability for the various licenses. Many instructional videos are available on the Unity Video archive (http://video.unity3d.com/) and Unity has recently introduced a Learn tab on their web site for easy access to documentation and tutorials.
The top section of the Unity Help menu (Figure 1-17) lists the official Unity documentation consisting of three documents: the Unity Manual, the Reference Manual, and the Scripting Reference. Although the Unity Manual doesn’t have much information on the installation and licensing procedure discussed in this chapter, the manual otherwise provides good general instruction and conceptual explanations on using Unity. The Reference Manual and Scripting Reference will become increasingly important as you create and script scenes throughout this book.

Figure 1-17. The Help menu
The Unity Help menu items bring up the locally installed copies of those manuals, but they are also available under the Learn tab of the Unity web site.
The first three items in the middle of the Unity Help menu are links to the official Unity community sites. The forum (http://forum.unity3d.com) is where users can bring up just about anything related to Unity (the forum does have moderators, though).
The Unity Answers site (http://answers.unity3d.com/) follows the format of Stack Exchange and provides some quality control over questions and answers. The Unity Feedback site (http://feedback.unity3d.com) allows users to post feature requests and vote on feature requests, whether they’re their own or posted by someone else.
Tip Although the bug type selector offers Feature Request as a Type of Bug, Unity encourages everyone to submit feature requests to their Feedback site.
Welcome to the Unity community!