Parris Bradly |
The Cheap, Easy, and Effective Snow Machine |
Making it snow for Villanova University’s production of Angels in Americu, I faced several difficulties: it had to snow at several onstage locations; we didn’t have a few thousand dollars to spare; and my crew consisted of unskilled student labor. The biggest obstacle, though, was that, since the grid of our black box theatre is close to the ceiling, there was no room to mount a snow cradle, and the snow would have to be stored and loaded into a distribution system that started in the wings. In response, I designed and built an inexpensive, very workable, and nearly foolproof snow machine.

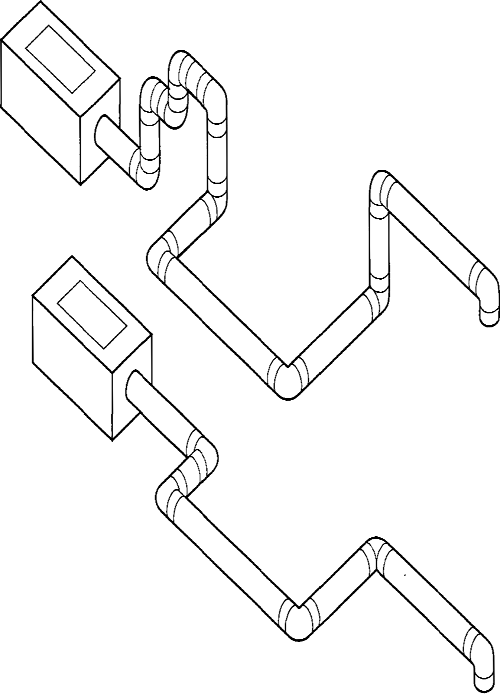
FIGURE 1: INEFFICIENT AND EFFICIENT SNOW MACHINE LAYOUTS
The snow machine consists of a bathroom exhaust fan, several lengths of PVC, and an assortment of PVC fittings, all joined by gaffer’s tape to facilitate any unclogging that might be necessary. In use, plastic snow is manually fed into the bathroom fan and is blown through the PVC to the desired exit port(s) onstage.
THE FAN
Buy a ducted bathroom exhaust fan without a light, taking two factors into consideration: the cfm rating and the sones rating. Most bathroom exhaust fans move 50 to 70 cfm with more expensive models moving as much as 110 cfm. The sones rating is an index of noise generated during operation. The lower the number, the quieter the fan. A fan with a 0.6 sones rating is practically noiseless: a 4.0 sones rating will remind you of the fan in a cheap apartment building bathroom. I have found that all work effectively, but the air/snow stream from more forceful fans can be unacceptably noisy at the exit port(s). I recommend using an economy exhaust fan with ratings of 50 cfm and 2.5 sones. Its air stream is relatively quiet, and you can build a sound-insulating plywood box around the fan if necessary. Ratings aside, all bathroom fans come with a plug, and, therefore, no wiring is needed.
THE DUCTWORK
Flexible ducting is not a good choice for snow delivery because of its tendency to clog. The amount of PVC piping and the number of fittings will vary with the length of snow run(s) and the number of turns required to reach the destination. Within reason, any length of PVC run can be employed. We have had runs up to 60′ with few problems. In laying out the system, plan to mount the fan as high as or higher than the distribution runs, and keep in mind that the straighter the path, both horizontally and vertically, the more efficient the system will be. See Figure 1. Design a route that minimizes the number of elbows required. Remember that elbows that change the horizontal direction of an air stream are less prone to clogging than “vertical” ones.
Most bathroom fans are designed to receive a 4″ duct. For most of my snow runs, I attach a reducing coupling at the fan and “step down” to 2″ PVC. I do not recommend using anything smaller. The runs’ exit ports do not have to be increased in order to obtain a nice spread of falling snow. The air currents of the theater will provide that for you. Keep in mind that this type of snow system is for the specific aiming of the snow, but it will never look like a blizzard.
USE AND MAINTENANCE
Feeding plastic snow directly into an inverted exhaust fan may seem strange at first, but it truly is the best method. The fan housing should be vacuumed at the end of each performance for maintenance.
CONCLUDING NOTES
Plastic snow can be bought at a local theatrical supply store or through any mail order theatrical supply company like Mutual Hardware, (278) 361-2480. Not only have I used one snow machine to generate snow effects in a half-dozen shows, I have also used it with Mylar® and different types of paper to produce successful showers of blue rain and yellow drops of sunlight.
