
E-mail Solutions
This section gives you some freely available solutions for regaining privacy in your communications. First, we discuss PGP and walk you through sending a signed and encrypted e-mail message. Then we discuss some Web-based e-mail solutions such as Yahoo! Mail, HushMail, and LokMail. Of these, both HushMail and LokMail are based on the OpenPGP standards.
Imagine for a minute that Alice is a biologist. She has been working with her colleague Bob on a new vaccination for a rare disease. They want to keep their communications private until their testing is finished. Otherwise, the media or someone else might exploit their work and misrepresent it. After Alice and Bob have each installed PGP software and generated their own private/public key pairs, they are in business and are almost ready to exchange secure e-mail.
They must follow seven basic steps to send and receive PGP encrypted and signed e-mail:
1. |
Alice creates her message for Bob using her favorite e-mail program. |
2. |
Alice encrypts the message with Bob's public key before sending it. |
3. |
Alice sends the message to Bob using SMTP. |
4. | |
5. |
Bob receives the message using his favorite e-mail program. |
6. |
Bob decrypts Alice's message with his own private key. |
7. |
Bob reads the message. |
At step 4, the message is traveling across the Internet, where it would normally be vulnerable to a man-in-the-middle attack. Because the message is encrypted and digitally signed, no one can modify or read it, except Bob, the intended recipient.
Let's expand upon steps 2 and 6 a little bit, taking a closer look at the technical details of when the message is encrypted (step 2) and decrypted (step 6).
Step 2
1. |
The message is sealed using either the MD5 or SHA-1 hashing algorithm. Recall that using a hashing algorithm (discussed in Chapter 12) on the message is just like sealing an envelope. If the seal is broken, the receiver knows that the message has been read or modified. |
2. |
Alice signs the message with her private key (RSA, DSS). |
3. |
The message is compressed, making it smaller. |
4. |
The message is encrypted with a random session key and algorithm such as IDEA, CAST, or 3DES, using Bob's public key with DSS and Diffie-Hellman. |
Step 6
1. |
The message is decompressed, returning to its normal size. |
2. |
The seal is examined for tampering, using a hashing algorithm such as MD5 or SHA-1. |
3. |
Bob verifies Alice's digital signature using her public key. |
The previous steps summarize the big picture of how PGP works. If you can understand these steps, you have a good grasp of the PGP concepts. Now let's move on to a practical example of using PGP from Outlook XP. Although each program is a little bit different, this process will be nearly the same for any e-mail client, including Outlook Express and Eudora. In the following few steps, you are going to add the PGP public key for [email protected] to your key ring and send a new message to that address that is both signed and encrypted. Let's get started.
PGP E-mail Setup: Step 1
We have already discussed getting PGP freeware installed and working on your computer. We will just outline the four steps here:
1. |
Install PGP software. |
2. |
Generate a public and private key pair. |
3. | |
4. |
Upload your PGP public key to a PGP key server. (You do not have to, but if you do, people will be able to easily find your public key.) |

Learn Your PGP KeyringAfter PGP is installed on your system, you should get familiar with your keyring. This is just like the keyring that holds your house and car keys, except that the PGP Keyring holds all of your friends' and correspondents' PGP public keys, as well as your very own private/public key combination. You can access the PGP Keyring by selecting Start, Programs, PGP, PGPKeys. You will see a screen like Figure 8.9 from earlier. At first, only a few entries are available for the default public keys that come installed with PGP, but as you add more friends' and associates' public keys to the list, you will see their names fill up your key ring. Within the PGPKeys interface, you can manage keys, export them and mail them to others, search key servers for public keys, and more. |
Caution
When you export a key from your key ring, you can e-mail it to other people. Be careful never to export your private key! You should only be exporting your public key to send to others. If you send someone your private key, that person will be able to impersonate you and open messages encrypted to you.
If you use Eudora, Outlook, Outlook Express, or Lotus Notes for your e-mail client, PGP provides a plug-in for you. A plug-in is like an extension to a program. After you install PGP, it extends Outlook or Eudora with direct support for PGP. From within the e-mail client, you can now use the PGP functionality. That is, you can directly sign and encrypt your messages from within an e-mail message.
PGP E-mail Setup: Step 2
Before youcan send someone a PGP-encrypted e-mail, you have to have his PGP public key on your key ring. If you do not have anybody in mind already, you can use our PGP public key for [email protected]:
1. |
Use your Web browser to visit http://pgpkeys.mit.edu:11371. (Make sure you put in the colon and 11371 just as shown.) This site exists just for PGP public keys. In its database, millions of people have uploaded their PGP public keys, which anyone can download and view. If you cannot reach this site, try http://keyserver.pgp.com instead. |
2. | |
3. |
Our PGP public key will be returned. |
4. | |
5. |
Open your PGP key ring by selecting Start, Programs, PGP, PGPKeys. |
6. |
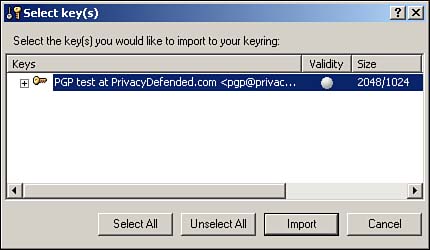
Select Edit, Paste. You see the Select key(s) window, as shown in Figure 8.11. Click Import to add this public key to your key ring. Figure 8.11. Importing the PGP public key for [email protected].
|
That's it! Move on to step 3 to compose a secure message.
PGP E-mail Setup: Step 3
Now that you have some PGP public keys on your key ring, you are ready to send secure e-mail. Remember: You can only send secure e-mail to people whose public keys you have. You can use whichever e-mail program you normally use in the following steps—that is, provided it is one that PGP supports, and you have installed PGP with the e-mail plug-ins for it. In our example, we are using Microsoft Outlook XP. However, users of older versions of Outlook can follow along, and even users of Eudora will follow similar steps:
1. |
Open Outlook and start a new message. |
2. | |
3. |
Type the subject and message body as you normally would. |
4. |
Encrypt and sign the message using PGP. You can do this in one of two ways using the PGP plug-ins, as shown in Figure 8.12:
Figure 8.12. PGP e-mail plug-ins are accessible from either the menu bar or the icon buttons.
|
5. |
After you have composed the message and selected to both Encrypt and Sign the message, you are ready to send it. |
6. |
To perform the digital signature, you will be asked to enter your secret passphrase. |

That's it! You have successfully sent a secure e-mail message. If you go into your Sent Items folder and try to open the message, you will notice that not even you can read the contents! That is because you encrypted it with our PGP public key, which makes it readable only by us.
PGP is valuable only if you use it. Ask your friends to set themselves up with PGP, and start exchanging secure e-mail with as many people as you can. PGP might seem complicated at first because of all the functionality it has, but it becomes simple to use after you are familiar with the basics.
If you are wondering what this message looks like to someone who was not intended to see it, take a look at Figure 8.13. The message is encrypted and appears as unreadable gibberish to anybody but the person or persons for whom it was intended.
Figure 8.13. PGP e-mail is encrypted and unreadable to anybody but the intended recipients.

You can rest assured that if you are encrypting with a valid and trustworthy public key, your e-mail message will be unreadable garbage to anybody other than the people you want reading it. This will be the case whether you use your own installed copy of PGP Freeware or an online e-mail service that supports OpenPGP, such as HushMail and LokMail.