
Let's start with logging into the system. If you have installed the windows client, you may already have a shortcut icon to it on your machine. If not, go to Start | Oracle | Primavera Professional.
You should see a screen as shown in the following screenshot. If you have an account, enter your login name and password in the displayed boxes:
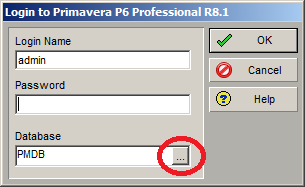
If you do not already have a connection set up, click on the Database ellipse button near the bottom of the screen to add and edit database connections. This will show the database connections that P6 knows about. If you are running the client for the first time, it is likely that there will be no items on this list.

Click Add and you will get a dialog asking for two pieces of information.

Database alias: This is a name for your own use to identify the connection. It can be anything. It is helpful to make the alias descriptive enough to remind you to which system it connects. A good practice is to identify the name of the server and the database that the alias represents.
Driver type: There are three options:
- Oracle
- Microsoft SQL Server/SQL Express
- Primavera Compression Server
The next screen asks you to specify the connection information.

Configure ORACLE Connection: Specify the Oracle Connection String, which is given to you by the administrator. You may also notify your system administrator that the following syntax is also valid:
//<server>:<port>/<SID>
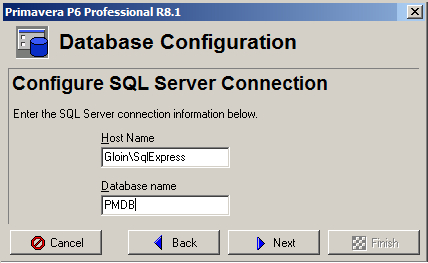
Configure SQL Server Connection: Specify the name of the server in Host Name, and the database in Database name. If your database runs on a non-default instance, then also specify the name of the instance, as in:
<server><instance>

Configure Primavera Compression Server: The compression server is a technology that sits between the P6 database and the client, managing the data that is sent between database and client to ensure that the number of packets is minimized. The compression server requires an additional server which sits between the database and the client. Note that this technology is only relevant to the windows client.

No matter which kind of system you are connecting to, the next screen asks you to enter public login information. These are the credentials of a database account set up specifically for the P6 client application. By default this is named pubuser and its password is pubuser, but the specific name may be different, so check with your system administrator. The Public group ID should be set to 1.

Click Next to validate the connection. If the validation succeeds, then click Finish. You will now see the new database alias in the Edit Database Connections screen.
Choose the alias, press OK, and you will be logged into the P6 client.