You can insert comments or other annotations about the content you collect in a notebook in several ways. For example, you can:
Tag a note or paragraph with a built-in or custom tag.
Insert note text on top of an image.
Handwrite notes by using a Tablet PC pen.
Handwrite notes by using the OneNote pen.
Add a note to your Microsoft Office Outlook task list.
In this topic, we discuss tagging notes. OneNote tags are a convenient (and fun) feature that make it simple to assign information to a category, bring it to your attention, or mark it for later follow-up. OneNote includes 29 built-in tags, including the 9 in the following list, which have been selected by Microsoft as the most common and assigned keyboard shortcuts (Ctrl+1 through Ctrl+9):
To Do
Important
Question
Remember For Later
Definition
Highlight
Contact
Address
Phone Number
Other built-in tags you might want to use include Web Site To Visit, Idea, Password, Movie To See, Book To Read, Music To Listen To, Remember For Blog, Discuss With, Send In E-mail, and Call Back. Most tags are associated with a unique symbol that appears to the left of the tagged text. Some tags apply character formatting, paragraph formatting, or highlighting to the tagged paragraph, in addition to or instead of inserting a symbol.

Before applying a tag, you indicate how you want it applied in one of two ways:
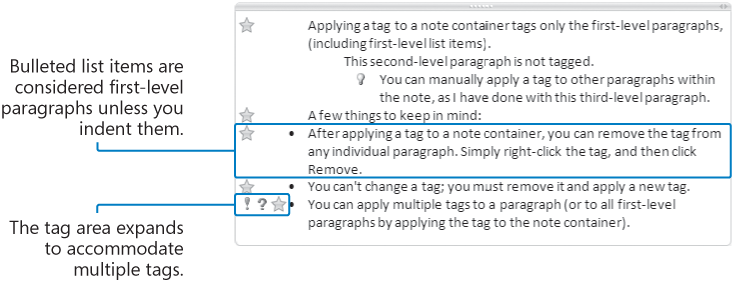
To tag a specific paragraph within a note, place the insertion point anywhere in the paragraph (or select it). The tag appears immediately to the left of the paragraph.
To tag all the first-level (non-indented) paragraphs in a note, select the note container. OneNote considers bulleted items to be first-level paragraphs unless you specifically indent them. The tag appears in the left margin of the note container.
Note
See Also For information about paragraph levels, see the sidebar Formatting Notes, Pages, and Sections in Chapter 15, Chapter 15.
After indicating the paragraph you want to tag, you can apply the tag in several ways:
You can use options in the Customize My Tags task pane to modify or delete existing tags, create your own tags, and change the order of tags on the menu. To display this task pane, click Customize My Tags on the Tag menu.

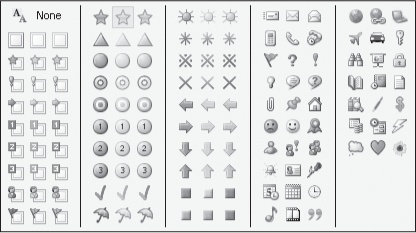
When creating or modifying a tag, you can choose from 138 symbols, 40 font colors, 15 highlight colors, or any combination of symbol, font color, and highlighting.
So far, tagging probably sounds fun and cool. Tags are a nice tool for bringing items on a page to your attention, keeping checklists, or other uses. But here's the real value of note tags: You can display a collated view of your notes in the Tags Summary task pane, and generate note pages containing lists of tagged notes. The first characters of the note text are visible in the list. (The number of characters depends on the width of the task pane.) You can group the notes by the type of tag, by section title, by page title, or by date, or you can list them in alphabetical order by the note text. Instead of displaying all notes from all notebooks, you can limit the results to the notes in a specific location (active page group, active section, active section group, or active notebook) or to notes modified during a certain date range (today, yesterday, this week, last week, or older). You can't, however, limit the results to a combination of notes in a specific location and notes modified during a date range.
Synchronizing Notes with Outlook Tasks
OneNote 2007 is particularly convenient for Microsoft Office Outlook users, because it integrates tightly with Outlook tasks and messaging. Flagging a note as a task in OneNote automatically adds the task to your Outlook task list. Updating the status of a task in either place immediately and seamlessly updates it in both.
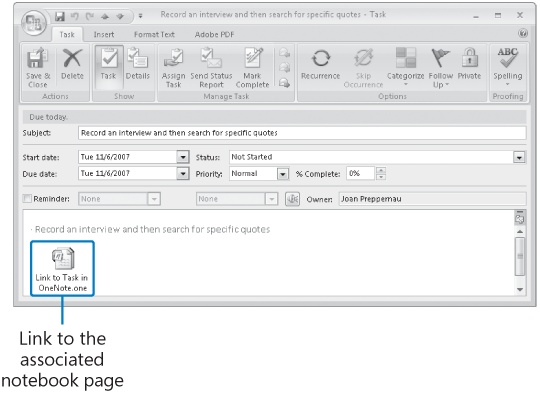
You can jump from Outlook to the notebook page associated with a flagged task. You can flag a task on any page of a notebook and return directly to that page from Outlook by clicking the Link To Task In OneNote attachment created in the task item window.
When you open a notebook from the Outlook task, you can choose whether to open the entire notebook or only the relevant section.
Note
See Also Outlook 2007 is not part of the Home and Student Edition of the 2007 Microsoft Office system, but is available as part of the Basic, Standard, Professional Plus, and Enterprise editions, or as a stand-alone application. For helpful information about Outlook 2007, refer to Microsoft Office Outlook 2007 Step by Step, by Joan Preppernau and Joyce Cox (Microsoft Press, 2007).
In this exercise, you will tag notes and view your tagged notes. You will also generate a page that summarizes tagged notes.
Note
USE the OneNote 2007 Guide notebook provided with OneNote 2007. This practice file is located in the DocumentsOneNote Notebooks folder.
OPEN the OneNote 2007 Guide notebook.
 If the Navigation Bar is expanded, click the Collapse Navigation Bar button to maximize the size of the content pane.
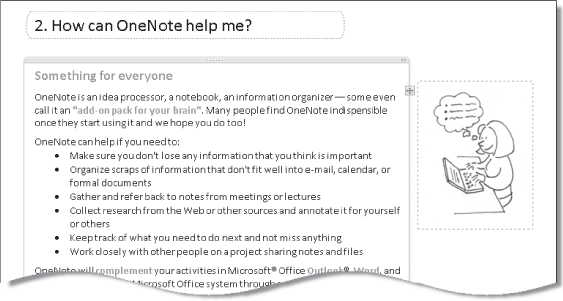
In the Getting Started with OneNote section, display the page titled 2. How can OneNote help me?
Point to the note text to display the note container.
All the text is stored in one note container. Applying a tag to the container will tag all the first-level paragraphs on the page.
Note
See Also For information about splitting note containers, see Moving and Removing Information, earlier in this chapter.
In turn, point to each of the graphics on the right side of the page.
Each of the three graphics is a separate object on the page within a frame, not a note container.
 Click the note container header to select the note content. On the Standard toolbar, click the Tag arrow, and then in the list, click Remember for later.
Click away from the note container to see the results.
Each first-level paragraph is highlighted in yellow. The Remember For Later tag applies highlighting but does not insert a tag symbol.
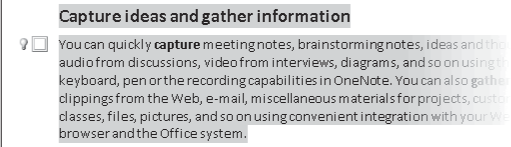
Click to place the insertion point anywhere in the first paragraph under the second heading (the paragraph beginning with You can quickly capture). Then in the Tag list, click Idea.
A light bulb symbol appears to the left of the first line of the paragraph.
In the same paragraph, select the words gather clippings from the Web. Then in the Tag list, click To Do.
Although the selected text occurs halfway through the paragraph, the tag symbol appears to the left of the first line of the paragraph. OneNote cannot tag specific text within a paragraph.
The To Do tag symbol in the Tag list is a check box containing a red check mark. The inserted To Do tag symbol is an empty check box. When you complete the task you have set for yourself, you can insert the check mark to indicate completion.
Click the To Do symbol.
A red check mark appears in the check box. You can toggle check marks on and off in any of the 27 check box–based tag symbols.
To the right of the tagged paragraph, point to the graphic depicting a man creating documents, pictures, and message on his computer, and then click the dotted frame of the object.
In the Tag list, point to More, and then click Remember for blog.
The Remember For Blog symbol, a conversation balloon, appears to the left of the midpoint sizing handle of the graphic.
Use any of the methods described earlier in this topic to insert an additional five tags of your choice, anywhere on this page.
In the Tag list, click Show All Tagged Notes.
The Tags Summary task pane opens, displaying the first characters of the tagged content in all the open notebooks, grouped by tag name. Tagged graphics appear in their entirety.
In the Group tags by list, click Title to sort the list by page title, and in the Search list, click This page group. If 2. How can OneNote help me? does not appear at the top of the list, scroll the list to display it.
Notice that some items in the list are preceded by tag symbols, and others are not. Those without symbols are tagged with highlighting or font color.
Click items in the list to jump to the corresponding notes. Then experiment on your own with different ways of grouping the tags.
At the bottom of the Tags Summary task pane, click the Create Summary Page button.
A new page appears in the active section, containing the full text of the tagged content in the order that it currently appears in the Tags Summary task pane.